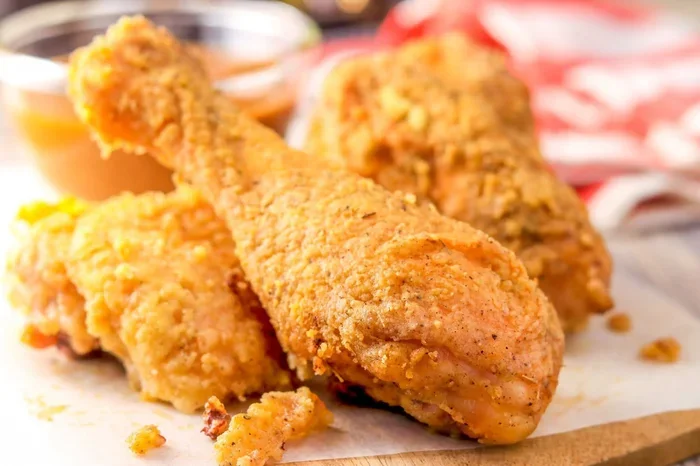
How Long To Cook Chicken Drumsticks In Toaster Oven
Want to know how long to cook chicken drumsticks in a toaster oven? This guide gives you the exact time and temperature for crispy, juicy results every time. You’ll learn the best settings, tips for perfect skin, and common mistakes to avoid.
There’s something magical about how long to cook chicken drumsticks in a toaster oven. It’s one of those simple questions that opens the door to a world of crispy, juicy, golden-brown chicken. Whether you’re cooking for two or feeding a small family, a toaster oven is your best friend. It heats up fast, uses less energy, and delivers incredible results. You don’t need a huge full-size oven for a perfect batch of drumsticks.
Many people shy away from using a toaster oven for chicken. They worry about uneven cooking or dry meat. But the truth is simple. With the right time and temperature, your toaster oven can outperform a big oven. This guide will walk you through everything you need to know. We’ll cover the exact minutes, the best settings, and the small tweaks that make a huge difference.
By the end, you’ll feel confident enough to bake drumsticks any night of the week. You’ll know exactly when to pull them out and how to get that restaurant-quality crunch at home. Let’s dive in and make your next batch of toaster oven drumsticks the best one yet.
Key Takeaways
- Standard cooking time: Bake at 400°F for 25 to 35 minutes for perfectly cooked drumsticks.
- Use a wire rack: It ensures hot air circulates evenly for crispy skin on all sides.
- Check internal temperature: The chicken must reach 165°F in the thickest part to be safe.
- Adjust for frozen drumsticks: Add 10 to 15 extra minutes and always verify the internal temp.
- Pat the skin dry: Dry skin is the secret to ultra-crispy, golden-brown results.
- Don’t overcrowd the pan: Leave space between drumsticks so heat can flow freely.
- Let them rest: Resting for 5 minutes keeps the juices locked in for tender meat.
📑 Table of Contents
Why A Toaster Oven Is Perfect For Chicken Drumsticks
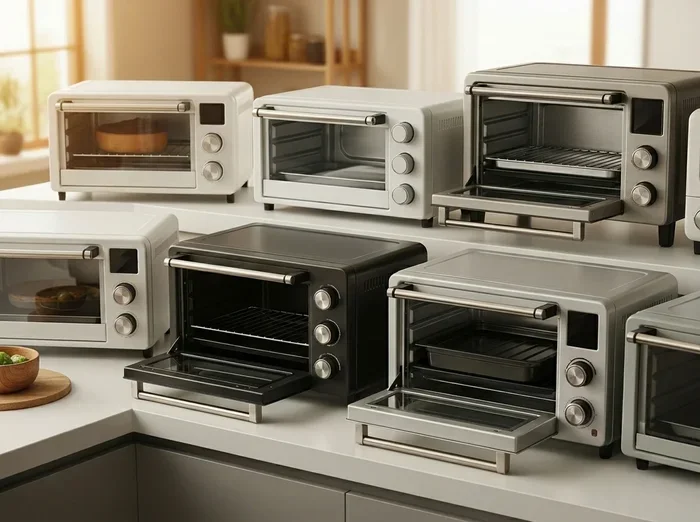
A toaster oven is a compact powerhouse. It sits right on your countertop and preheats in minutes. That speed is a huge advantage when you’re craving crispy chicken drumsticks but don’t want to wait for a full oven to heat up. Here’s why it works so well for this cut of chicken.
The Benefits Of Small-Batch Cooking
- Faster preheating: A toaster oven reaches 400°F in about 5 minutes, compared to 15 minutes for a full oven.
- Energy savings: You use less electricity because the interior is small and heats up quickly.
- Better crispiness: The smaller space concentrates heat, which helps the skin become beautifully crunchy.
- Easy monitoring: You can watch the drumsticks through the glass door without opening the main oven.
When To Use A Toaster Oven Instead Of A Full Oven
Think of your toaster oven as a specialized tool. It’s perfect when you’re cooking one to four drumsticks. If you’re feeding a crowd of eight, a full-size oven makes more sense. But for weeknight dinners, quick lunches, or a solo treat, the toaster oven wins. It also shines when you want to bake drumsticks without heating up the kitchen on a hot day.
| Feature | Toaster Oven | Full-Size Oven |
|---|---|---|
| Preheating Time | 3–5 minutes | 10–15 minutes |
| Cooking Time (4 drumsticks) | 25–35 minutes | 30–40 minutes |
| Energy Use | Low | Medium to High |
| Crispiness | Excellent (concentrated heat) | Good |
| Batch Size | 1–4 drumsticks | 6–12 drumsticks |
As you can see, the toaster oven offers speed and efficiency. It’s the go-to choice for oven-baked drumsticks when you want quick, delicious results without the wait.
How Long To Cook Chicken Drumsticks In Toaster Oven
The short answer is 25 to 35 minutes at 400°F. But the full answer depends on a few factors. Drumstick size, starting temperature, and whether you use a rack all play a role. Let’s break down the exact cooking time for drumsticks so you never have to guess again.
The Standard Time And Temperature
For fresh, thawed drumsticks, set your toaster oven to 400°F. Place them on a wire rack over a baking sheet. Bake for 25 minutes, then flip them. Bake for another 10 to 15 minutes until the skin is crispy and the internal temperature hits 165°F. This toaster oven temperature is the sweet spot for rendering fat and crisping the skin without drying out the meat.
If you like extra-crispy skin, you can broil for the last 2 minutes. Just watch them closely. Broiling can turn perfect chicken into charcoal in seconds. Keep a close eye on the chicken drumsticks during that final push.
Adjusting For Frozen Drumsticks
Cooking from frozen changes the game. You need to add time because the meat starts cold. Place frozen drumsticks on the wire rack and bake at 400°F for 40 to 45 minutes. Flip them halfway through. The frozen drumstick cooking time is longer, but the result is still juicy if you don’t overcook them.
Always use a meat thermometer with frozen chicken. The outside can cook faster than the inside, and you need to make sure the center reaches 165°F. This is a food safety rule you should never skip.
Bone-In vs Boneless Cooking Times
Bone-in drumsticks take a little longer than boneless pieces. The bone acts as an insulator, slowing down heat transfer. Here’s a quick comparison:
- Bone-in, skin-on: 25–35 minutes at 400°F.
- Boneless, skinless: 18–22 minutes at 400°F. Check early because they dry out faster.
- Boneless, skin-on: 20–25 minutes at 400°F. The skin crisps up nicely.
Bone-in drumsticks are forgiving. They stay juicy even if you cook them a few minutes extra. Boneless pieces are less forgiving, so set a timer and check them often.
Step-By-Step Guide To Baking Drumsticks In Your Toaster Oven
Now that you know the time and temperature, let’s walk through the actual process. Following these steps ensures even cooking and that perfect crunch you’re after.
Prep Work: Seasoning And Marinating
Start with dry drumsticks. Pat them thoroughly with paper towels. Moisture is the enemy of crispy skin. Once dry, season generously. A simple mix of salt, pepper, garlic powder, and paprika works wonders. If you have time, toss them in a light coating of olive oil. This helps the seasoning stick and promotes browning.
For deeper flavor, marinate the drumsticks for 30 minutes to 2 hours. A yogurt-based marinade with lemon and herbs tenderizes the meat beautifully. Just make sure to pat them dry before baking. Marinating drumsticks adds flavor, but excess moisture will steam the skin instead of crisping it.
Setting Up The Toaster Oven
Place a wire rack inside your toaster oven. Set a baking sheet underneath to catch drips. The wire rack is non-negotiable if you want crispy skin on all sides. Putting drumsticks directly on a sheet pan traps steam and creates soggy bottoms. Trust me, the rack makes all the difference.
Preheat the toaster oven to 400°F. Wait for the preheat signal. A hot oven from the start is key to a good sear. Once it’s ready, slide the rack with the seasoned drumsticks inside.
The Cooking Process And Flipping
- Bake for 25 minutes at 400°F with the door slightly ajar if your model allows it (this helps moisture escape).
- Open the door and carefully flip each drumstick using tongs.
- Bake for another 10 to 15 minutes until the skin is golden brown and crispy.
- Insert a meat thermometer into the thickest part, avoiding the bone. The reading should be 165°F.
- If the skin needs more color, switch to broil for 1–2 minutes. Stay right there and watch them.
This flipping technique ensures both sides get equal exposure to the heat. It’s the secret to even browning on every drumstick. Don’t skip the flip, or you’ll end up with one crispy side and one pale side.
Tips For Crispy Skin And Juicy Meat
Getting the perfect balance of crunchy outside and tender inside is an art. These quick tips for even cooking will elevate your drumsticks from good to amazing.
Use A Wire Rack
I mentioned this earlier, but it’s worth repeating. A wire rack lifts the drumsticks above the baking sheet. Hot air flows underneath and around the chicken. This creates airflow that crisps the skin uniformly. Without a rack, the bottom side sits in its own juices and turns soft. A rack is the single best upgrade you can make.
Pat The Skin Dry
Before seasoning, take a few extra minutes to blot the skin with paper towels. The drier the surface, the crispier it will get. This one simple step can transform your toaster oven chicken drumsticks. It’s the same principle as frying—moisture creates steam, and steam prevents crispiness. Remove as much surface moisture as possible.
Brush With Oil Or Butter
A light brush of olive oil or melted butter adds flavor and helps the skin brown faster. Use a pastry brush or your hands to coat the drumsticks thinly. Too much oil will make them greasy, so just a thin, even layer is enough. For extra flavor, add a pinch of smoked paprika or a drizzle of honey before the final 5 minutes of baking.
Don’t Crowd The Pan
Give each drumstick at least an inch of space. Overcrowding blocks airflow and creates steam pockets. The result is uneven cooking and soggy skin. If you’re cooking more than four drumsticks, use two racks or bake in batches. Small batch cooking in a toaster oven is the key to consistent quality.
Common Mistakes That Ruin Toaster Oven Drumsticks
Even with the best recipe, small errors can lead to disappointing results. Knowing these pitfalls helps you avoid them entirely.
Overcrowding The Pan
This is the number one mistake. When drumsticks touch each other, the steam has nowhere to go. The skin steams instead of crisping. You end up with pale, rubbery chicken instead of golden, crunchy perfection. Always give each piece its own space. If your toaster oven is small, cook in two batches. The wait is worth it.
Skipping The Resting Time
When the drumsticks come out of the oven, they’re not done cooking yet. The internal temperature will continue to rise as the meat rests. More importantly, the juices redistribute. If you cut into them immediately, those juices run out onto the cutting board instead of staying in the meat. Let them rest for 5 minutes on the rack. The meat will be noticeably juicier and more tender.
Wrong Temperature Settings
Some toaster ovens have a “bake” setting and a “convection” setting. If yours has convection, use it. The fan circulates hot air and cooks the drumsticks more evenly. If you don’t have convection, just stick with regular bake mode. Also, avoid setting the temperature too low. 375°F will cook the drumsticks, but it won’t crisp the skin as effectively as 400°F. The higher heat is what creates that satisfying crunch.
Not Using A Meat Thermometer
guessing whether chicken is done is a food safety risk. The only reliable way to know is with a meat thermometer. The thickest part of the drumstick, near the bone but not touching it, should read 165°F. Invest in a simple instant-read thermometer. It takes the guesswork out of cooking and ensures perfectly safe, juicy drumsticks every single time.
Flavor Variations And Serving Ideas
Once you’ve mastered the basic toaster oven chicken drumsticks recipe, it’s time to get creative. Different flavors turn a simple baked drumstick into a star dish.
Classic Herb And Garlic
Mix minced garlic, dried rosemary, thyme, salt, and pepper with olive oil. Rub this mixture all over the drumsticks before baking. The herbs infuse the meat with a savory, aromatic flavor that pairs perfectly with roasted potatoes and green beans. This is a timeless combination that never gets old.
Spicy Buffalo Style
For a crowd-pleasing appetizer, toss the baked drumsticks in hot sauce and a little melted butter. Return them to the toaster oven for 3–5 minutes to let the sauce caramelize. Serve with celery sticks and blue cheese dip. It’s the same great flavor as wings, but baked instead of fried.
Sweet And Sticky Glaze
Brush the drumsticks with a mixture of honey, soy sauce, and a touch of sriracha during the last 10 minutes of baking. The glaze turns sticky, sweet, and slightly spicy. It creates a beautiful lacquered finish that everyone will love. This variation works especially well with bone-in drumsticks because the bone adds extra flavor.
Serving Suggestions
Toaster oven drumsticks pair beautifully with a crisp garden salad, roasted vegetables, or a simple coleslaw. For a fun presentation, serve them with a dipping sauce like honey mustard, ranch, or tzatziki. The small size of a toaster oven meal makes it perfect for a cozy dinner for two or a quick family supper.
Conclusion
Now you know exactly how long to cook chicken drumsticks in a toaster oven. The answer is 25 to 35 minutes at 400°F for fresh drumsticks, and 40 to 45 minutes for frozen ones. But the real secret is in the details. Use a wire rack, pat the skin dry, flip halfway, and always check the internal temperature. These small steps add up to perfectly crispy, juicy drumsticks every time.
Your toaster oven is a versatile kitchen tool that deserves more credit. It can bake, roast, and crisp better than many full-size ovens for small batches. Next time you’re craving chicken drumsticks, skip the long preheat and the big oven. Reach for your toaster oven instead. You’ll be amazed at how easy it is to get restaurant-quality results at home. Now go ahead and fire up that oven—you’ve got this.
Frequently Asked Questions
Can I cook drumsticks in a toaster oven from frozen?
Yes, you can. Place frozen drumsticks on a wire rack and bake at 400°F for 40 to 45 minutes. Flip them halfway through. Always use a meat thermometer to ensure the internal temperature reaches 165°F in the thickest part.
What temperature is best for toaster oven drumsticks?
400°F is the ideal temperature. It’s hot enough to crisp the skin beautifully while cooking the meat through evenly. If your toaster oven runs hot, you can drop it to 385°F and add a few extra minutes.
Do I need to flip drumsticks when baking in a toaster oven?
Yes, flipping is highly recommended. Bake for 25 minutes, then flip each drumstick. This ensures both sides get crispy and golden. Without flipping, the bottom side can become soggy while the top browns.
How do I know when drumsticks are done without a thermometer?
Poke the thickest part of the meat near the bone with a knife. The juices should run clear, not pink. The meat should feel firm, not rubbery. However, a meat thermometer is the most reliable method and removes all guesswork.
Can I use a toaster oven to reheat leftover drumsticks?
Absolutely. Reheat at 350°F for 8 to 10 minutes. This warms the meat without drying it out. The wire rack again helps keep the skin crispy. Avoid microwaving leftover drumsticks, as it makes the skin soggy.
What’s the best way to get crispy skin in a toaster oven?
Pat the skin completely dry before seasoning. Use a wire rack instead of a flat pan. Bake at 400°F and avoid overcrowding the pan. For extra crispiness, broil for the last 1–2 minutes while watching closely.