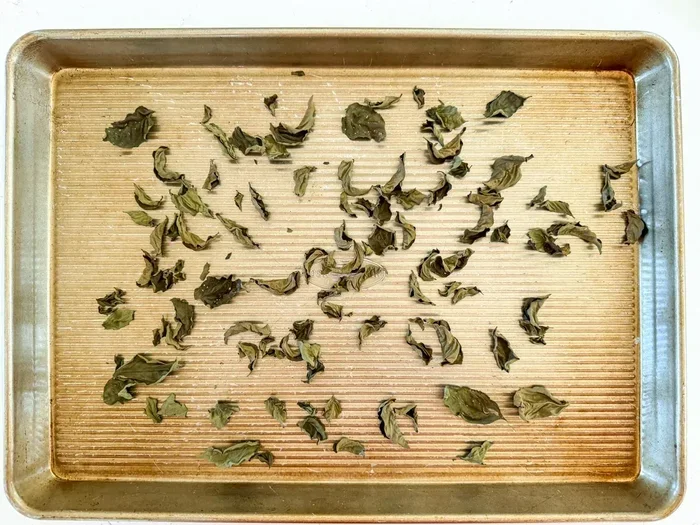
How To Dry Out Basil Leaves In The Oven The Easy Way
Learning how to dry out basil leaves in the oven is one of the simplest and most rewarding kitchen skills you can master. This guide walks you through the entire process from selecting fresh basil to storing your dried herbs. You will discover the ideal oven temperature, timing, and techniques that keep your basil flavorful and aromatic. Whether you are a beginner or a seasoned cook, these methods make drying basil quick and effortless. By the end, you will have a pantry full of homemade dried herbs ready for your favorite recipes.
Learning how to dry out basil leaves in the oven is one of the simplest and most rewarding kitchen skills you can pick up. Whether you grow your own fresh basil or buy it from the farmers market, drying it at home saves money and keeps that wonderful basil flavor locked in for months. This guide gives you every detail you need, from picking the right leaves to storing your finished product. You will learn the exact oven temperature to use, how long each batch takes, and the small tricks that make a big difference. By the time you finish reading, you will feel confident enough to start your first batch today.
There are several ways to preserve fresh herbs, but using your oven is hands-down the easiest and most accessible method. You do not need any fancy equipment. You just need a few simple kitchen tips and a little patience. Drying basil in the oven works because the gentle heat removes moisture while keeping the essential oils intact. The result is a concentrated burst of flavor that elevates every dish you make. Let us walk through the whole process together.
Key Takeaways
- Oven drying is the fastest method: You can have dried basil in under two hours using your home oven.
- Low heat is essential: Keeping the temperature between 170°F and 200°F preserves the flavor and prevents burning.
- Proper preparation matters: Washing and thoroughly drying your fresh basil before baking ensures even results.
- Storage determines shelf life: Airtight containers in a cool, dark place keep dried basil fresh for up to a year.
- Dried basil is versatile: Use it in cooking, seasoning blends, marinades, and homemade gift bags.
- Avoid common mistakes: Too much heat and moisture are the top reasons dried basil turns brown or loses flavor.
📑 Table of Contents
- Why Oven-Dried Basil Is Worth Your Time
- What You Need Before You Start
- Step-by-Step: How To Dry Out Basil Leaves In The Oven
- Common Mistakes to Avoid When Drying Basil
- How to Store Dried Basil for Maximum Freshness
- Creative Ways to Use Your Dried Basil
- Expert Tips for the Best Dried Basil
- Conclusion
Why Oven-Dried Basil Is Worth Your Time
Herb drying has been around for centuries, but the oven method makes it faster and more reliable than traditional approaches. When you dry out basil leaves in the oven, you get consistent results every single time. The controlled heat ensures that your dried herbs maintain their color, aroma, and taste. Here is why this method stands out.
The Benefits of Drying Basil at Home
Making your own oven-dried basil has several clear advantages over buying it from the store. First, you control the quality. You know exactly where your fresh basil came from and whether it was grown without pesticides. Second, home-dried basil flavor is far more intense than most store-bought versions. Third, it saves you a surprising amount of money over time. A single basil plant can produce enough leaves to fill multiple jars of dried herb.
Another big benefit is convenience. You can dry basil any time of year, not just during the growing season. Have extra basil from your garden? Pop it in the oven. Need a quick garnish for dinner? Your homemade dried herbs are ready to go. This kind of basil preservation means you never have to settle for wilted store-bought leaves again.
Fresh vs. Dried Basil: What Changes?
It helps to understand what happens when you dehydrate basil. Fresh basil contains a lot of water, usually around 80 to 90 percent. When you remove that water through food dehydration, the remaining tissue becomes concentrated with flavor and essential oils. One teaspoon of dried herbs is roughly equivalent to one tablespoon of fresh herbs in cooking.
The flavor profile does change slightly. Dried basil tends to have a warmer, more earthy taste compared to the bright, peppery notes of fresh leaves. This makes it perfect for cooked dishes like sauces, soups, and stews where it has time to rehydrate and release its oils. You can still use it as a finishing garnish, but the flavor will be more subtle.
| Method | Time Required | Flavor Intensity | Equipment Needed | Best For |
|---|---|---|---|---|
| Oven Drying | 1.5 to 3 hours | Strong and concentrated | Oven, baking sheet | Quick batches, consistent results |
| Dehydrator | 4 to 8 hours | Very strong | Food dehydrator | Large quantities, set-and-forget |
| Air Drying | 1 to 3 weeks | Mild and natural | None | Small batches, no heat needed |
| Microwave Drying | 2 to 5 minutes | Good but inconsistent | Microwave | Tiny amounts in a hurry |
As you can see, oven drying hits a sweet spot between speed and quality. It is faster than air drying or using a dehydrator, and it produces better results than microwaving. For most home cooks, it is the ideal choice for low heat drying of basil and other delicate herbs.
What You Need Before You Start
Before you begin the drying basil process, gather everything you need. Having your tools and ingredients ready will make the whole experience smooth and enjoyable. Here is a simple checklist.
Choosing the Right Basil
Not all basil leaves are created equal when it comes to drying. Look for leaves that are vibrant green and free from brown spots or yellowing. The best time to harvest is in the morning after the dew has dried but before the sun gets too hot. At this point, the essential oils in the leaves are at their peak.
Sweet basil is the most common variety for drying, but Thai basil, lemon basil, and even purple basil work well too. Avoid using basil that has already flowered, as the leaves tend to become bitter once the plant starts bolting. If you are growing your own, pinch off the top sets of leaves to encourage bushier growth and more harvestable foliage.
Essential Tools and Equipment
You do not need much to get started with baking basil in the oven. Here is what you will want on hand:
- Fresh basil leaves – washed and patted completely dry
- A baking sheet – lined with parchment paper for easy cleanup
- An oven – any standard home oven will work
- A cooling rack – optional but helpful for airflow
- Airtight containers – glass jars with lids work best for storage
- A spatula or tongs – for handling delicate leaves
The most important thing is making sure your leaves are dry before they go on the baking sheet. Any remaining moisture can cause steaming instead of drying, which leads to uneven results and potential mold. Take the extra minute to pat each leaf thoroughly with a clean kitchen towel.
Step-by-Step: How To Dry Out Basil Leaves In The Oven
This is the core of the whole process. Follow these steps carefully, and you will have beautiful oven-dried basil in no time. Each step is designed to maximize flavor and color while minimizing the risk of burning or wilting.
Preparing Your Basil Leaves
Start by rinsing your fresh basil gently under cool running water. This removes any dirt, insects, or residue. Do not soak the leaves, as excess water can dilute the flavor and make drying take longer. After rinsing, lay the leaves out on a clean towel and pat them dry gently.
Next, remove the leaves from the stems. You can simply slide your thumb and forefinger along the stem to strip the leaves off. Discard the stems or compost them. Spread the leaves out on your parchment-lined baking sheet in a single layer. Make sure none of the leaves are overlapping, as this traps moisture and leads to uneven herb drying.
Setting the Right Oven Temperature
The oven temperature is the single most important factor in successful basil drying. You want to use low heat to gently draw out moisture without cooking the leaves. Set your oven to the lowest setting, which is typically between 170°F and 200°F (75°C to 95°C).
Why does temperature matter so much? High heat destroys the delicate essential oils that give basil its distinctive aroma and taste. If your oven runs hot, you can prop the door open slightly with a wooden spoon to let moisture escape and keep the temperature lower. The goal is low heat drying that slowly wilts the leaves until they become crispy and crumbly.
The Drying Process
Place the baking sheet on the middle rack of your oven. Set a timer for 90 minutes. After the first hour and a half, open the oven and check the leaves. They should feel dry and crispy to the touch but not burnt or brown. If they still feel slightly flexible or leathery, keep drying for another 15 to 30 minutes.
Here are a few things to watch for during the food dehydration process:
- Leaves should feel completely dry and crumble easily between your fingers
- They should not turn completely brown or black, as this means they are overcooked
- You may see some curling at the edges, which is perfectly normal
- The kitchen should smell amazing as the basil dries
Every oven is different, so your timing may vary. Some ovens run hotter than others, and the thickness of the leaves also plays a role. Check your basil every 20 to 30 minutes after the first hour to make sure everything is progressing well.
Testing for Doneness
The best way to test if your dried herbs are ready is the crumble test. Take a leaf and press it between your fingers. It should crumble into small pieces easily. If it bends or feels leathery, it needs more time. Once the leaves pass the crumble test, remove the baking sheet from the oven and let the dehydrated basil cool completely on the counter.
Do not store warm leaves in a container, as trapped heat creates condensation. That moisture will ruin your basil storage and can lead to mold. Let them cool for at least 30 minutes before handling them further.
Common Mistakes to Avoid When Drying Basil
Even with the best intentions, it is easy to make a few missteps when you are learning how to dry out basil leaves in the oven. Knowing what to avoid will save you from wasted batches and disappointing flavor.
Using Too High Heat
This is the number one mistake people make. It is tempting to crank up the oven to speed things along, but high heat destroys the very oils you are trying to preserve. Drying basil at temperatures above 200°F will cook the leaves instead of gently dehydrating them. The result is bitter, dark, flavorless herbs that are not worth keeping.
If your oven does not have a setting low enough, use the lowest temperature available and prop the door open with a wooden spoon or silicone spatula. This allows moisture to escape and keeps the temperature from climbing too high. Patience is the key to great oven-dried basil.
Skipping the Washing Step
Some people skip washing their basil leaves before drying, thinking it adds unnecessary moisture. But unwashed leaves may carry dirt, insects, or pesticide residue that you do not want in your food. The trick is to wash gently and dry thoroughly afterward.
Another issue people face is not drying the leaves enough after washing. If you put damp leaves on a baking sheet, they will steam rather than dry. This creates uneven texture and can promote mold growth. Always take the time to pat your leaves completely dry with a clean towel before placing them on the baking sheet.
Overcrowding the Baking Sheet
It might be tempting to fit as many leaves as possible on one sheet to save time, but overcrowding is a recipe for uneven drying. Leaves that overlap trap moisture and dry inconsistently. Give each leaf some breathing room. If you need to dry a large batch, use multiple baking sheets and rotate them in the oven halfway through.
How to Store Dried Basil for Maximum Freshness
Proper basil storage is just as important as the drying process itself. Even perfectly dried herbs will lose their flavor if stored incorrectly. Follow these simple guidelines to keep your homemade seasoning fresh and potent for months.
Container Options for Long-Term Storage
The best containers for dried herbs are airtight glass jars with tight-fitting lids. Mason jars work perfectly and look beautiful on a kitchen shelf. You can also use small spice jars or even resealable plastic bags, though glass is preferred because it does not absorb odors over time.
Crush or crumble the dried leaves just before storing, or leave them whole for longer shelf life. Whole leaves retain their flavor longer, and you can crush them into smaller pieces right before using them in your basil recipes. This simple habit can double the usable life of your dried herbs.
Shelf Life and Freshness Tips
When stored properly, oven-dried basil can last for up to 12 months. The flavor is strongest in the first three to six months, so try to use your dried herbs within that window for the best results. Here are a few tips to maximize freshness:
- Store jars in a cool, dark place away from direct sunlight
- Keep containers away from the stove or other heat sources
- Label each jar with the date you dried the basil
- Open jars only when you need to use the herbs
- Never store dried basil in the refrigerator, as moisture can enter
If you notice that your dried basil has lost its aroma after several months, it is still safe to eat but will have less flavor. It is best to make smaller batches more frequently rather than storing one large batch for too long. Freshly dried herbs always taste better than ones that have been sitting on the shelf for a year.
Creative Ways to Use Your Dried Basil
Now that you have a jar full of oven-dried basil, what can you do with it? The possibilities are nearly endless. Cook with dried basil in everything from pasta sauces to roasted vegetables, and you will be amazed at how much flavor it adds.
Cooking with Dried Basil
Dried herbs are best used during the cooking process rather than as a finishing garnish. The heat and moisture of cooking help rehydrate the leaves and release their concentrated flavor. Add dried basil early in the cooking process so it has time to bloom and infuse your dish.
Some of the best uses for dried basil include:
- Tomato sauces and marinara
- Homemade pizza seasoning
- Roasted vegetable dishes
- Chicken and fish marinades
- Homemade soup recipes
- Pasta salads and grain bowls
Remember the conversion rule: one tablespoon of fresh basil equals about one teaspoon of dried. Start with a smaller amount and taste as you go, since dried herbs are more concentrated and can easily overpower a dish if you use too much.
Homemade Seasoning Blends and Gifts
Homemade seasoning blends are a fantastic way to showcase your dried basil. Mix it with garlic powder, onion powder, oregano, and a pinch of salt for a versatile Italian seasoning. You can also combine dried basil with dried thyme, rosemary, and parsley for a classic herbes de Provence blend.
Dried basil also makes a wonderful homemade gift. Fill a small mason jar with your dried herbs, tie a ribbon around the lid, and attach a label with the blend name and usage suggestions. Friends and family will love receiving this thoughtful, practical gift. It is a great way to share the joy of basil preservation with others.
Expert Tips for the Best Dried Basil
Even if you follow every step perfectly, a few extra tricks can take your dried basil from good to outstanding. These kitchen tips come from experienced cooks and food preservation experts who have dried thousands of batches of herbs.
First, harvest your basil at the right time. The morning hours right after the dew has dried are ideal because the essential oils are most concentrated at this point. Second, handle the leaves gently throughout the process. Rough handling bruises the leaves and causes them to lose flavor. Third, consider drying a small test batch first to dial in your oven settings before committing to a larger quantity.
Another pro tip is to mix dried basil with a small amount of sea salt before storing. The salt helps absorb any residual moisture and can enhance the savory notes of the herb. Just use a very light touch, about a pinch of salt per cup of dried leaves. This simple trick can extend the shelf life and boost the flavor of your dried herbs.
Finally, do not throw away the stems. They can be added to stock pots, soups, and simmering sauces for extra herb flavor. The stems contain plenty of essential oils and are a great way to get every bit of value from your harvest. This is a smart practice for anyone serious about basil preservation and reducing kitchen waste.
Conclusion
Learning how to dry out basil leaves in the oven is a skill that pays dividends in the kitchen for months to come. From selecting the best leaves to storing your finished product, each step is simple and rewarding. You now know the ideal oven temperature, the common pitfalls to avoid, and the creative ways to use your oven-dried basil in everyday cooking.
The beauty of this method is that it works with any standard home oven and requires no special equipment. You can dry basil in the dead of winter or during the peak of summer, giving you access to homemade dried herbs whenever you need them. Start with a small batch, experiment with your timing and temperature, and soon you will have a pantry full of flavorful, aromatic basil ready for your favorite basil recipes.
Grab some fresh basil from your garden or the store, preheat your oven, and give it a try. Once you taste the difference between homemade dried basil and the store-bought version, you will never go back. Drying basil at home is easy, affordable, and incredibly satisfying. Your kitchen and your taste buds will thank you.
Frequently Asked Questions
Can I use any type of basil for oven drying?
Yes, you can dry most basil varieties in the oven, including sweet basil, Thai basil, lemon basil, and purple basil. Sweet basil is the most popular choice because of its classic flavor and thick leaves that hold up well to heat. Avoid basil that has already flowered, as the leaves tend to become bitter once the plant starts bolting.
How long does dried basil last when stored properly?
Properly dried and stored basil can last for up to 12 months. The flavor is strongest in the first three to six months, so it is best to use it within that window for the most intense taste. Keep your dried basil in an airtight glass jar in a cool, dark place away from heat and sunlight to maximize its shelf life.
Can I dry basil in the oven without parchment paper?
Yes, you can, but parchment paper makes cleanup much easier and prevents the leaves from sticking to the baking sheet. If you do not have parchment paper, you can lightly grease the sheet with a thin layer of oil or use a silicone baking mat. Just make sure the leaves are in a single layer with no overlap for even drying.
Is dried basil as healthy as fresh basil?
Dried basil retains most of its nutritional benefits, including antioxidants and vitamin K, though the concentration per teaspoon is higher since the water content has been removed. However, because dried basil is more potent in flavor, you typically use much less of it compared to fresh basil. Both forms offer health benefits and can be part of a nutritious diet.
Can I freeze dried basil instead of storing it at room temperature?
You can freeze dried basil, but it is usually unnecessary since the low moisture content already prevents spoilage at room temperature. Freezing may cause condensation when you remove the container, which can introduce moisture and degrade quality. Airtight glass jars stored in a cool, dark pantry are the best option for most home cooks.
What is the difference between dried basil and basil powder?
Dried basil consists of whole or partially crumbled leaves, while basil powder is ground into a fine consistency. Dried basil leaves retain more of their essential oils and have a stronger, more recognizable herbal flavor. Basil powder is more convenient for sprinkling but can lose its potency faster. For most cooking purposes, dried basil leaves offer better flavor and versatility.