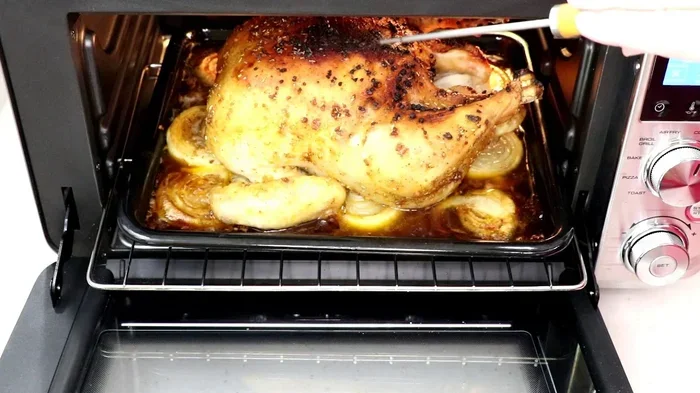
How To Cook Whole Chicken Legs In The Oven Perfectly
Learning how to cook whole chicken legs in the oven is one of the simplest and most rewarding kitchen skills you can master. This guide walks you through everything from selecting the best bone-in chicken legs to achieving crispy skin and perfectly cooked meat every single time. You will learn the ideal oven temperature, cooking times, seasoning tricks, and pro tips that turn ordinary chicken into a restaurant-quality meal. Whether you are a beginner or a seasoned home cook, this method guarantees delicious, juicy roasted chicken legs with minimal effort. Follow along and discover why oven-baked whole chicken legs deserve a spot on your weekly dinner rotation.
There is something truly special about a tray of roasted chicken legs coming out of the oven. The smell fills the kitchen, the skin turns golden and crispy, and you know you are about to eat something incredibly satisfying. Learning how to cook whole chicken legs in the oven is a skill that will serve you well for years to come.
Whole chicken legs, also known as leg quarters, include the thigh and drumstick still connected. They are one of the most affordable and flavorful cuts of chicken you can buy. Unlike boneless, skinless chicken breasts that can dry out easily, bone-in chicken legs stay moist and tender even if you slightly overestimate the cooking time. This makes them perfect for busy weeknights when you want a reliable, delicious meal without stress.
In this complete guide, we will cover everything you need to know. From picking the best chicken at the store to nailing the perfect oven temperature and cooking time, you will find every detail you need. We will also share seasoning ideas, common mistakes to avoid, and helpful tips that take your oven-baked chicken from good to absolutely amazing.
Key Takeaways
- Choose the right cut: Bone-in whole leg quarters with the thigh and drumstick connected give the best flavor and moisture.
- Oven temperature matters: Roast at 400°F to 425°F for crispy skin and evenly cooked meat.
- Use a meat thermometer: The internal temperature should reach 165°F in the thickest part for food safety.
- Brine or dry rub for juiciness: Seasoning the chicken ahead of time dramatically improves flavor and tenderness.
- Rest the chicken after cooking: Letting it rest for 5 to 10 minutes keeps the juices locked in.
- Parchment paper or foil helps: These simple tools make cleanup easier and promote even browning.
- Experiment with flavors: Try different herbs, spices, and glazes to keep your roasted chicken legs exciting.
📑 Table of Contents
- Why Oven-Baked Whole Chicken Legs Are A Great Choice
- What You Need Before You Start
- Step-By-Step Guide To Cooking Whole Chicken Legs In The Oven
- Tips For Perfectly Crispy Skin And Juicy Meat
- Common Mistakes To Avoid When Baking Chicken Legs
- Serving Ideas And Flavor Variations
- How To Store and Reheat Leftover Chicken Legs
- Nutrition Information
- Conclusion
Why Oven-Baked Whole Chicken Legs Are A Great Choice
Before we dive into the recipe, let us talk about why roasted chicken legs are such a fantastic option. There are many reasons home cooks love this dish, and once you try it, you will understand why.
They Are Budget-Friendly
Whole chicken legs are one of the most affordable cuts of poultry available. A pack of bone-in leg quarters costs significantly less than chicken breasts or tenderloins. When you bake chicken legs in the oven, you get generous portions with rich flavor for a fraction of the price of other proteins.
They Stay Juicy and Tender
Because the thigh and drumstick are connected by bone and have more fat content, whole leg quarters retain moisture much better than leaner cuts. The bone also adds flavor during the roasting process. Even if you cook them a few minutes longer than planned, the meat stays succulent and does not dry out the way breast meat can.
They Are Incredibly Versatile
You can season chicken legs with virtually any flavor profile. Think smoky paprika, lemon herb, buffalo sauce, honey mustard, or classic Italian seasoning. This versatility means you can make roasted chicken legs tonight and enjoy a completely different taste next week without getting bored.
They Make Great Meal Prep
Cooking a big batch of oven-baked chicken legs is one of the best meal prep strategies. They reheat well, taste great cold in salads or wraps, and provide excellent protein for lunches throughout the week. A single baking sheet can feed a family of four easily.
What You Need Before You Start
Good chicken cooking starts long before the meat hits the oven. Having the right ingredients and equipment ready makes the entire process smoother and more enjoyable.
Ingredients for Perfect Whole Chicken Legs
Here is a simple list of what you need for a classic batch of oven-roasted whole chicken legs:
- Bone-in whole chicken legs (thigh and drumstick connected) — about 4 to 6 pieces
- Olive oil or melted butter — 2 to 3 tablespoons
- Salt — 1 to 1.5 teaspoons
- Black pepper — 1/2 teaspoon
- Garlic powder — 1 teaspoon
- Smoked paprika — 1 teaspoon
- Onion powder — 1/2 teaspoon
- Fresh herbs like rosemary or thyme (optional)
- Lemon juice or zest for extra brightness (optional)
Equipment You Will Need
- A rimmed baking sheet or roasting pan
- Parchment paper or aluminum foil
- A wire cooling rack (optional but helpful)
- A meat thermometer — this is essential
- A pair of tongs for handling hot chicken
- A small bowl for mixing seasoning
Selecting the Best Chicken Legs
When shopping for whole leg quarters, look for chicken that has a pinkish color with creamy white fat. Avoid pieces that look gray or have a strong odor. If possible, buy chicken that is free-range or organic, as it tends to have better flavor and texture. You can also buy frozen chicken legs, but make sure to thaw them completely in the refrigerator before seasoning and roasting.
Step-By-Step Guide To Cooking Whole Chicken Legs In The Oven
Now for the fun part. This step-by-step method will walk you through exactly how to cook whole chicken legs in the oven like a pro. Follow these steps carefully, and you will get consistent, restaurant-quality results every time.
Step 1: Preheat Your Oven
Start by preheating your oven to 425°F (220°C). A hot oven is key to getting crispy, golden-brown skin. While the oven is warming up, take the chicken legs out of the refrigerator and let them sit at room temperature for about 15 to 20 minutes. This small step helps the chicken cook more evenly.
Step 2: Pat the Chicken Dry
Use paper towels to thoroughly pat the chicken legs dry on all sides. This is one of the most important cooking tips for crispy skin. Moisture on the surface creates steam, which prevents the skin from crisping up properly. The drier the chicken, the crispier the result.
Step 3: Season Generously
In a small bowl, mix together your salt, pepper, garlic powder, smoked paprika, onion powder, and any other dried herbs you like. Drizzle the chicken legs with olive oil first, then sprinkle the seasoning mix over all sides. Use your hands to rub the oil and spices evenly onto every piece. Do not be shy with the seasoning — the chicken skin needs enough salt and spice to develop maximum flavor.
Step 4: Arrange on the Baking Sheet
Line a baking sheet with parchment paper or aluminum foil for easy cleanup. Place the chicken legs on the sheet with the skin side facing up. Leave space between each piece so hot air can circulate around them. Overcrowding the pan leads to steaming instead of roasting, which prevents crispy skin.
Step 5: Roast in the Oven
Place the baking sheet on the middle rack of your oven. Roast the chicken legs for 35 to 45 minutes, depending on the size of the pieces. For the best results, flip the chicken halfway through cooking. This ensures both sides get evenly golden and crispy.
Step 6: Check the Internal Temperature
This is the most critical step. Insert a meat thermometer into the thickest part of the thigh, being careful not to touch the bone. The internal temperature should read 165°F (74°C). If it has not reached 165°F yet, continue roasting for 3 to 5 more minutes and check again. Never rely on color alone to determine if chicken is fully cooked.
Step 7: Let the Chicken Rest
Once the chicken reaches the right temperature, remove it from the oven and let it rest for 5 to 10 minutes before serving. Resting allows the juices to redistribute throughout the meat, making every bite moist and flavorful. Tent the chicken loosely with foil to keep it warm during this time.
Tips For Perfectly Crispy Skin And Juicy Meat
Getting the perfect balance between crispy skin and juicy meat is what separates good roasted chicken legs from great ones. Here are some expert cooking tips that make a huge difference.
Dry Brine the Chicken Overnight
One of the best cooking tips for juicy oven-baked chicken is dry brining. Simply salt the chicken legs generously and place them uncovered on a plate in the refrigerator overnight. The salt draws out moisture, which then gets reabsorbed into the meat, seasoning it deeply and improving texture. The next day, pat them dry and proceed with your seasoning. The result is noticeably juicier and more flavorful chicken.
Use a Wire Rack
If you want the crispiest skin possible, place a wire cooling rack on top of your baking sheet and set the chicken on the rack. This allows hot air to flow underneath the chicken, crisping the bottom side just as well as the top. It also prevents the chicken from sitting in its own rendered fat, which can make the skin soggy.
Do Not Overcrowd the Pan
Give each chicken leg at least 2 inches of space. When pieces are too close together, the steam gets trapped and the skin turns rubbery instead of crispy. If you are cooking a large batch, use two baking sheets or roast in two batches.
Baste for Extra Flavor
About halfway through cooking, open the oven and spoon some of the rendered chicken fat over the pieces. This is called basting, and it adds richness and helps the skin brown more evenly. For extra flavor, add a splash of melted butter or a drizzle of honey before basting.
Let the Chicken Come to Room Temperature
Never put cold chicken straight from the refrigerator into a hot oven. Cold chicken cooks unevenly, with the outside potentially burning before the inside reaches a safe temperature. Letting it sit out for 15 to 20 minutes makes a real difference in cooking time and overall results.
Common Mistakes To Avoid When Baking Chicken Legs
Even experienced home cooks sometimes make mistakes that affect the final result. Here are the most common chicken cooking errors and how to avoid them.
Skipping the Thermometer
guessing whether chicken is done by its color or texture is risky. The only reliable way to know your whole chicken legs are safe to eat is by using a meat thermometer. Invest in a good instant-read thermometer and make it a habit to check every time.
Underseasoning the Chicken
Chicken skin can handle a lot of seasoning. Many people are too timid with salt and spices, resulting in bland roasted chicken legs. Season generously on all sides, and remember that some of the seasoning will fall off or stick to the pan, so more is better than less.
Cooking at Too Low a Temperature
A low oven temperature like 325°F might seem safer, but it leads to pale, rubbery skin and longer cooking times. 400°F to 425°F is the sweet spot for crispy skin and juicy meat. High heat also reduces the overall cooking time, which means less time for the juices to escape.
Not Letting the Chicken Rest
Cutting into chicken immediately after removing it from the oven causes all the juices to run out onto the cutting board. The meat becomes dry and less flavorful. Always let baked chicken legs rest for at least 5 minutes before serving.
Using Frozen Chicken Without Proper Thawing
Cooking frozen chicken legs directly in the oven leads to uneven cooking — the outside may be overdone while the inside is still raw. Always thaw chicken in the refrigerator overnight or use the cold water method if you are short on time.
Serving Ideas And Flavor Variations
Once you master the basic how to cook whole chicken legs in the oven method, you can get creative with flavors and serving styles. Here are some ideas to keep things exciting.
Flavor Variations
- Lemon Herb: Add fresh lemon juice, rosemary, thyme, and garlic to the seasoning mix for a classic Mediterranean flavor.
- Buffalo Style: Toss the cooked chicken legs in buffalo sauce and serve with blue cheese dipping sauce for a game-day treat.
- Honey Garlic: Brush the chicken with a honey garlic glaze during the last 10 minutes of roasting for a sweet and savory finish.
- Spicy BBQ: Coat the chicken in your favorite barbecue rub before roasting, or brush with BBQ sauce near the end of cooking.
- Asian-Inspired: Use soy sauce, ginger, garlic, and a touch of sesame oil for an umami-rich flavor profile.
What To Serve With Roasted Chicken Legs
- Roasted potatoes or sweet potatoes
- Steamed or roasted vegetables like broccoli, carrots, or green beans
- Rice pilaf or couscous
- Fresh green salad with vinaigrette
- Warm dinner rolls or garlic bread
- Coleslaw for a classic barbecue-style meal
How To Store and Reheat Leftover Chicken Legs
If you have leftover whole chicken legs, proper storage is key to maintaining quality. Let the chicken cool completely, then place it in an airtight container and refrigerate within two hours. Cooked chicken legs keep well in the fridge for up to 4 days.
To reheat, place the chicken in an oven-safe dish, cover with foil, and warm at 350°F for about 10 to 15 minutes. The oven reheats the chicken more evenly than a microwave, and it helps keep the skin crispy. You can also reheat on the stovetop in a skillet over medium heat for a few minutes on each side.
For longer storage, cooked roasted chicken legs freeze well for up to 3 months. Wrap each piece tightly in plastic wrap and place them in a freezer-safe bag. Thaw overnight in the refrigerator before reheating.
Nutrition Information
Whole chicken legs are a nutritious and protein-rich food choice. A single bone-in leg quarter contains approximately 250 to 300 calories, 15 to 18 grams of protein, and 15 to 20 grams of fat. The fat content is largely from the skin, so you can reduce calories by removing the skin before or after cooking. Chicken legs also provide important nutrients like iron, zinc, B vitamins, and selenium, making them a wholesome addition to a balanced diet.
Conclusion
Learning how to cook whole chicken legs in the oven is one of the most worthwhile skills you can build in the kitchen. It is simple, affordable, and delivers incredible results every time. By following the steps outlined in this guide — from selecting the right chicken and seasoning generously to roasting at the proper temperature and checking with a meat thermometer — you will consistently produce juicy, crispy, golden-brown chicken legs that your whole family will love.
Remember the key principles: dry the chicken before seasoning, roast at high heat, do not overcrowd the pan, and always use a meat thermometer to check for doneness. Avoid the common mistakes we covered, and do not be afraid to experiment with different flavors and serving styles. Oven-baked chicken legs are endlessly adaptable, making them a go-to meal for any night of the week.
Now that you have all the knowledge and cooking tips you need, it is time to put them into practice. Head to your kitchen, preheat that oven, and make a batch of perfectly roasted whole chicken legs today. You will not be disappointed.
Frequently Asked Questions
Can I cook whole chicken legs at 350°F instead of 425°F?
Yes, you can, but the cooking time will be longer — typically around 50 to 60 minutes. The lower temperature also produces less crispy skin. For the best results with crispy, golden-brown skin, 425°F is the recommended temperature.
How do I know when whole chicken legs are done without a meat thermometer?
The most reliable way is to use a meat thermometer, which should read 165°F in the thickest part of the thigh. If you do not have one, you can pierce the thickest part of the thigh and check that the juices run clear, not pink. However, a thermometer is always the safest and most accurate method.
Can I use frozen chicken legs for this recipe?
It is best to thaw frozen chicken legs completely before cooking. Thaw them in the refrigerator overnight. Cooking from frozen can lead to uneven cooking, where the outside is overdone before the inside reaches a safe temperature.
How long do cooked whole chicken legs last in the fridge?
Cooked chicken legs can be stored in the refrigerator for up to 4 days. Make sure to store them in an airtight container and refrigerate within two hours of cooking. Always reheat thoroughly before serving leftovers.
Should I remove the skin before or after cooking?
For the crispiest skin and most flavorful result, cook the chicken with the skin on. You can remove the skin after cooking if you prefer a lower-fat option. The skin also helps baste the meat during roasting, keeping it juicy.
What is the difference between whole chicken legs and chicken leg quarters?
They are the same thing. Whole chicken legs, also called leg quarters, include the thigh and drumstick still connected by bone. This cut is more flavorful and forgiving than boneless chicken pieces because the bone and connective tissue keep the meat moist during roasting.
=== CONCLUSION ===
Cooking whole chicken legs in the oven is a straightforward, rewarding, and delicious way to prepare a family-friendly meal. With the right oven temperature, proper seasoning, and a reliable meat thermometer, you can achieve perfectly crispy skin and juicy meat every single time. This guide has given you all the tools, cooking tips, and flavor variations you need to succeed. Now go ahead, fire up your oven, and make a batch of roasted chicken legs that will have everyone coming back for seconds.