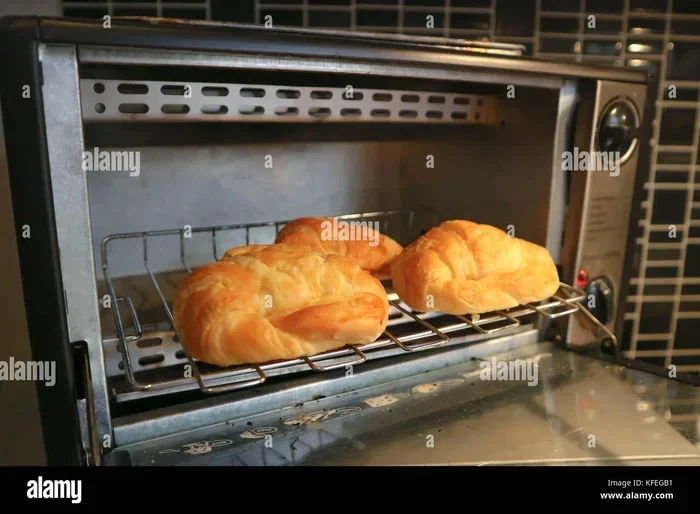
How To Bake French Bread In Oven With These Simple Steps
Baking French bread in your oven is easier than you think. With just a few simple ingredients and the right technique, you can create crispy, golden baguettes that rival any bakery. This guide walks you through every step, from mixing the dough to pulling a perfect loaf out of the oven.
There is something magical about pulling a fresh loaf of French bread out of your oven. The smell fills your kitchen. The crust crackles when you tap it. And the inside is soft, airy, and absolutely perfect.
Many people think baking French bread at home requires a fancy wood-fired oven or years of practice. That is simply not true. With a regular home oven, the right ingredients, and a bit of patience, you can make beautiful artisan bread that will impress everyone at your table.
This guide breaks down the entire process into easy-to-follow steps. Whether you are a complete beginner or someone who has tried before but not quite nailed it, you will find everything you need here. We will cover ingredients, dough preparation, shaping, proofing, and of course, the most important part — baking French bread in the oven to perfection.
By the end of this article, you will feel confident enough to bake your own crispy baguettes and golden loafs right at home. Let us get started.
Key Takeaways
- Use the right ingredients: Bread flour, active yeast, water, and salt are all you need for authentic French bread.
- Temperature matters: Bake at high heat (425-475°F) to get that signature crispy crust and oven spring.
- Steam is key: Adding steam during the first part of baking creates a golden brown crust and chewy texture.
- Patience with proofing: Let the dough rise properly for the best artisan bread results.
- Scoring makes a difference: Proper cuts allow the bread to expand and bake evenly.
- Cooling is essential: Always let your homemade bread cool on a rack before slicing.
- Storage tips extend freshness: Keep your bread in a paper bag or freeze for later use.
📑 Table of Contents
- What Makes Great French Bread
- Ingredients You Will Need
- Preparing the Dough
- Shaping and Proofing Your French Bread
- Baking French Bread in the Oven
- Common Mistakes to Avoid
- Storing and Serving Your Fresh Bread
- Expert Insights and Pro Tips
- Quick Tips for Perfect French Bread
- Comparison: Baking French Bread With and Without a Baking Stone
What Makes Great French Bread
Before we dive into the recipe, it helps to understand what sets French bread apart from other loaves. French bread is all about simplicity and technique.
The Hallmarks of Authentic French Bread
Traditional French bread has a few defining characteristics. First, the crust is thin, crispy, and deeply golden. Second, the inside — called the crumb — is light and airy with irregular holes. Third, the flavor is clean and slightly tangy from natural fermentation.
Unlike enriched breads that use butter, eggs, or sugar, French bread uses only four basic ingredients. This simplicity means the quality of each ingredient really matters.
The high heat of the oven-baked bread process is what creates that iconic crackling crust. When dough hits a hot oven, the surface dehydrates quickly and caramelizes. This is what gives French bread its distinctive look and sound.
Homemade bread also has something store-bought never can — freshness. A warm loaf straight from the oven is a completely different experience from anything you buy at a grocery store.
Why Bake French Bread at Home
Making French bread at home comes with many benefits. You control every ingredient. No preservatives, no additives. You can adjust the crust thickness and crumb texture to your liking.
Baking bread is also deeply satisfying. There is something therapeutic about kneading dough and watching it transform in the oven. Plus, the cost savings are significant. A single baguette from a bakery can cost several dollars. Making your own costs a fraction of that.
Ingredients You Will Need
Great French bread starts with great ingredients. The good news is that you do not need anything exotic. Here is what you need to gather before you start.
Essential Ingredients for Your Dough
- Bread flour: This has a higher protein content than all-purpose flour, which gives the dough the gluten strength it needs for a good rise. You can also use French bread flour if you can find it.
- Active dry yeast or instant yeast: Yeast is what makes the bread rise and gives it that slightly tangy artisan bread flavor. Instant yeast works faster and is more forgiving.
- Warm water: Lukewarm water (about 105-110°F) activates the yeast. Too hot and you will kill the yeast. Too cold and it will not wake up.
- Salt: Fine sea salt or kosher salt enhances flavor and controls the fermentation process. Do not skip this.
Some bakers like to add a tiny bit of sugar to help feed the yeast. This is optional but can help with oven spring — that beautiful rise the bread gets in the first few minutes of baking.
Optional Add-Ins for Extra Flavor
While traditional French bread keeps things simple, you can experiment with add-ins. A drizzle of olive oil makes the crumb more tender. Fresh herbs like rosemary or thyme add a lovely aroma. Some bakers even add a touch of malt powder for extra browning.
For a more rustic French bread recipe, try using a preferment like a poolish. This is a mixture of flour, water, and a small amount of yeast that you let sit overnight. It develops deep flavor and improves the texture of your crusty bread.
Preparing the Dough
Making the dough is the heart of the process. Do not worry if you have never done this before. The steps are straightforward and forgiving.
Mixing the Dough
Start by combining the flour and salt in a large mixing bowl. In a separate container, dissolve the yeast in warm water. Let it sit for about 5 minutes until it becomes foamy. This tells you the yeast is alive and active.
Pour the yeast mixture into the flour. Stir with a wooden spoon or your hand until a shaggy dough forms. Do not add any extra flour at this stage. The dough should be sticky and rough. That is exactly what you want.
Let the dough rest for about 15 minutes. This autolyse period allows the flour to fully hydrate and makes the next step much easier.
Kneading the Dough
After the rest, start kneading. Push the dough away from you with the heel of your hand, then fold it back over itself. Rotate it a quarter turn and repeat.
Knead for about 10-15 minutes. The dough will go from sticky to smooth and elastic. You will know it is ready when you can stretch a small piece thin enough to see light through it without it tearing. This is called the windowpane test.
If you have a stand mixer with a dough hook, you can use that too. Mix on medium speed for about 8-10 minutes. Just be careful not to overheat the dough.
First Rise
Place the dough in a lightly oiled bowl. Cover it with a damp towel or plastic wrap. Let it rise in a warm spot for about 1 to 2 hours until it has doubled in size.
During this time, the yeast is working hard, creating air pockets and developing flavor. This bulk fermentation is what gives homemade bread its characteristic tangy taste.
You can also refrigerate the dough overnight for a slower, more flavorful rise. Many bread baking experts prefer this method for artisan bread.
Shaping and Proofing Your French Bread
Shaping is where the magic starts to happen. This step determines the final look and texture of your loaf.
How to Shape a Baguette
Gently turn the dough out onto a lightly floured surface. Do not punch it down aggressively. Instead, use your hands to gently degas it — push out large air bubbles while keeping the small ones intact.
Divide the dough into pieces if you are making multiple baguettes. A standard baguette uses about 200-250 grams of dough. Shape each piece into a rough rectangle.
Fold the top third down and the bottom third up, like folding a letter. Then roll the dough tightly from one end to the other, using your palms to create tension. The surface should be smooth and taut.
Place the shaped baguettes on a parchment-lined baking sheet or a banneton (a floured proofing basket). Cover them loosely and let them proof for 30-45 minutes.
Final Proofing Tips
The dough should spring back slowly when you gently poke it with a finger. If it springs back immediately, it needs more time. If it does not spring back at all, it may be over-proofed.
Many bakers refrigerate the shaped dough for 30 minutes before baking. This cold proofing helps develop more flavor and makes the dough easier to score.
Scoring the Bread
Before the bread goes in the oven, you need to score it. Use a very sharp blade — a razor blade or a special bread lame works best. Make diagonal slashes about 1/4 inch deep across the top of each loaf.
Scoring serves two purposes. It controls where the bread expands during baking, and it creates those beautiful ear-like ridges on the crust. Do not skip this step if you want professional-looking French bread.
Baking French Bread in the Oven
This is the moment you have been waiting for. Baking French bread in the oven requires high heat and a bit of steam to get the perfect result.
Preheating Your Oven
Preheat your oven to 475°F (245°C) at least 30 minutes before you plan to bake. If you have a baking stone or steel, place it on the middle rack while the oven preheats. This helps create a crispy bottom crust.
If you do not have a stone, an inverted baking sheet works just as well. The key is to have a hot surface that the dough can bake on immediately.
Adding Steam for the Perfect Crust
Steam is essential for crusty bread. It keeps the surface of the dough moist during the first part of baking, which allows the bread to expand fully before the crust sets. This is what creates the golden brown crust and the crackly texture.
There are several ways to add steam to your oven:
- Water pan method: Place a metal pan on the bottom rack of the oven. Pour boiling water into it just before you put the bread in.
- Spray bottle method: Spray the walls of the oven with water right after you load the bread. Do this three times in the first minute.
- Ice cube method: Drop a few ice cubes into a hot pan on the bottom rack when you load the bread.
The steam only needs to be in the oven for the first 10-15 minutes. After that, you can vent it by opening the oven door briefly or removing the water pan.
Baking Temperature and Time
Bake the bread at 475°F for the first 15 minutes with the steam. Then reduce the temperature to 450°F and bake for another 15-20 minutes until the bread is deeply golden brown.
You can also start at a higher temperature of 500°F for the first 10 minutes, then reduce to 450°F. This creates even more oven spring and a thicker, crunchier crust.
Total baking time is usually about 30-35 minutes. The internal temperature should reach 210-220°F when measured with an instant-read thermometer.
Knowing When the Bread Is Done
There are several signs that your French bread is ready. The crust should be a deep golden brown, almost chestnut colored. When you tap the bottom of the loaf, it should sound hollow.
The bread should feel light for its size. If it feels heavy, it may need a few more minutes. Always trust the hollow sound test — it is the most reliable indicator.
Cooling the Bread
Once the bread is out of the oven, transfer it to a bread cooling rack immediately. Do not leave it on the hot baking sheet or it will steam the bottom and make the crust soggy.
Let the bread cool for at least 20-30 minutes before slicing. This is the hardest part, I know. But cutting into hot bread releases all the steam and the crumb will not set properly. Patience here pays off with a better texture.
Common Mistakes to Avoid
Even experienced bakers make mistakes. Here are some common pitfalls to watch out for when you are baking French bread in the oven.
Using the Wrong Flour
All-purpose flour works in a pinch, but it will not give you the same results as bread flour. Bread flour has more protein, which develops into gluten and gives the bread its structure and chew.
If you want to get serious about homemade bread, invest in a bag of bread flour. It makes a noticeable difference in every loaf.
Skipping the Steam
Without steam, your French bread will have a thick, hard crust instead of the thin, crispy one you are going for. The steam keeps the surface flexible long enough for the bread to rise fully in the oven.
Over-Proofing the Dough
If you let the dough rise too long, the structure breaks down and the bread will be flat and dense. Watch the dough carefully during the final proof. It should look puffy and spring back slowly when poked.
Not Preheating the Oven Enough
A lukewarm oven will not give you the oven spring you need. Always preheat for at least 30 minutes. The baking stone or steel especially needs time to absorb heat.
Opening the Oven Door Too Early
Resist the urge to check on the bread too often. Every time you open the door, you lose heat and steam. This can cause the bread to collapse. Trust the process and only open the door when you need to add steam or check the color near the end.
Storing and Serving Your Fresh Bread
You have baked a beautiful loaf of French bread. Now how do you keep it at its best?
Best Ways to Store Homemade Bread
For the first day, keep your bread in a paper bag or wrapped in a clean kitchen towel. This allows the crust to breathe while keeping the crumb moist.
Do not store French bread in a plastic bag right away. The trapped moisture will make the crust soft and chewy, which is the opposite of what you want.
For longer storage, slice the bread and freeze it. Wrap individual portions in plastic wrap and then foil. You can toast slices straight from the freezer in a toaster or oven.
Reheating Leftover Bread
Day-old French bread can be revived easily. Wrap it in aluminum foil and place it in a 350°F oven for 5-10 minutes. The crust will crisp right back up and the inside will be warm and soft.
You can also use day-old bread for French toast, bread pudding, or croutons. Homemade bread never truly goes to waste.
Serving Suggestions
French bread is incredibly versatile. Serve it warm with butter or olive oil for dipping. Use it for sandwiches, or tear it apart and enjoy it with a bowl of soup or stew.
The classic French way is simply to enjoy a fresh baguette alongside a cheese plate and a glass of wine. Keep it simple and let the quality of the bread speak for itself.
Expert Insights and Pro Tips
Here are some pro tips from experienced bakers that will elevate your French bread from good to great.
Use a kitchen scale. Baking by weight is far more accurate than measuring by volume. A simple digital scale that measures in grams will transform your results.
Invest in a banneton. A floured proofing basket gives the bread a beautiful shape and helps it hold its structure during the final proof. Bannetons are inexpensive and last for years.
Experiment with hydration. Traditional French bread has a high hydration level — around 65-70% water to flour ratio. Higher hydration gives you an open, airy crumb with large holes. It takes more skill to handle, but the results are worth it.
Keep a baking journal. Write down what you did each time so you can replicate successes and learn from mistakes. Over time, you will develop an intuition for the process.
Do not fear failure. Every baker has had loaves that did not turn out right. Each attempt teaches you something. The more you bake, the better you will get.
Quick Tips for Perfect French Bread
- Always weigh your ingredients with a kitchen scale for accuracy.
- Use warm water (not hot) to activate yeast without killing it.
- Let the dough rest after mixing before you start kneading.
- Perform the windowpane test to check gluten development.
- Add steam during the first 10-15 minutes of baking.
- Score the bread before baking for better expansion.
- Cool the bread completely on a rack before slicing.
- Store leftover bread in a paper bag, not plastic.
- Freeze extra loaves for fresh bread anytime.
- Reheat day-old bread in foil at 350°F for 5-10 minutes.
Comparison: Baking French Bread With and Without a Baking Stone
Using a baking stone or steel can make a significant difference in your French bread results. Here is a quick comparison.
| Feature | Without Baking Stone | With Baking Stone |
|---|---|---|
| Bottom crust | Softer, less crispy | Very crispy and even |
| Oven spring | Moderate | Excellent |
| Ease of use | Easier | Slightly more setup |
| Heat retention | Standard | Superior |
| Cost | Free | $20-$50 for a stone |
| Overall crust quality | Good | Exceptional |
If you are serious about baking French bread in the oven, a baking stone is one of the best investments you can make. It is affordable and lasts for years.
Frequently Asked Questions
Can I use all-purpose flour instead of bread flour for French bread?
Yes, you can, but the results will be different. Bread flour has more protein, which creates a stronger gluten structure. All-purpose flour will give you a softer crumb and less chewy texture. For the most authentic French bread, bread flour is recommended.
How do I know if my yeast is still active?
Dissolve the yeast in warm water with a pinch of sugar. Wait 5-10 minutes. If it becomes foamy and bubbly, the yeast is alive and active. If nothing happens, the yeast is dead and you should replace it before baking.
Can I bake French bread in a convection oven?
Absolutely. Baking French bread in a convection oven works great because the fan circulates heat evenly. Reduce the temperature by about 25°F from the standard recipe and keep an eye on the bread as it may bake slightly faster.
Why did my French bread come out flat?
A flat loaf usually means the dough was over-proofed or the yeast was not active enough. Over-proofing causes the structure to collapse in the oven. Make sure your yeast is fresh and watch the proofing time carefully.
What is the best way to reheat store-bought French bread?
Wrap the bread in aluminum foil and place it in a 350°F oven for 5-10 minutes. This will re-crisp the crust and warm the inside. You can also use a toaster for individual slices, though the whole loaf method gives better results.
How long does homemade French bread last?
Freshly baked French bread stays at its best for about 1-2 days at room temperature. After that, the crust softens. You can freeze the bread for up to 3 months. Slice it before freezing so you can take out individual pieces as needed.
=== CONCLUSION ===
Baking French bread in the oven is one of the most rewarding things you can do in your kitchen. It requires simple ingredients, basic equipment, and a little bit of patience. The result is a loaf that tastes better than anything you can buy at a store.
From mixing the dough to pulling a golden brown crust out of the oven, every step is satisfying. You will learn how the yeast bread transforms with heat and steam. You will develop an intuition for when the dough is ready. And you will gain a skill that brings joy to everyone who tastes your homemade bread.
Start with the basic recipe and technique. Practice regularly. Experiment with hydration levels, proofing times, and baking temperatures. Each loaf you make will be better than the last. Before long, baking French bread will feel second nature to you.
So preheat your oven, gather your ingredients, and get ready to bake the best French bread of your life. Your kitchen — and your taste buds — will thank you.