How To Make Salmon Jerky In The Oven With This Recipe
Making salmon jerky in the oven is simple, affordable, and incredibly rewarding. This homemade salmon jerky recipe walks you through every step, from slicing the fish to enjoying a perfectly chewy, flavor-packed protein snack. You will learn how to dehydrate salmon in your oven, pick the best seasoning, and store your jerky so it stays fresh for weeks.
Key Takeaways
- Oven-baked salmon jerky is a healthy, low-carb alternative to traditional beef jerky.
- You only need a few simple ingredients and basic kitchen tools to get started.
- Proper slicing and marinating are the keys to perfectly chewy, flavorful jerky.
- Your homemade jerky can last up to two weeks when stored correctly.
- This fish jerky recipe is highly customizable with different seasoning blends.
- Making jerky at home saves money compared to buying store-bought versions.
- The oven dehydration method is beginner-friendly and requires no special equipment.
📑 Table of Contents
- How To Make Salmon Jerky In The Oven With This Recipe
- Why Make Salmon Jerky at Home?
- What You Will Need
- Step-by-Step Instructions for Making Salmon Jerky
- Tips for Perfect Oven-Baked Salmon Jerky
- Common Mistakes to Avoid When Making Salmon Jerky
- Flavor Variations for Your Salmon Jerky
- Storing Your Homemade Salmon Jerky
- Frequently Asked Questions
- Final Thoughts
How To Make Salmon Jerky In The Oven With This Recipe
Have you ever wanted to try homemade salmon jerky but thought it was too complicated? Think again. Making oven-baked salmon jerky is one of the easiest kitchen projects you can tackle. It takes about an hour of active prep time and then your oven does all the work for you.
This salmon jerky recipe is perfect for beginners and seasoned cooks alike. You will learn how to slice salmon fillets properly, mix a simple marinade, and dry the strips in your oven until they are perfectly chewy. Whether you want a high-protein snack for hiking or a healthy alternative to chips, this guide has you covered.
We will walk through every single step in detail. You will also find tips to avoid common mistakes, flavor variations to keep things interesting, and advice on storing your finished jerky. By the end, you will feel confident enough to make homemade jerky whenever the craving strikes.
Why Make Salmon Jerky at Home?
Store-bought jerky can be expensive and full of preservatives. When you make your own, you control every ingredient that goes into it. This is especially important if you are watching your sodium intake or avoiding artificial additives.
Homemade salmon jerky is also incredibly nutritious. Salmon is rich in omega-3 fatty acids, protein, and essential vitamins. Turning it into jerky preserves all those benefits in a convenient, portable snack format. It makes a great protein snack for gym bags, road trips, or even a quick afternoon pick-me-up at the office.
Another big advantage is cost. A pound of fresh salmon fillets can make several servings of jerky. When you compare that to the price of premium store-bought jerky, the savings add up fast. Plus, you get to experiment with flavors that commercial brands rarely offer.
Salmon Jerky vs. Beef Jerky
Many people assume jerky only comes from beef. Salmon jerky is a fantastic beef jerky alternative that offers a completely different flavor and texture profile. Salmon jerky tends to be softer and more tender, with a rich, buttery taste that beef jerky simply cannot match.
Here is a quick comparison of the two:
| Feature | Salmon Jerky | Beef Jerky |
|---|---|---|
| Protein per serving | High (around 15g) | High (around 12g) |
| Fat content | Healthy omega-3 fats | Higher saturated fat |
| Texture | Softer, more tender | Chewier, tougher |
| Flavor profile | Rich, buttery, mild | Smoky, bold, savory |
| Shelf life | 1-2 weeks | 2-4 weeks |
| Best for | Light snacking, omega-3 boost | Heavy protein needs |
Both options make excellent dried fish snacks and protein snacks. The choice really comes down to personal preference and dietary goals. If you want a lighter, heart-healthy option, salmon jerky wins hands down.
What You Will Need
Ingredients for Oven-Baked Salmon Jerky
Keep your ingredient list simple. You do not need anything fancy to make great jerky. Here is what you will need:
- 2 pounds of fresh salmon fillet (skinless, boneless)
- 1/4 cup soy sauce (use tamari for gluten-free)
- 2 tablespoons Worcestershire sauce
- 1 tablespoon honey or maple syrup
- 1 teaspoon garlic powder
- 1 teaspoon onion powder
- 1/2 teaspoon black pepper
- 1/2 teaspoon smoked paprika
- 1/4 teaspoon cayenne pepper (optional, for heat)
- 1 teaspoon curing salt (optional but recommended for food safety)
The jerky seasoning blend is where you can really get creative. The base recipe above gives you a savory, slightly sweet flavor that works beautifully with salmon. Feel free to adjust the spices to match your taste preferences.
Equipment You Will Need
You do not need a fancy jerky maker or a dehydrator to make great jerky. Your oven works perfectly fine. Here is your equipment checklist:
- A sharp knife or a meat slicer
- A cutting board
- A large mixing bowl
- Paper towels
- A wire cooling rack
- A baking sheet (rimmed)
- Aluminum foil or parchment paper
That is it. No special tools required. If you have a sharp knife and a standard oven, you are ready to go. The wire rack is important because it allows air to circulate around the salmon strips, which helps them dry evenly.
Step-by-Step Instructions for Making Salmon Jerky
Step 1: Prepare the Salmon
Start by patting your salmon fillet dry with paper towels. Moisture is the enemy of good jerky. The drier the surface of your fish, the better the final texture will be. Remove any pin bones with a pair of tweezers or pliers.
Now, slice the salmon against the grain into strips that are about 1/4 inch thick. Consistent thickness is crucial here. If some strips are thicker than others, they will dry at different rates. Use a sharp knife and apply steady, even pressure as you cut.
Pro tip: partially freeze the salmon for about 30 minutes before slicing. This makes it much easier to get thin, uniform jerky slices. The fish firms up and holds its shape better when it is slightly frozen.
Step 2: Make the Marinade
In a large mixing bowl, combine the soy sauce, Worcestershire sauce, honey, garlic powder, onion powder, black pepper, smoked paprika, cayenne pepper, and curing salt. Whisk everything together until the honey is fully dissolved and the mixture is smooth.
Place your salmon strips into the bowl and toss them until every piece is evenly coated. Cover the bowl with plastic wrap and refrigerate for at least 4 hours. For the best flavor, marinate overnight. The longer the salmon sits in the marinade, the more intense the flavor will be.
Step 3: Pat Dry and Prep for the Oven
After marinating, remove the salmon strips from the bowl and place them on a wire rack lined with paper towels. Pat the top of each strip dry with additional paper towels. You want to remove as much excess liquid as possible before the strips go into the oven.
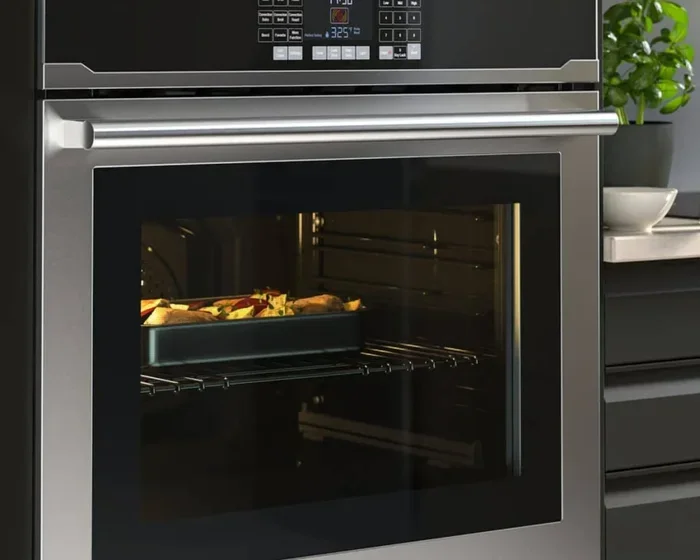
Preheat your oven to the lowest setting it will go. Most ovens can be set to 170 degrees Fahrenheit. If your oven only goes down to 200 degrees, that will work too, but you will need to keep a closer eye on the jerky to prevent overcooking.
Line a baking sheet with aluminum foil or parchment paper. Place the wire rack on top of the baking sheet. This setup allows hot air to flow underneath the salmon strips, promoting even oven dehydration.
Step 4: Bake the Salmon Jerky
Arrange the salmon strips on the wire rack in a single layer. Make sure none of the strips are overlapping. Overlapping strips will not dry properly and may develop soggy spots.
Place the baking sheet in the oven and prop the door open slightly with a wooden spoon. This allows moisture to escape and helps the jerky dry out instead of steaming. The oven dehydration process works best with good airflow.
Bake the salmon jerky for 2 to 4 hours. The exact time depends on the thickness of your strips and your oven temperature. Check the jerky every 30 minutes after the first 2 hours. You are looking for strips that are dry but still slightly flexible. When you bend a strip, it should crack slightly but not snap completely in half.
Step 5: Cool and Store
Remove the baking sheet from the oven and let the jerky cool completely on the rack. This usually takes about 30 minutes. As the jerky cools, it will become firmer and chewier.
Once cooled, store your homemade salmon jerky in an airtight container. Mason jars, zip-lock bags, or vacuum-sealed bags all work great. Keep the container in a cool, dark place. Properly stored jerky will last for one to two weeks at room temperature.
For longer storage, you can refrigerate or freeze the jerky. Refrigerated jerky stays good for up to one month. Frozen jerky can last for up to three months. Just make sure it is fully thawed before eating for the best texture.
Tips for Perfect Oven-Baked Salmon Jerky
Getting the perfect batch of jerky takes a little practice, but these tips will set you up for success from your very first attempt.
Slice Thin and Even
The single most important factor in making great jerky is slicing consistency. Aim for strips that are uniform in thickness throughout. This ensures every piece dries at the same rate. Thinner strips will become crispier, while thicker strips will stay chewier. Pick your preferred texture and slice accordingly.
Remove Excess Moisture
Moisture leads to spoilage and uneven drying. Always pat your salmon strips dry before marinating and again after marinating. The drier your starting material, the faster and more evenly your jerky will dehydrate in the oven.
Do Not Rush the Process
It can be tempting to turn up the heat to speed things along. Resist that urge. High heat will cook the outside of the jerky while leaving the inside moist and underdone. Low and slow is the way to go for oven dehydration. Patience is your best friend when making jerky.
Use Curing Salt for Safety
Curing salt helps prevent the growth of harmful bacteria during the drying process. While salmon is less risky than some other meats, using a small amount of curing salt adds an extra layer of food safety. It also enhances the color and flavor of your finished jerky.
Common Mistakes to Avoid When Making Salmon Jerky
Using Salmon That Is Too Wet
Fresh salmon contains a lot of moisture. If you skip the patting-dry step, your jerky will take much longer to dehydrate and may develop an unpleasant texture. Always blot your salmon strips thoroughly before and after marinating.
Overlapping the Strips
When strips touch or overlap on the baking sheet, moisture gets trapped between them. This creates sticky, under-dried spots that are prone to mold. Always lay your strips in a single layer with space between each piece.
Opening the Oven Door Too Often
Every time you open the oven door, you release heat and moisture. This slows down the drying process and can result in unevenly dried jerky. Check on your jerky only every 30 minutes after the first two hours, and resist the temptation to peek constantly.
Over-Marinating the Salmon
While marinating adds flavor, too much time in the marinade can make the salmon strips mushy. The acids in the soy sauce and Worcestershire sauce begin to break down the fish protein after extended periods. Stick to the recommended 4 to 12 hours for the best texture.
Flavor Variations for Your Salmon Jerky
One of the best things about making homemade jerky is that you can customize the flavors to suit your mood. Here are some delicious variations to try:
Teriyaki Salmon Jerky
Swap the Worcestershire sauce for teriyaki sauce and add 1 tablespoon of sesame oil. This creates a sweet, savory Asian-inspired flavor that pairs wonderfully with the richness of salmon. Add a sprinkle of sesame seeds on top before drying for extra crunch.
Lemon Pepper Salmon Jerky
For a lighter, fresher option, use the juice of one lemon along with 2 teaspoons of lemon zest, 1 teaspoon of black pepper, and 1 teaspoon of dried dill. This variation highlights the natural flavor of the salmon without overpowering it. It is especially refreshing as a summer snack.
Spicy Cajun Salmon Jerky
Add 1 teaspoon of cayenne pepper, 1 teaspoon of smoked paprika, 1/2 teaspoon of thyme, and 1/2 teaspoon of oregano to your marinade. This bold, spicy version is perfect for those who love heat. The cayenne gives a slow-building kick that pairs beautifully with the salmon’s richness.
Honey Garlic Salmon Jerky
Increase the honey to 2 tablespoons and add 3 minced garlic cloves (fresh, not powder). This sweet and savory combination is incredibly addictive. The garlic becomes mellow and sweet during the drying process, creating a deeply satisfying flavor.
Storing Your Homemade Salmon Jerky
Proper storage is key to keeping your salmon jerky recipe results fresh and safe to eat. Here is what you need to know:
- Airtight containers: Mason jars, vacuum-sealed bags, or zip-lock bags with the air pressed out work best.
- Room temperature storage: Keeps jerky fresh for 1 to 2 weeks in a cool, dark pantry.
- Refrigerator storage: Extends shelf life to about 1 month.
- Freezer storage: Keeps jerky fresh for up to 3 months. Thaw at room temperature before eating.
- Silica packets: Toss a food-safe silica packet into your storage container to absorb any residual moisture and extend freshness.
Always check your jerky before eating. If you notice any off smells, unusual discoloration, or sticky surfaces, discard the batch. When stored properly, your oven-baked salmon jerky will be safe and delicious every time.
Frequently Asked Questions
Can I use frozen salmon to make jerky?
Yes, you absolutely can. Thaw the salmon completely in the refrigerator before slicing and marinating. Pat it very dry after thawing to remove excess moisture. Frozen salmon works just as well as fresh salmon for making jerky, as long as it is fresh when frozen and properly thawed before use.
How long does salmon jerky last in the oven during dehydration?
Most batches take between 2 and 4 hours at 170 degrees Fahrenheit. The exact time depends on the thickness of your slices and how dry you like your jerky. Thinner strips dry faster, while thicker strips need more time. Always check for doneness by bending a strip gently.
Is curing salt necessary for making salmon jerky?
Curing salt is not strictly necessary, but it is highly recommended for food safety. It helps inhibit the growth of bacteria during the low-temperature drying process. If you prefer to skip it, make sure your salmon is very fresh and consume the jerky within a few days for the safest results.
What is the best way to tell if salmon jerky is done?
Done jerky should be dry but still slightly flexible. When you bend a strip, it should crack along the surface but not snap cleanly in half. If it bends without cracking, it needs more time. If it snaps immediately, it may be over-dried and tough.
Can I make salmon jerky without a marinade?
Yes, you can use a dry rub instead of a wet marinade. Simply coat your salmon strips generously with salt, pepper, garlic powder, and your choice of spices. Dry-rubbed jerky will have a different texture and flavor profile, but it is still delicious. The marinating process adds moisture and deeper flavor, so dry-rubbed jerky tends to be slightly chewier.
Is salmon jerky a good low-carb snack?
Absolutely. Salmon jerky is naturally very low in carbohydrates and high in protein and healthy fats. It makes an excellent snack for people following a keto or low-carb diet. Just be mindful of the soy sauce and honey in the marinade, as these add a small amount of carbs. You can reduce or omit the honey to keep carbs even lower.
Final Thoughts
Making salmon jerky in the oven is one of the most satisfying and rewarding kitchen projects you can try. It requires minimal equipment, a handful of affordable ingredients, and a little patience. The result is a delicious, healthy, protein-packed snack that beats anything you will find on a store shelf.
This salmon jerky recipe gives you a solid foundation to build on. Once you master the basic method, you can experiment with different marinades, spice blends, and slicing techniques to find your perfect version. The beauty of homemade jerky is that it is entirely customizable to your taste.
So grab some fresh salmon, fire up your oven, and give it a try. You will be amazed at how easy it is to create restaurant-quality jerky right in your own kitchen. Your taste buds and your body will thank you for choosing this wholesome, homemade snack over processed alternatives.