How Long To Cook Chicken Strips In Oven At 350 Degrees
Cooking chicken strips in the oven at 350°F takes about 20 to 25 minutes for fresh strips and 30 to 35 minutes for frozen ones. The key to perfect oven-baked chicken strips is reaching an internal temperature of 165°F while keeping them juicy and crispy. This guide covers everything from prep to plating so you can bake chicken strips with confidence every single time.
There’s something magical about chicken strips in the oven. They’re easy to make, crowd-pleasing, and perfect for weeknight dinners. Whether you’re feeding a family or prepping meals for the week ahead, knowing the right cooking time makes all the difference.
If you’ve ever wondered how long to cook chicken strips in oven at 350 degrees, you’re in the right place. This guide walks you through every step with simple, practical advice. No guesswork. No stress. Just great oven-baked chicken that turns out golden and delicious every time.
The beauty of baking chicken strips at 350°F is that it’s a forgiving temperature. It gives you a nice window where the chicken cooks through without drying out. Whether you’re using breaded chicken strips, grilled chicken strips, or plain seasoned ones, this guide has you covered. Let’s dive in and make your next batch of baked chicken strips the best one yet.
Key Takeaways
- Cook Time: Fresh chicken strips need 20-25 minutes at 350°F, while frozen strips take 30-35 minutes.
- Internal Temperature: Always check that chicken reaches 165°F using a meat thermometer for food safety.
- Prep Matters: Patting chicken dry and seasoning well leads to crispier, more flavorful results.
- Avoid Overcrowding: Space strips on the baking sheet so hot air circulates evenly around each piece.
- Resting Is Essential: Let chicken rest for 5 minutes after baking to lock in juices.
- Thickness Affects Time: Thicker strips need a few extra minutes, so adjust accordingly.
- Frozen vs Fresh: Frozen strips take roughly 50% longer and may need a higher finish temp check.
📑 Table of Contents
- Why 350°F Is the Perfect Temperature for Chicken Strips
- How Long to Cook Chicken Strips in Oven at 350
- Step-by-Step Guide to Baking Chicken Strips at 350°F
- Factors That Affect Cooking Time
- Common Mistakes to Avoid When Baking Chicken Strips
- Delicious Serving Ideas for Baked Chicken Strips
- How to Store and Reheat Leftover Chicken Strips
- Expert Tips for the Best Oven-Baked Chicken Strips
- Frequently Asked Questions
- Conclusion
Why 350°F Is the Perfect Temperature for Chicken Strips
Temperature is everything when it comes to baking chicken strips. Too low and they take forever. Too high and the outside burns before the inside cooks through. 350°F hits the sweet spot for even cooking and great texture.
At this temperature, the heat surrounds the chicken gently. It cooks the meat evenly from edge to center. The outside gets a nice golden color while the inside stays moist and tender. This is why so many home cooks and chefs prefer 350°F for oven chicken recipes.
The Science Behind the Temperature
When chicken cooks at 350°F, the proteins break down slowly. This means the muscle fibers stay juicy instead of seizing up and squeezing out all the moisture. The fat renders gently, adding flavor throughout each strip.
Also, at 350°F, any breading or coating has time to crisp up without burning. You get that satisfying crunch on the outside while the inside reaches a safe internal chicken temperature. It’s the perfect balance of texture and taste.
How This Compares to Other Temperatures
Some recipes call for 400°F or even 425°F. These higher temps cook faster but can dry out the chicken. On the other hand, 325°F takes longer and may not give you that crispy exterior. 350°F remains the most reliable choice for consistent, delicious oven-baked chicken strips.
How Long to Cook Chicken Strips in Oven at 350
This is the big question, right? How long to cook chicken strips in oven at 350 degrees? The answer depends on a few factors, but here’s a quick breakdown to get you started.
Fresh Chicken Strips: 20 to 25 Minutes
For fresh, thawed chicken strips that are about a quarter-inch thick, 20 to 25 minutes at 350°F is the standard range. This gives the chicken enough time to cook through while developing a light golden crust.
If your strips are thinner, they might be done in 18 minutes. Thicker strips could need the full 25 minutes or even a couple extra. The key is to use a meat thermometer and check that the internal temperature hits 165°F.
Frozen Chicken Strips: 30 to 35 Minutes
Cooking frozen chicken strips takes longer because you’re starting from a frozen state. Plan for 30 to 35 minutes at 350°F. The extra time allows the heat to penetrate through the ice crystals and cook the chicken all the way to the center.
Pro tip: spread frozen strips out on the baking sheet and let them sit at room temperature for 5 to 10 minutes before baking. This small step helps them cook more evenly and reduces the overall cooking time for frozen chicken slightly.
Breaded vs. Unbreaded Strips
Breaded chicken strips may need an extra 2 to 3 minutes compared to plain strips. The coating acts as an insulator, so the heat takes a bit longer to reach the chicken inside. Watch the color — when the breading turns golden brown, it’s usually close to done.
Unbreaded or simply seasoned strips cook a bit faster since there’s no coating slowing down the heat transfer. These are great for a quicker weeknight meal when you’re short on time.
Step-by-Step Guide to Baking Chicken Strips at 350°F
Now that you know the timing, let’s walk through the actual process. Following these steps ensures your baked chicken strips come out perfectly every time.
Step 1: Preheat Your Oven
Start by preheating your oven to 350°F. Give it at least 10 to 15 minutes to reach the right temperature. An oven that’s not fully preheated can lead to uneven cooking and longer bake times.
Use an oven thermometer if you’re unsure about your oven’s accuracy. Many ovens run slightly hot or cool, and this small detail can make a big difference in your chicken strip recipe results.
Step 2: Prepare the Chicken Strips
Take your chicken strips out of any packaging and pat them dry with paper towels. Removing excess moisture helps the outside crisp up better. If you’re using plain strips, season them generously with salt, pepper, garlic powder, and any other spices you love.
For breaded chicken strips, set up a breading station with flour, beaten eggs, and breadcrumbs. Dip each strip in flour, then egg, then breadcrumbs. Place them on a plate or tray and let them rest for a few minutes before baking. This helps the coating stick better.
Step 3: Arrange on a Baking Sheet
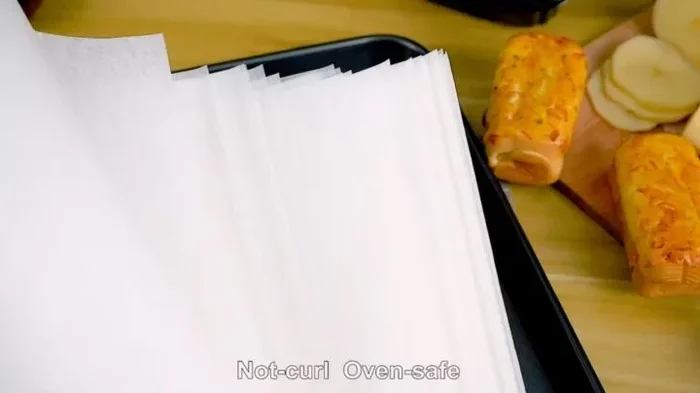
Line a baking sheet with parchment paper or aluminum foil for easy cleanup. Place the chicken strips on the sheet in a single layer. Leave space between each strip — about half an inch — so hot air flows around them evenly.
Overcrowding is one of the most common mistakes people make. When strips are packed too close together, they steam instead of bake. This leads to soggy, unevenly cooked chicken. Give them room to breathe.
Step 4: Bake and Monitor
Place the baking sheet in the center rack of your oven. Set a timer for 18 minutes if the strips are fresh and thin. For thicker or breaded strips, set it for 22 to 25 minutes.
At the halfway point, open the oven and flip each strip. This ensures both sides get equally crispy. Check the internal temperature with a meat thermometer. When it reads 165°F, the chicken is safe to eat.
Step 5: Rest and Serve
Once done, remove the baking sheet from the oven. Let the chicken strips rest on the sheet for 5 minutes. This resting period allows the juices to redistribute throughout the meat, making each bite more flavorful and tender.
Serve with your favorite dipping sauces — honey mustard, BBQ sauce, ranch, or a simple squeeze of lemon. Pair with a side salad, fries, or roasted vegetables for a complete meal.
Factors That Affect Cooking Time
The 20 to 25 minute range is a great starting point, but several factors can change your actual baking time for chicken strips. Understanding these helps you adjust and avoid undercooked or overcooked chicken.
Strip Thickness
This is the biggest variable. Thin strips, about a quarter-inch thick, cook faster. Thick strips, especially those cut from a whole chicken breast, need more time. If you’re cutting your own strips, try to keep them uniform in thickness for even cooking.
Thick strips are great for juicy results but require a bit more patience. Use a meat thermometer to check doneness in the thickest part of the strip. Never rely on color alone — chicken can look done on the outside but still be undercooked inside.
Starting Temperature
Whether your chicken is fridge-cold or has been sitting at room temperature matters. Cold chicken straight from the fridge takes longer to bake through than chicken that’s been resting at room temp for 15 minutes.
If you’re in a hurry, take the strips out 10 to 15 minutes before baking. This small step can reduce your total oven time by a few minutes and promote more even cooking throughout.
Oven Type and Accuracy
Not all ovens are created equal. Convection ovens circulate hot air, which can cook food faster and more evenly. If you’re using a convection oven, you might need to reduce the temperature by 25°F or check for doneness a few minutes early.
Standard conventional ovens work perfectly fine too. Just be aware that hot spots can exist, so rotating the baking sheet halfway through helps ensure even chicken strip cooking on all sides.
Breading and Coating Type
A heavy breading adds time because it creates a barrier between the heat and the chicken. Panko breadcrumbs, for example, create a thicker layer than regular breadcrumbs and may need an extra minute or two.
Light coatings like a thin layer of olive oil and spices cook faster and don’t add much time. If speed is your priority, go with a lighter seasoning approach instead of a heavy breading.
Common Mistakes to Avoid When Baking Chicken Strips
Even experienced cooks can slip up when making oven-baked chicken strips. Here are the most common mistakes and how to avoid them.
Skipping the Thermometer
This is the number one mistake. You can’t always tell if chicken is done just by looking at it. The internal temperature must reach 165°F for food safety. Invest in a good instant-read thermometer. It takes seconds and takes all the guesswork out of cooking chicken.
Overcrowding the Pan
We mentioned this earlier, but it’s worth repeating. Overcrowding leads to steaming, not baking. Your chicken strips will come out pale and soft instead of golden and crispy. Use two baking sheets if you need to cook a large batch.
Not Letting the Chicken Rest
Cutting into chicken strips right out of the oven releases all those juices onto the cutting board instead of keeping them in the meat. A simple 5-minute rest makes a noticeable difference in juiciness and flavor.
Ignoring the Oven Hot Spots
Most ovens have hot spots where the heat is stronger. If you notice one side of your baking sheet browning faster than the other, rotate the pan halfway through baking. This small trick ensures evenly cooked chicken strips every time.
Using the Wrong Pan
Dark or non-stick pans can cause the bottom of your strips to overcook or burn. Light-colored aluminum baking sheets work best for even heat distribution. Parchment paper adds an extra layer of protection against sticking and burning.
Delicious Serving Ideas for Baked Chicken Strips
Once you’ve mastered the cooking time for chicken strips at 350, it’s time to think about serving. Baked chicken strips are incredibly versatile and pair well with so many sides and sauces.
For a classic combo, serve strips with fries and a side of honey mustard dip. Kids and adults both love this combination. If you want something lighter, pair strips with a fresh garden salad and a squeeze of lemon.
Chicken strip sandwiches are another hit. Serve the strips on a toasted bun with lettuce, tomato, and your favorite sauce. They also work great in wraps or tacos. Chop them up and toss them into a salad for a protein boost.
For meal prep, let the strips cool completely after baking, then store them in an airtight container in the fridge. They stay good for up to 4 days. Reheat in the oven at 350°F for about 8 to 10 minutes to keep them crispy.
How to Store and Reheat Leftover Chicken Strips
Leftover baked chicken strips are just as good the next day when stored and reheated properly. Here’s how to make the most of them.
Store cooled strips in an airtight container in the refrigerator. They’ll keep for up to 4 days. For longer storage, freeze them in a single layer on a baking sheet, then transfer to a freezer bag. Frozen strips keep well for up to 3 months.
To reheat, preheat your oven to 350°F and warm the strips for 8 to 10 minutes. Avoid the microwave if you can — it tends to make the coating soggy. The oven keeps the texture crispy and the chicken moist.
Expert Tips for the Best Oven-Baked Chicken Strips
Want to take your chicken strip recipe to the next level? These expert tips make a real difference.
- Brine for juiciness: Soak strips in salted water for 30 minutes before baking. This adds moisture and flavor deep into the meat.
- Double dip for extra crunch: After the first breading coat, dip the strip back in egg and breadcrumbs again for a thicker, crunchier shell.
- Use buttermilk for tender meat: Soaking chicken in buttermilk before breading tenderizes the meat and adds a subtle tangy flavor.
- Add a touch of cornstarch to breading: This creates an extra crispy exterior that stays crunchy even after resting.
- Spray with oil before baking: A light mist of cooking oil on the strips helps the breading brown faster and more evenly.
Frequently Asked Questions
Can I cook chicken strips at 350°F from frozen?
Yes, you absolutely can. Frozen chicken strips take about 30 to 35 minutes at 350°F. Just make sure to check the internal temperature with a meat thermometer. The center should reach 165°F before serving. You may want to add a few extra minutes if the strips are particularly thick.
How do I know when chicken strips are done in the oven?
The most reliable way is to use a meat thermometer. Insert it into the thickest part of the strip. When the internal temperature reads 165°F, the chicken is fully cooked and safe to eat. The outside should also be golden brown and the juices should run clear, not pink.
Can I use a convection oven for chicken strips at 350°F?
Yes, convection ovens work great for baked chicken strips. You can keep the temperature at 350°F or reduce it slightly to 325°F since convection ovens circulate heat more efficiently. Check for doneness a few minutes early, as convection ovens often cook faster than conventional ones.
What is the best breading for oven-baked chicken strips?
A classic blend of panko breadcrumbs, grated Parmesan, garlic powder, and paprika makes an excellent crispy coating. Panko gives extra crunch, while Parmesan adds flavor and helps with browning. For a healthier option, use whole wheat breadcrumbs or crushed cornflakes as a lighter alternative.
How do I keep chicken strips from drying out in the oven?
Don’t overcook them. Stick to the recommended cooking time and use a meat thermometer to avoid going past 165°F internal temperature. Brining the strips before baking also helps retain moisture. Additionally, letting the chicken rest for 5 minutes after baking allows the juices to settle back into the meat.
Can I reuse leftover breading for the second batch?
It’s best not to reuse breading that has had raw chicken touching it, as this poses a food safety risk. However, if you set aside your breading before dipping any raw chicken, you can safely reuse that portion for a second batch. Always practice safe food handling when working with raw poultry.
Conclusion
So there you have it — everything you need to know about how long to cook chicken strips in oven at 350 degrees. From the ideal temperature to the exact timing, you’re now equipped to make perfectly baked chicken strips every single time.
Remember, fresh strips take about 20 to 25 minutes and frozen strips need 30 to 35 minutes at 350°F. Always check that the internal temperature reaches 165°F for food safety. Prep your strips well, give them space on the baking sheet, and let them rest before serving.
Whether you’re making a quick weeknight dinner or meal-prepping for the whole family, oven-baked chicken strips are a go-to choice that never disappoints. Try these tips, experiment with different seasonings and coatings, and enjoy the process of creating delicious, crispy chicken right in your own kitchen.
Now it’s your turn. Preheat that oven, grab your chicken, and get cooking. You’ve got this, and the results are going to be amazing.