How To Professionally Clean An Oven With These Tips
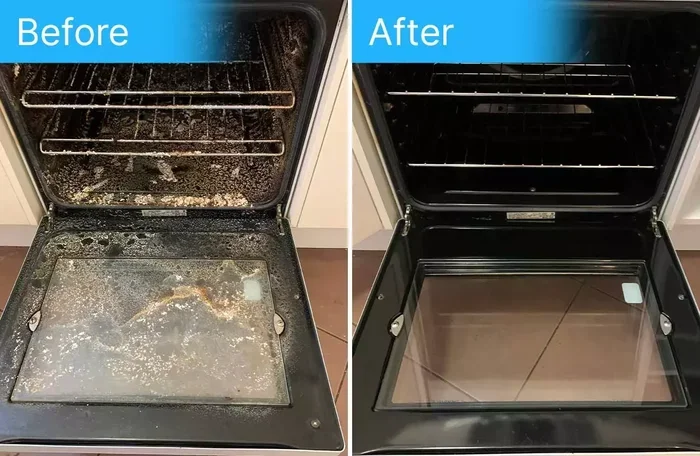
Learning how to professionally clean an oven is easier than you think. With the right tools and a simple step-by-step process, you can remove tough grease, baked-on grime, and stubborn stains from your oven interior. This guide covers natural cleaning methods, commercial products, and expert maintenance tips to keep your oven spotless.
Have you ever opened your oven and been hit by a wave of burnt grease and stubborn food residue? That smell alone is enough to make anyone want to professionally clean an oven right away. But here is the good news. You do not need to call a technician or spend a fortune to get your oven looking and smelling like new.
Whether you have a standard gas oven, an electric model, or a self-cleaning oven, the process is surprisingly straightforward. With the right supplies and a little patience, you can tackle even the worst baked-on grease and oven grime. This guide walks you through every step of oven cleaning like a professional would.
You will learn how to use natural oven cleaning solutions, when to reach for commercial products, and how to keep your oven sparkling between deep cleans. By the end of this article, you will have all the knowledge you need to handle oven grease removal with confidence. Let us get started.
Key Takeaways
- Regular cleaning prevents buildup: A weekly wipe-down keeps grease from hardening and makes deep cleans much faster.
- Baking soda and vinegar work wonders: These natural ingredients are safe, affordable, and highly effective for oven cleaning.
- Remove racks before cleaning: Soaking oven racks separately ensures a thorough and even clean.
- Never mix chemicals: Combining different oven cleaners can create dangerous fumes and damage surfaces.
- Know when to call a pro: Heavy buildup or self-cleaning oven issues may require professional oven cleaning services.
- Maintenance saves time and money: Simple daily habits reduce the need for intense degreasing sessions.
📑 Table of Contents
- Why You Should Clean Your Oven Like a Pro
- What You Need Before You Start
- Step-by-Step Guide to Cleaning Your Oven
- Natural Cleaning Solutions That Really Work
- Using Commercial Oven Cleaners the Right Way
- Keeping Your Oven Clean After a Deep Clean
- When to Hire a Professional Oven Cleaner
- Final Thoughts
Why You Should Clean Your Oven Like a Pro
The Hidden Dangers of a Dirty Oven
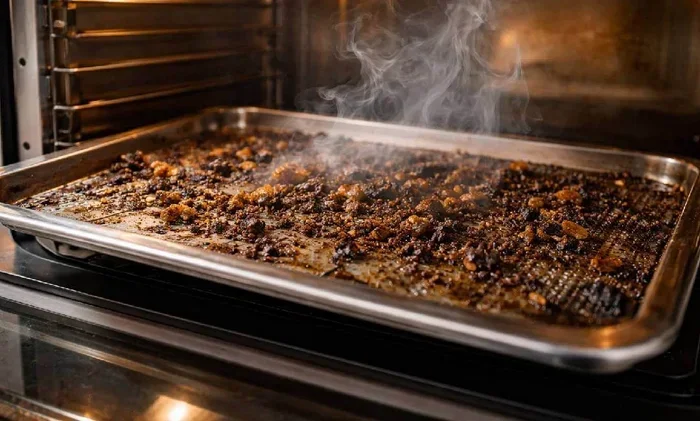
A dirty oven is more than just an eyesore. Built-up grease and food residue can create smoke that affects the taste of your food. It can also release unpleasant odors every time you cook. Over time, this buildup becomes a fire hazard. Grease splatters on the oven bottom can catch fire at high temperatures, putting your kitchen at risk.
Beyond safety, a grimy oven affects performance. Thick layers of grime act as insulation, making your oven work harder to reach the right temperature. This means longer cooking times and higher energy bills. Keeping your oven clean ensures it runs efficiently and lasts longer.
Another reason to prioritize oven interior cleaning is hygiene. Old food particles harbor bacteria and pests. Crumbs and spills attract insects and create an unsanitary cooking environment. Regular deep clean oven sessions eliminate these risks and keep your kitchen healthy.
How Often Should You Deep Clean Your Oven?
Most experts recommend a thorough oven cleaning every three to six months. However, this depends on how often you cook. If you bake frequently or deal with a lot of greasy foods, you may need to clean more often. A good rule of thumb is to inspect your oven after every few uses.
For everyday maintenance, wipe down the interior after each use while it is still warm. This simple habit prevents spills from hardening into stubborn stains. A quick oven cleaning routine saves you from intense scrubbing sessions later on.
What You Need Before You Start
Essential Supplies for Professional-Level Oven Cleaning
Before you dive in, gather everything you need. Having the right tools makes the process faster and more effective. Here is a list of must-have supplies:
- Baking soda – a gentle, natural abrasive that cuts through grease
- White vinegar – helps dissolve residue and deodorize
- Dish soap – cuts through light grease and grime
- Spray bottle – for applying cleaning solutions evenly
- Microfiber cloths – lint-free and great for wiping surfaces
- Scrub brush or old toothbrush – for reaching tight corners
- Rubber gloves – protects your hands from harsh chemicals
- Plastic scraper – safely removes hardened food without scratching
- Commercial oven cleaner (optional) – for heavy-duty grease removal
For those who prefer a clean oven naturally, baking soda and vinegar are your best friends. They are non-toxic, affordable, and surprisingly powerful. You do not need expensive products to achieve professional results.
Safety Tips to Keep in Mind
Safety always comes first when cleaning any kitchen appliance. If you use a chemical oven cleaner spray, make sure your kitchen is well-ventilated. Open windows and turn on the exhaust fan. Never mix different cleaning products together. Combining ammonia-based cleaners with bleach creates toxic fumes that are extremely dangerous.
Wear rubber gloves to protect your skin from harsh chemicals. If your oven has a self-cleaning cycle, never use chemical cleaners inside it during that cycle. The high heat can cause dangerous fumes to release. Always follow the manufacturer instructions for your specific oven model.
Step-by-Step Guide to Cleaning Your Oven
Step 1: Remove the Racks and Accessories
Start by pulling out all removable parts. Take out the oven racks, the broiler pan, and any other trays or inserts. These parts need separate cleaning because they are easier to handle outside the oven cavity.
Place the racks in your bathtub or a large sink filled with hot, soapy water. Let them soak for at least 30 minutes. The warm water loosens baked-on food and makes scrubbing much easier. For oven racks cleaning, you can also use a paste of baking soda and water applied directly to tough spots.
Step 2: Apply Your Cleaning Solution
Now it is time to tackle the oven interior. For a natural approach, make a thick paste using baking soda and water. Spread it evenly across the inside walls, the bottom, and the ceiling of the oven. Avoid coating the heating elements directly, as this can damage them.
Let the paste sit for at least 12 hours or overnight. This gives it time to break down the grease and grime. For particularly stubborn oven stains, you can add a little vinegar to the paste to activate its cleaning power.
If you prefer a commercial route, spray a generous layer of oven cleaner spray inside the oven. Make sure to follow the product instructions carefully. Most sprays need 15 to 30 minutes to work before you wipe them away.
Step 3: Scrub the Interior Surfaces
After the cleaning solution has had time to work, put on your rubber gloves and start scrubbing. Use a scrub brush or an old toothbrush to work through the paste or residue. Focus on areas with heavy baked-on grease and darkened spots.
For oven bottom cleaning, use a plastic scraper to lift off any hardened food bits. Be gentle to avoid scratching the oven surface. Wipe away the loosened grime with a damp microfiber cloth. Repeat the process if needed until the surfaces look clean.
One of the best oven cleaning hacks is to use a damp cloth wrapped around a butter knife. This lets you reach into corners and crevices where grease likes to hide. It is a simple trick that makes a big difference.
Step 4: Clean the Oven Door and Glass
The oven door is often the most visible part, so it needs special attention. The glass window on the door can accumulate a film of grease that dulls its shine. Mix a solution of equal parts water and white vinegar in a spray bottle.
Spray the glass generously and let it sit for five minutes. Then wipe it down with a clean microfiber cloth. For clean oven glass door streaks, use a dry cloth to buff the surface until it is crystal clear. If the grease is thick, apply a baking soda paste to the glass and scrub gently with a soft sponge.
Do not forget the door edges and the rubber gasket around the frame. Wipe these areas with a damp cloth to remove any trapped food particles. A clean gasket ensures a proper seal, which improves oven efficiency.
Step 5: Deal with the Bottom and Broiler Pan
The oven bottom and broiler pan often collect the most grease. Place a sheet of aluminum foil on the oven bottom before cooking to catch drips and make future cleaning easier. When it is time to clean, remove the foil and wipe the bottom with a vinegar solution.
For the broiler pan, soak it in hot soapy water and scrub away the grease with a stiff brush. If the pan has deep oven stains, sprinkle baking soda on it and spray with vinegar. The fizzing reaction helps lift stuck-on residue. Rinse thoroughly and dry before placing it back in the oven.
Natural Cleaning Solutions That Really Work
The Baking Soda and Vinegar Method
The baking soda oven method is one of the most popular and effective oven cleaning hacks. Baking soda is a mild alkali that dissolves grease naturally. When combined with vinegar, it creates a fizzing action that lifts grime from surfaces.
To use this method, make a thick paste with three parts baking soda and one part water. Spread it inside the oven, avoiding heating elements. Let it sit overnight. The next morning, spray vinegar over the paste and wipe everything clean with a damp cloth. This approach works beautifully for degrease oven interiors without harsh chemicals.
Why Natural Cleaners Are Worth Trying
Natural oven cleaning solutions offer several advantages. They are safe for your family and pets. They do not produce toxic fumes. They are inexpensive and easy to find in any kitchen. For everyday oven maintenance, natural cleaners are often all you need.
However, there are times when a commercial product is the better choice. Heavy baked-on grease that has built up over months may require a stronger solution. In those cases, a quality oven cleaner spray designed for tough jobs can save you hours of scrubbing.
Using Commercial Oven Cleaners the Right Way
Top Commercial Products to Consider
When natural methods are not enough, commercial oven cleaners step up to the plate. Look for products that are specifically designed for oven grease removal. Popular brands include Easy-Off, Krud Kutter, and Glist. Always check that the product is safe for your oven type.
Self-cleaning ovens require special care. Do not use chemical cleaners inside a self-cleaning oven. The high heat of the self-cleaning cycle can cause chemical residues to release toxic fumes. Stick to natural methods or consult the manufacturer guidelines.
Chemical Cleaners vs Natural Methods
Both approaches have their place in professional oven cleaning. Chemical cleaners work faster and handle heavy buildup better. Natural methods are safer, cheaper, and better for the environment. The best approach depends on the condition of your oven and your personal preferences.
For regular oven interior cleaning, natural methods work great. Reserve commercial products for deep cleans or when you are dealing with months of accumulated grime. Always read the label and follow safety instructions when using any chemical product.
Keeping Your Oven Clean After a Deep Clean
Simple Habits That Prevent Buildup
The secret to a always-clean oven is prevention. Use oven-safe liners or aluminum foil on the bottom to catch drips. Cover dishes with lids to prevent food from bubbling over. Wipe up spills immediately while the oven is still warm. These small habits make a huge difference in oven maintenance.
Another great habit is to place a baking sheet under any dish that might bubble over. This one simple trick saves you from scrubbing the oven bottom after every baking session. Over time, these habits keep your oven looking and performing its best.
Quick Spill Management
When a spill happens, do not let it sit. Wait until the oven cools enough to touch safely, then wipe it up with a damp cloth. For hardened spills, a quick spray of vinegar can soften the residue before wiping. Staying on top of spills means your deep clean oven sessions are far less frequent.
After every few uses, do a quick wipe of the oven interior. This takes less than two minutes and prevents grease from building up into a major problem. Consistent oven cleaning is always easier than intensive oven grease removal sessions.
When to Hire a Professional Oven Cleaner
There are times when even the best DIY efforts are not enough. If you have not cleaned your oven in years and the baked-on grease is several layers deep, a professional service may be the smart choice. Professionals have industrial-grade tools and products that can handle extreme buildup without damaging your oven.
You should also consider hiring a pro if you have a self-cleaning oven that is not performing correctly. A malfunctioning self-cleaning cycle could indicate a deeper issue that needs expert attention. Professional oven cleaning services can diagnose problems and restore your oven to optimal condition.
For people with busy schedules or physical limitations, professional cleaning is a practical solution. It saves time, ensures thorough results, and extends the life of your appliance. A one-time professional clean oven service can reset your appliance and make ongoing maintenance much easier.
Final Thoughts
How To Professionally Clean An Oven does not have to be a daunting task. With the right supplies, a clear plan, and a little elbow grease, you can transform your oven from grimy to gleaming. Whether you choose natural oven cleaning solutions or commercial products, the key is consistency and regular maintenance.
Start with the simple habits that prevent buildup, and save deep cleans for every few months. Your oven will run more efficiently, your food will taste better, and your kitchen will smell fresh every time you cook. Follow the steps in this guide, and you will have the confidence to handle any oven cleaning challenge that comes your way.
Remember, a clean oven is a safe oven. It performs better, lasts longer, and makes cooking a more enjoyable experience. Take pride in your kitchen and keep your oven in top shape. With these tips, you are now equipped to clean like a professional every time.
Frequently Asked Questions
What is the best homemade oven cleaner?
A mixture of baking soda and water creates the best homemade oven cleaner. Spread the paste inside the oven, let it sit overnight, and wipe clean with a vinegar solution. This natural method is safe, effective, and perfect for regular oven maintenance.
How long does it take to professionally clean an oven?
A thorough DIY oven cleaning session takes about one to two hours, depending on the level of grime. Natural methods need longer soak times, while commercial sprays work faster. Regular cleaning keeps future sessions much shorter.
Can I use oven cleaner on the oven racks?
Yes, but it is better to remove the racks and clean them separately. Soak them in hot soapy water or use a baking soda paste for oven racks cleaning. Chemical sprays can be harsh on rack coatings, so natural methods are often safer.
Is it safe to use a self-cleaning oven feature?
Yes, the self-cleaning feature is safe when used correctly. Remove all food debris and racks first, then run the cycle in a well-ventilated room. The high heat burns off grease and food residue, leaving ash that is easy to wipe away.
How do I remove baked-on grease from my oven?
For baked-on grease, apply a thick baking soda paste and let it sit for several hours. The alkaline nature of baking soda breaks down the grease. Follow up with vinegar to dissolve the residue and wipe clean with a damp cloth.
How often should I clean my oven?
A deep clean every three to six months is recommended for most households. If you cook frequently or use your oven for greasy foods, clean it more often. Quick wipe-downs after spills and regular oven interior cleaning keep the appliance in great shape between deep cleans.
=== CONCLUSION ===
How To Professionally Clean An Oven is a skill anyone can master with the right approach. From gathering your supplies to scrubbing the final corner, every step matters. Natural methods like the baking soda and vinegar technique offer a safe and affordable way to handle everyday oven grease removal. Commercial products are there when you need extra power for heavy-duty oven stains and buildup.
Consistency is the real secret. A little regular maintenance goes a long way toward keeping your oven in top condition. Simple habits like wiping spills immediately and using oven liners prevent the need for intense cleaning sessions. Your oven will thank you with better performance, cleaner food, and a longer lifespan.
Now that you have these professional tips, put them into action. Your kitchen deserves a fresh, clean oven, and you have everything you need to make it happen. Happy cleaning!