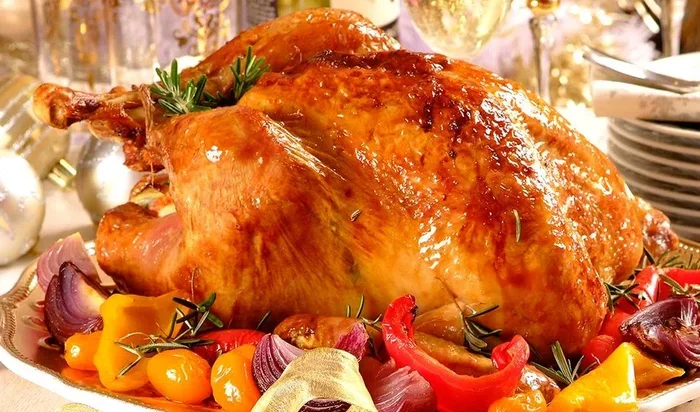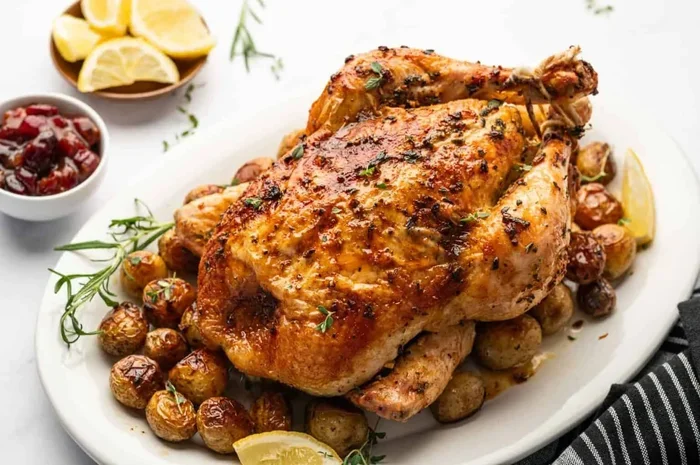
How High To Cook Chicken In Oven For Juicy Results
The secret to perfect chicken lies in knowing how high to cook chicken in oven and at what temperature. Most cuts shine at 400°F to 425°F, delivering crispy skin and juicy meat every time. How high to cook chicken in oven depends on the cut, thickness, and your desired texture. This guide covers the best oven placement, cooking times, and tips for every chicken cut. Follow these steps and you will never serve dry chicken again.
There is nothing better than pulling a tray of oven-baked chicken out of the oven and hearing that satisfying sizzle. The skin is golden and crispy, and the inside is perfectly moist. But getting to that point is not always easy. Many home cooks struggle with the same question: how high to cook chicken in oven. The answer is simpler than you think, but it makes a huge difference.
Whether you are baking chicken breasts, roasting a whole bird, or making crispy chicken wings, your oven temperature and rack position control everything. Too high and the outside burns before the inside cooks. Too low and you end up with pale, rubbery meat. This guide breaks down the exact oven temperature for chicken and rack placement for every cut. You will learn practical chicken cooking tips that work every single time.
By the end of this article, you will know exactly how to position your chicken, what chicken cooking time to use, and how to get crispy roasted chicken with juicy meat every time. No more guessing. No more dry chicken. Just delicious, foolproof results.
Key Takeaways
- Right Temperature: Cook most chicken cuts at 400°F to 425°F for the best balance of crispy skin and juicy meat.
- Rack Position Matters: Place chicken on the middle oven rack for even heat distribution and consistent cooking.
- Use a Meat Thermometer: The internal temperature chicken should reach 165°F in the thickest part for safe eating.
- Rest Your Chicken: Let chicken rest for 5 to 10 minutes after cooking to lock in juicy chicken juices.
- Cut-Specific Times: Different cuts need different chicken cooking times and oven heights for the best results.
- Avoid Common Mistakes: Overcooking, skipping the rest, and wrong rack placement are the top culprits of dry chicken.
📑 Table of Contents
Understanding Oven Temperature and Chicken Placement
Before you start cooking, it helps to understand why oven temperature and rack position matter so much. Your oven heats from the top and bottom elements, and the way heat moves around the cavity affects how your chicken cooks. Getting this right is the first step toward juicy, flavorful results.
Why Oven Rack Position Matters
The position of your chicken on the oven rack controls how heat reaches the meat. When chicken sits too high, the top gets too close to the heating element and can burn. When it sits too low, the bottom does not get enough heat and the skin turns out soggy. The middle oven rack is almost always the best spot.
Placing chicken on the middle rack allows hot air to circulate evenly around the meat. This means the crispy chicken skin gets perfectly golden on all sides. The chicken oven rack position also affects how much space hot air has to move. If you crowd the oven with multiple trays, the air cannot flow properly and your chicken cooks unevenly.
Here is a quick rule to remember. For a single tray of bake chicken breast or chicken thighs oven, use the middle rack. For a whole whole chicken baking project, you may need to lower the rack slightly to fit the bird. Always preheat your oven before placing the chicken inside. This gives the heat time to stabilize and ensures cooking starts immediately.
The Best Oven Temperatures for Different Chicken Cuts
Not all chicken cuts need the same roast chicken temperature. Thicker pieces need more time and moderate heat, while thinner cuts benefit from higher heat for a shorter period. Here is a simple breakdown of the best oven temperature for chicken by cut type.
- Whole Chicken: 425°F for a crispy skin and even cooking. This high heat renders the fat quickly and creates a beautiful golden color.
- Chicken Breasts: 400°F to 425°F depending on thickness. Thinner breasts do well at 425°F for faster cooking. Thicker breasts benefit from 400°F to cook more gently.
- Chicken Thighs and Drumsticks: 400°F to 425°F. These cuts have more fat and connective tissue, so higher heat helps crisp the skin while melting the fat inside.
- Chicken Wings: 425°F to 450°F for ultra-crispy chicken wings bake results. The high heat dries out the skin quickly, creating that perfect crunch.
- Chicken Tenders: 400°F for about 15 to 18 minutes. These thin pieces cook fast and can dry out quickly if the temperature is too high.
Using the right high heat chicken approach for each cut is one of the easiest ways to improve your results. If you want a deeper flavor, you can also try a low and slow chicken method at 325°F for a longer time. This works well for whole birds and tougher cuts like thighs.
How High To Cook Chicken In Oven By Cut Type
Now that you understand the basics of temperature and placement, let us get specific. The how high to cook chicken in oven question really comes down to the type of chicken you are preparing. Each cut has unique needs, and understanding them is the key to perfect results.
Whole Chicken Oven Position
Roasting a whole chicken baking is one of the most rewarding things you can do in the oven. The bird needs enough space for hot air to circulate around it completely. Place a whole chicken on a roasting rack set inside a baking pan. This elevates the bird and allows heat to reach the bottom evenly.
Position the rack in the lower third of the oven if your bird is very large. This prevents the top from burning while the inside finishes cooking. A whole chicken at 425°F typically takes about 1 hour to 1 hour and 20 minutes depending on the size. Use a meat thermometer to check the internal temperature chicken in the thickest part of the thigh. It should read 165°F for safe eating.
Let the chicken rest for at least 10 minutes before carving. This allows the chicken juices to redistribute throughout the meat. If you cut too soon, all those flavorful juices run out onto the cutting board instead of staying in the meat.
Chicken Breasts
Chicken breast cooking can be tricky because the meat is lean and dries out easily. The best approach is to bake chicken breast at 400°F to 425°F for a short time. This high heat seals the outside quickly while keeping the inside moist.
Place chicken breasts on the middle rack with space between each piece. Do not overcrowd the pan. If you are cooking thin breasts, 425°F for 18 to 22 minutes works well. For thicker breasts, drop to 400°F and cook for 25 to 30 minutes. Always check the internal temperature chicken at the thickest point. It should read 165°F.
A great tip is to pound your chicken breasts to an even thickness before cooking. This ensures they cook evenly and reduces the risk of dry edges with a raw center. You can also brine your breasts beforehand for extra moisture. Even a quick 30-minute soak in salted water makes a noticeable difference in the final result.
Chicken Thighs and Drumsticks
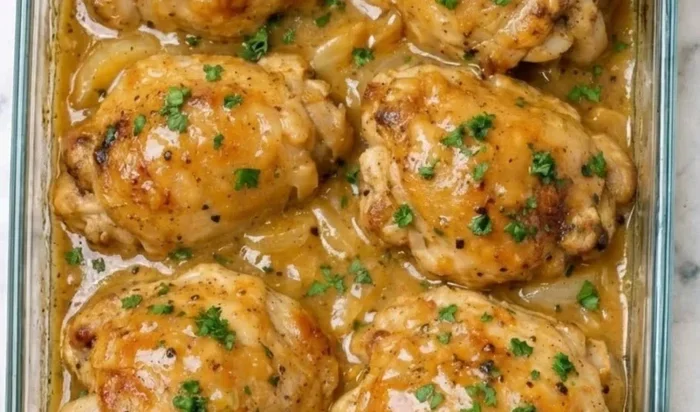
Chicken thighs oven recipes are some of the most forgiving. Dark meat has more fat and connective tissue, which means it stays moist even if you slightly overcook it. Place thighs and drumsticks skin-side up on the middle rack at 425°F for 35 to 45 minutes.
The high heat renders the fat under the skin and creates crispy chicken skin on the outside. You will know they are done when the skin is deep golden and the internal temperature chicken reaches 165°F in the thickest part. These cuts are great for oven-baked chicken meal prep because they reheat well and stay juicy.
If you prefer a more hands-off approach, you can lower the temperature to 375°F and cook for 50 to 60 minutes. This low and slow chicken method produces incredibly tender meat with a softer skin. It is perfect for busy days when you want to set it and forget it.
Chicken Wings
Chicken wings bake best at high heat. Set your oven to 425°F to 450°F and place wings on a wire rack set over a baking sheet. The wire rack is essential here because it allows air to circulate underneath, giving you crispy skin on all sides.
Cook wings for 40 to 50 minutes, flipping them halfway through. The high heat chicken approach dries out the skin quickly while cooking the meat through. The result is crispy roasted chicken wings with a beautiful golden color and a satisfying crunch.
For extra crispy wings, pat them completely dry with paper towels before seasoning. Moisture is the enemy of crispy skin. You can also increase the temperature to 475°F for the last 10 minutes to get an extra crunch. Just watch them closely so they do not burn.
Cooking Times and Temperature Guide
Knowing the right chicken cooking time for each cut takes the guesswork out of how high to cook chicken in oven. Use this quick reference guide to plan your meals with confidence.
- Whole Chicken (4 to 5 lbs): 425°F for 60 to 80 minutes. Check at 60 minutes and continue until 165°F internal temperature.
- Bone-in Chicken Breasts: 400°F for 30 to 35 minutes. Thinner pieces may be done in 25 minutes.
- Boneless Chicken Breasts: 425°F for 18 to 22 minutes. Slice and serve immediately for the juiciest results.
- Bone-in Thighs: 425°F for 35 to 45 minutes. The higher fat content makes these very forgiving.
- Boneless Thighs: 425°F for 25 to 30 minutes. These cook faster than bone-in cuts.
- Drumsticks: 425°F for 30 to 40 minutes. Flip once halfway through for even browning.
- Wings: 425°F to 450°F for 40 to 50 minutes. Flip at the halfway mark for crispy results on both sides.
Always use a meat thermometer to verify doneness. The internal temperature chicken should read 165°F in the thickest part, away from the bone. Visual cues like clear juices and firm meat help too, but a thermometer is the most reliable tool in your kitchen.
Keep in mind that chicken cooking times can vary based on your oven’s accuracy. Some ovens run hot, and others run cool. If you are new to baking chicken, start checking a few minutes early. You can always add more time, but you cannot undo overcooked chicken.
Tips for Juicy, Flavorful Oven Chicken
Getting the oven temperature for chicken right is only half the battle. How you prepare the chicken before and after cooking also matters. These practical chicken cooking tips will take your oven-baked chicken from good to outstanding.
Brine or Dry Brine for Extra Moisture
Brining is one of the best chicken cooking tips you can follow. A simple saltwater soak helps the meat retain moisture during cooking. For a quick brine, dissolve 1 tablespoon of salt per cup of water and soak your chicken for 30 minutes to 2 hours. For a dry brine, rub salt directly on the chicken and let it sit in the fridge uncovered for a few hours. This draws out moisture, which then gets reabsorbed, seasoning the meat deeply.
Do Not Skip the Resting Period
Resting your chicken after cooking is just as important as the cooking itself. When you take the chicken out of the oven, the chicken juices are concentrated in the center. If you cut immediately, those juices run out and the meat dries out. Let the chicken rest for 5 to 10 minutes before slicing. This simple step makes a noticeable difference in juiciness.
Season Generously and Layer Flavors
Do not be shy with your seasoning. Olive oil, salt, pepper, garlic, and herbs create a flavorful base for any chicken recipes. For extra flavor, try adding paprika, cumin, or lemon zest to your rub. Brush the chicken with a little olive oil or melted butter before cooking. This helps the skin crisp up and carries flavors into the meat.
Use a Wire Rack for Even Cooking
A wire rack set over a baking sheet is a game-changer for crispy roasted chicken. It lifts the chicken off the pan and allows hot air to flow underneath. This means you get crispy skin on the bottom too, not just on top. If you do not have a wire rack, you can use a bed of chopped onions or vegetables to elevate the chicken slightly.
Common Mistakes That Ruin Oven Chicken
Even experienced cooks make mistakes when baking chicken. Knowing what to avoid is just as important as knowing what to do. Here are the most common errors that lead to dry, flavorless oven-baked chicken.
Overcooking the Chicken
Overcooking is the number one reason for dry chicken. It is easy to leave chicken in the oven a few minutes too long, especially if you get distracted. The difference between juicy and dry can be just a few minutes. Set a timer, stay nearby, and use a meat thermometer to pull the chicken out as soon as it reaches 165°F in the thickest part.
Skipping the Preheat
Putting chicken into a cold oven leads to uneven cooking and soggy skin. Always preheat your oven to the target oven temperature for chicken before placing the meat inside. This ensures the cooking environment is stable from the moment the chicken goes in.
Wrong Rack Position
Placing chicken too high or too low in the oven creates uneven results. The top can burn while the bottom stays pale, or the skin can turn out soft instead of crispy. Always use the middle oven rack for even heat distribution. This small adjustment solves many common cooking problems.
Not Letting the Chicken Come to Room Temperature
Cold chicken straight from the fridge cooks unevenly. The outside may be done while the inside is still raw. Take your chicken out of the refrigerator 20 to 30 minutes before cooking. This small step helps the meat cook more evenly and reduces the overall chicken cooking time.
Overcrowding the Pan
Crowding pieces too close together traps steam and prevents the skin from crisping up. Give each piece enough space for hot air to circulate freely. If you need to cook a large batch, use multiple trays or cook in batches. The extra effort is worth the crispy chicken skin you will achieve.
Expert Tips for Perfect Chicken Every Time
Professional cooks use a few tricks that make their oven-baked chicken stand out. These chicken cooking tips are easy to follow and make a big difference in your results.
First, always pat your chicken dry before seasoning. Moisture on the surface creates steam instead of crispiness. Use paper towels to remove excess moisture from the skin. This is especially important for wings and thighs where crispy skin is the goal.
Second, let your chicken recipes develop flavor over time. Seasoning chicken the night before and letting it marinate in the fridge produces deeper, more complex flavors. Even a quick 30-minute rest at room temperature helps the salt penetrate the meat.
Third, invest in a good meat thermometer. This is the single most important tool for perfect chicken. It removes all guesswork and takes the stress out of cooking. Digital instant-read thermometers are affordable and give you accurate readings in seconds.
Fourth, experiment with different roast chicken temperature settings. Try 425°F for crispy skin or 375°F for tender, slow-cooked results. Once you understand how temperature affects the outcome, you can adjust based on what you are in the mood for.
Finally, keep a cooking log. Write down what worked and what did not. Note the chicken cooking times, temperatures, and rack positions that gave you the best results. Over time, you will develop a personal reference guide that makes cooking chicken effortless.
Conclusion
Getting how high to cook chicken in oven right is the foundation of great oven-baked chicken. The middle oven rack, a temperature between 400°F and 425°F, and the right chicken cooking time are all you need for juicy, flavorful results. Every cut has its own ideal settings, and now you know exactly what they are.
Remember to always use a meat thermometer and let your chicken rest before serving. These small habits make a huge difference in the final dish. Avoid common mistakes like overcooking, skipping the preheat, and overcrowding the pan, and you will see an immediate improvement in your chicken.
With these chicken cooking tips and chicken recipes, you are ready to cook delicious, juicy chicken every time. Whether you are making a simple weeknight dinner or a weekend roast, you now have the knowledge to get it right. Get in the kitchen, preheat that oven, and enjoy the process of creating crispy roasted chicken that your whole family will love.
Frequently Asked Questions
What is the best oven temperature for chicken?
The best oven temperature for chicken is between 400°F and 425°F. This range creates crispy skin while keeping the meat juicy. Thicker cuts like whole chickens do well at 425°F, while thinner pieces like breasts can be cooked at 400°F for more gentle results.
How long does it take to cook chicken in the oven?
Chicken cooking times vary by cut and size. A whole chicken takes about 60 to 80 minutes at 425°F. Breasts cook in 18 to 35 minutes depending on thickness. Thighs and drumsticks need 30 to 45 minutes. Always check the internal temperature chicken reaches 165°F for safe eating.
Should I cover chicken with foil when baking?
Most of the time, you should leave chicken uncovered for crispy skin. Foil traps steam and can make the skin soggy. However, if your chicken is browning too quickly, you can loosely cover it with foil for the last part of cooking. This prevents burning while the inside finishes cooking.
How do I know when chicken is done without a thermometer?
Without a meat thermometer, check that the juices run clear when you pierce the thickest part. The meat should feel firm, not rubbery or soft. However, a thermometer is the most reliable method and takes the guesswork out of cooking chicken safely and perfectly.
Can I cook chicken on the top rack of the oven?
The top rack is not ideal for most chicken recipes because it exposes the top to direct heat, which can cause burning. The middle oven rack provides the most even heat distribution. If you must use the top rack, lower the temperature by 25°F and watch the chicken closely.
Is it better to bake chicken at high or low heat?
For most cuts, high heat chicken at 400°F to 425°F produces the best results with crispy skin and juicy meat. A low and slow chicken approach at 325°F to 375°F works well for whole birds and tougher cuts that need more time to become tender. Choose based on the cut and your desired texture.