How To Dry Celery Leaves In The Oven Step By Step Guide
Drying celery leaves in the oven is one of the simplest ways to preserve fresh herbs for months. This guide walks you through the entire oven drying method from prep to storage. You will learn how to dehydrate celery leaves perfectly every time with minimal effort and no special equipment.
If you have ever grown celery or bought a bunch from the farmers market, you know the leaves are packed with flavor. Yet most people throw them away. That is a real waste. Drying celery leaves in the oven is one of the easiest ways to save them. You get a homemade celery seasoning that works in soups, salads, and so much more. This guide shows you exactly how to do it right.
The oven drying method has been used for centuries to preserve herbs. It is fast, reliable, and requires almost no special tools. Whether you are a beginner cook or a seasoned home chef, you can master this technique in minutes. Let us get into the details of how to dehydrate celery leaves using your everyday oven.
Key Takeaways
- Easy Preservation: Oven drying celery leaves is a simple kitchen technique that extends their shelf life for months.
- Low Temperature Is Key: Using a low heat setting prevents burning and keeps the dried celery leaves flavorful.
- Versatile Uses: Crispy celery leaves work as seasoning, garnish, and ingredient in many recipes.
- Proper Storage Matters: Storing your dried herb seasoning correctly keeps it fresh longer.
- No Special Tools Needed: You only need a basic oven, a baking sheet, and fresh celery.
- Quick Process: The entire oven drying method takes about 1 to 2 hours from start to finish.
📑 Table of Contents
Why Dry Celery Leaves In The Oven
Fresh celery leaves are full of flavor and nutrients. But they wilt fast. Within a day or two, they go limp and lose their taste. Drying them locks in the celery flavor preservation so you can enjoy them year round. Here are some strong reasons to try this method.
Saves Money and Reduces Waste
Most people buy celery and only use the stalks. The leaves end up in the trash. That is money going straight into the bin. When you dry celery leaves in oven, you use the whole plant. This cuts down on food waste and saves you cash at the grocery store.
Extends Shelf Life Significantly
Fresh celery leaves last only a few days in the fridge. But dried celery leaves can stay good for six months or more when stored properly. This means you always have a burst of fresh celery flavor ready to go in your kitchen.
Creates a Versatile Ingredient
Once dried, celery leaves become a powerful dried herb seasoning. You can crumble them over popcorn, mix them into salt blends, or add them to homemade soup stock. The possibilities are wide open. Crispy celery leaves also make a great garnish for cocktails and plated dishes.
No Special Equipment Required
You do not need a fancy dehydrator or a lot of counter space. Your regular oven works perfectly. This makes the kitchen herb drying process accessible to everyone. All you need is a baking sheet, some parchment paper, and fresh celery leaves.
Preparing Your Celery Leaves
Good prep work makes the whole process smoother. Taking a few extra minutes here ensures your dried celery leaves turn out perfectly crispy and flavorful. Let us walk through each step.
Choose the Right Leaves
Start with fresh celery stalks that still have healthy green leaves. Look for leaves that are bright in color and firm to the touch. Avoid leaves that are yellowing, wilting, or showing brown spots. The fresher the leaves, the better the dried herb seasoning will taste.
Wash and Dry Thoroughly
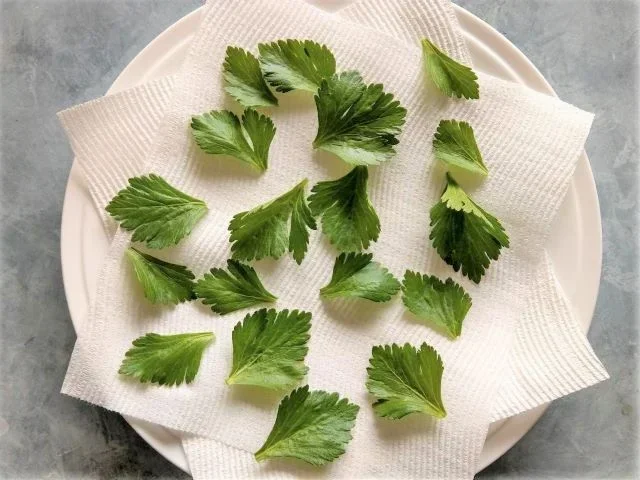
Rinse the leaves gently under cool running water. Pat them dry with a clean kitchen towel. You can also lay them on a paper towel and let them air dry for a few minutes. It is very important that the leaves are completely dry before they go in the oven. Any extra moisture can make the drying time longer and lead to uneven results.
Remove Stems and Debris
Pick off any damaged or discolored parts of the leaves. Remove the small stems attached to each leaf. You want only the soft, leafy parts for the best flavor and texture. This step is quick but it makes a big difference in the final product.
Preheat Your Oven
Set your oven to the lowest temperature possible. Most ovens go down to about 170 degrees Fahrenheit. If yours goes lower, even better. A low temperature drying approach is the secret to keeping the color and flavor intact. Too much heat will burn the leaves and destroy their nutrients.
The Step By Step Oven Drying Process
Now comes the fun part. This is where you turn fresh leaves into crispy celery leaves that can be used for weeks. Follow these steps carefully for the best results.
Step 1: Arrange Leaves on a Baking Sheet
Line a baking sheet with parchment paper. Spread the leaves out in a single layer. Make sure none of the leaves overlap. Overlapping traps moisture and leads to uneven drying. If you have a lot of leaves, use two baking sheets and work in batches.
Step 2: Place in the Oven
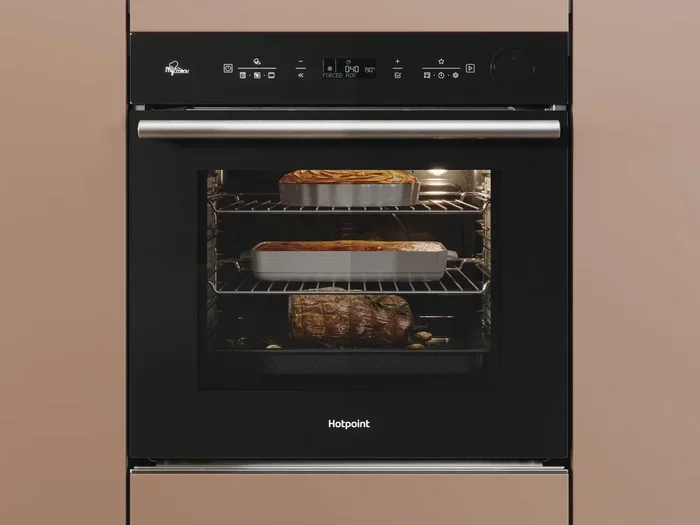
Put the baking sheet on the middle rack of your oven. Leave the oven door slightly cracked open. This allows moisture to escape and helps the leaves dry evenly. A wooden spoon handle works great for keeping the door propped open.
Step 3: Dry for 1 to 2 Hours
Set a timer and check the leaves every 20 minutes. The drying time depends on your oven and how thick the leaves are. Most oven drying method recipes call for about one to two hours total. The leaves are done when they feel crispy and crumble easily between your fingers.
Step 4: Cool Completely
Once the leaves look dry and crispy, pull them out of the oven. Let them cool on the baking sheet for at least 30 minutes. They will continue to crisp up as they cool. Do not store them while they are still warm, or moisture can get trapped and cause mold.
Step 5: Crush and Store
Gently crumble the dried celery leaves into small pieces. You can leave them as larger flakes or crush them into a fine powder. A mortar and pestle works well for making celery leaf powder. Transfer the dried leaves into an airtight container and move on to the next section for storage tips.
Tips For Perfect Dried Celery Leaves Every Time
Getting great results is easier than you think. A few small adjustments can make a huge difference. Here are some practical tips from experienced home cooks and food preservation experts.
Use the Lowest Heat Setting
This cannot be stressed enough. High heat destroys the delicate oils in celery leaves that give them their flavor. Keep your oven at or below 170 degrees Fahrenheit. The goal is gentle, slow drying, not cooking. Think of it as a food dehydration process, not baking.
Check Leaves Frequently
Every oven runs a little differently. Some hot spots can burn leaves in certain areas. Check on your drying celery leaves every 15 to 20 minutes. Rotate the baking sheet if needed. This ensures even drying and prevents any scorching.
Do Not Rush the Process
It might be tempting to crank up the heat to save time. Resist that urge. Rushing the herb drying technique leads to burnt, bitter leaves. Low and slow is the winning formula here. Patience pays off with better flavor and color.
Experiment with Leaf Thickness
Thicker leaves take longer to dry. Thinner leaves dry faster but can become brittle. Try mixing different leaf sizes on the same tray for a balanced batch. This gives you a nice variety of textures in your final celery leaf powder.
Add a Pinch of Salt for Extra Flavor
Some people like to sprinkle a tiny bit of sea salt on the leaves before drying. This creates a ready made seasoning right out of the oven. Just a light dusting is all you need. Too much salt can draw out too much moisture and affect the drying process.
Common Mistakes To Avoid
Even simple tasks like drying herbs in oven can go wrong if you are not careful. Here are the most common mistakes people make and how to avoid them.
Using Too High a Temperature
This is the number one mistake. High heat cooks the leaves instead of drying them. The result is bitter, dark, and crumbly leaves that lose their fresh celery flavor. Stick to low temperatures and trust the process.
Overlapping the Leaves
Crowding the baking sheet leads to uneven drying. Moisture gets trapped between overlapping leaves, and they can end up damp or moldy. Always spread leaves out in a single layer. If you need more space, use a second baking sheet.
Skipping the Cooling Step
Storing warm leaves is a quick way to introduce moisture back into the batch. This can lead to spoilage and mold growth. Always let your crispy celery leaves cool completely before you put them in a container.
Not Using Airtight Storage
Even perfectly dried leaves will lose their flavor fast if stored incorrectly. Always use airtight glass jars or sealed containers. Keep them in a cool, dark place away from direct sunlight and heat sources.
Ignoring Leaf Quality
Starting with old or damaged leaves will give you a lower quality final product. Always choose the freshest, healthiest leaves you can find. Good ingredients make all the difference in kitchen herb drying success.
Uses For Dried Celery Leaves
Now that you know how to make them, what can you do with dried celery leaves? More than you might think. These little flavor bombs are incredibly versatile in the kitchen.
Homemade Soup and Stock Seasoning
Crumbled dried celery leaves add a deep, savory flavor to homemade soups and stocks. They work beautifully in vegetable broth, chicken stock, and ramen. Add a teaspoon or two during cooking for an extra layer of flavor.
Custom Spice Blends
Mix celery leaf powder with salt, pepper, garlic powder, and onion flakes for a custom seasoning blend. This makes a great all purpose seasoning for meats, vegetables, and popcorn. You can also blend it with dried dill and parsley for a classic herb mix.
Garnish for Cocktails and Dishes
Crispy dried celery leaves look beautiful as a cocktail garnish. They add a subtle herbal note to Bloody Marys and other drinks. You can also use them to top plated dishes for a restaurant quality finish.
Salad and Soup Topping
Sprinkle dried leaves over fresh salads for a celery flavor boost. They also work well as a finishing touch on creamy soups and chowders. The texture adds a nice crunch that pairs well with soft ingredients.
Infused Oils and Vinegars
Add a few dried herb seasoning pieces to olive oil or vinegar for a quick infusion. Let the mixture sit for a week or two, then strain. You will have a flavorful celery infused oil perfect for dressings and marinades.
Storing Your Dried Celery Leaves Properly
Proper storage is the final step in the celery leaf preservation process. Get this right and your dried celery leaves will stay fresh and flavorful for months.
Best Containers for Storage
Glass jars with tight fitting lids are the gold standard for storing dried herbs. Mason jars work great and look nice on a kitchen shelf. You can also use small airtight plastic containers or resealable bags. The key is to keep moisture and air out.
Where to Store Them
Keep your stored dried celery leaves in a cool, dark place. A pantry or cupboard away from the stove works perfectly. Direct sunlight and heat will degrade the flavor and color over time. A dark cabinet is your best friend here.
How Long Do They Last
When stored correctly, dried herb seasoning can last for six to twelve months. Check on them every few months. If the color fades or the smell weakens, it is time to make a fresh batch. Always label your containers with the date so you know how old they are.
Freezing as an Alternative
If you want even longer storage, you can freeze dried celery leaves. Place them in a freezer safe bag and remove as much air as possible. Frozen dried leaves can last for over a year. Just let them come to room temperature before opening the bag to avoid moisture buildup.
Frequently Asked Questions
Can I dry celery leaves without an oven?
Yes, you can. Air drying celery is another popular method. Simply tie the leaves in small bundles and hang them upside down in a warm, dry, well ventilated spot. It takes longer than the oven method, usually three to five days, but it works well if you have the time and space.
What temperature should I use to dry celery leaves?
The best temperature is between 150 and 170 degrees Fahrenheit. This low temperature drying approach preserves the flavor and color of the leaves. Higher temperatures can burn the leaves and destroy their delicate oils. Always use the lowest setting your oven allows.
How long does it take to dry celery leaves in the oven?
Most batches take about one to two hours. The exact time depends on your oven, the thickness of the leaves, and how much moisture they contain. Check the leaves every 20 minutes and look for a crispy, crumbly texture. When they easily break apart, they are done.
Can I use a dehydrator instead of an oven?
Absolutely. A food dehydrator works great for dehydrate celery leaves and gives you more control over temperature and airflow. Set it to around 125 degrees Fahrenheit and let it run for two to four hours. The results are similar to the oven method but with even more consistent drying.
Are dried celery leaves as nutritious as fresh ones?
Drying does reduce the water content, which concentrates some nutrients. Dried celery leaves still contain vitamins A, C, and K, along with antioxidants. However, some heat sensitive nutrients may decrease during the drying process. Overall, they remain a healthy addition to your meals.
What is the best way to crush dried celery leaves?
A mortar and pestle gives you the most control. You can make a fine celery leaf powder or leave some pieces larger for flakes. You can also place the dried leaves in a zip lock bag and crush them with a rolling pin. This is a quick and easy method that works well for larger batches.
Conclusion
Drying celery leaves in the oven is one of the most rewarding and simple kitchen skills you can learn. It takes almost no effort, costs very little, and gives you a versatile homemade celery seasoning that elevates countless dishes. From soups to cocktails to custom spice blends, your crispy celery leaves will find their way into everything you cook.
The oven drying method is forgiving and easy to master. Follow the steps in this guide, avoid the common mistakes, and you will have beautiful dried celery leaves ready to use in no time. Remember to keep the temperature low, check your leaves often, and store them properly once they are done.
Once you start drying your own herbs, you will never go back to store bought versions. The flavor is brighter, the quality is better, and you know exactly what goes into your dried herb seasoning. Give this technique a try the next time you have fresh celery in your kitchen. Your taste buds will thank you.