How To Install Gas Oven With This Step By Step Guide
Installing a gas oven yourself is easier than most people think. This guide walks you through every step safely and clearly. You will learn how to connect the gas line, level the oven, and test for leaks. Follow these instructions to save money and avoid common mistakes. By the end, you will feel confident tackling the gas oven installation on your own.
Installing a gas oven might seem intimidating at first. But with the right steps, it becomes a manageable weekend project. Whether you are replacing an old unit or setting up a new one, this guide has you covered. You will learn how to handle the gas line, secure the oven, and run all safety checks. Let us walk through each step together so you can get your kitchen up and running with confidence.
A gas oven installation requires attention to detail and basic tools. You do not need to be a licensed gas fitter to handle this job. However, you do need to follow safety rules carefully. This step by step guide breaks everything down into simple, clear actions. By the time you finish reading, you will know exactly what to do.
Key Takeaways
- Gather all tools first: Having everything ready makes the process smooth and safe.
- Check gas supply and ventilation: Proper setup prevents leaks and ensures efficient operation.
- Use a gas leak detector: Always test connections before using the oven.
- Level the oven correctly: This protects the appliance and ensures even cooking.
- Know when to call a pro: Some tasks require a licensed professional for safety and compliance.
- Follow the manufacturer manual: It contains oven-specific instructions you cannot skip.
📑 Table of Contents
What You Need Before You Start
Tools and Materials Checklist
Before you touch any gas lines, gather your tools. Having everything ready saves time and prevents frustration. Here is what you will need for a smooth oven hookup:
- Adjustable wrench set
- Gas leak detector solution or soapy water
- Level (torpedo level works great)
- Screwdriver set (Phillips and flathead)
- Gas connector hose (check your oven manual for the right size)
- Shims or leveling feet
- Rag or cloth for cleaning
- Flashlight
Also, keep your oven manual nearby. Every model has specific requirements. The manual tells you the correct gas fitting size and clearance needs. Skipping this step can lead to improper installation and safety risks.
Safety Gear You Should Wear
Safety always comes first when working with gas. Wear closed toe shoes and gloves. Keep a fire extinguisher nearby just in case. Make sure your workspace is well lit. If you smell gas at any point, stop immediately and open windows. Never use open flames or electrical switches near a suspected leak.
Preparing the Installation Area
Choosing the Right Spot
Where you place your gas oven matters more than most people realize. The area needs proper ventilation to allow heat and combustion gases to escape. Check your local building codes for clearance requirements. Typically, you need at least 2 inches of space on each side and 1 inch at the back.
Make sure the floor can support the weight of the oven. A full gas oven can weigh 150 pounds or more. Avoid placing it on uneven surfaces that could tip over. If you are installing the oven in a cabinet or built-in space, confirm there is enough airflow around the unit.
Checking the Gas Supply
Locate your gas supply valve before you begin. This valve controls the gas flow to the oven connection point. Make sure it is accessible and in the off position before you start any work. The valve should be clearly labeled and easy to reach for emergencies.
Inspect the gas line for any damage or corrosion. If you see rust, cracks, or worn sections, do not attempt to use them. Call a professional to replace the damaged line. A gas fitting must be in perfect condition before you connect anything.
Turning Off the Gas Supply
This is the most important safety step. Turn the gas supply valve to the off position. Then open your oven burner briefly to release any remaining gas pressure. You should smell the gas escape for a few seconds. Once it stops, you are ready to proceed with the connection.
Never skip this step. Working on a pressurized gas line is extremely dangerous. Take your time and make sure the gas is fully shut off before you connect any fittings.
Connecting the Gas Line
Attaching the Gas Connector
Now comes the main part of the gas oven installation process. Take your gas connector hose and attach it to the gas supply outlet. Use an adjustable wrench to tighten the fitting. Hand tighten first, then give it a quarter turn with the wrench. Do not overtighten, as this can damage the threads.
Make sure the connector is the correct type for your gas supply. Natural gas and propane fittings are different. Using the wrong connector can cause a serious leak. Check the labels on both the oven and the gas line to confirm compatibility.
Checking the Gas Pressure
After connecting the gas fitting, verify the pressure matches your oven requirements. Most residential ovens operate at 3.5 to 7 inches of water column pressure. If you are unsure, consult a licensed professional to test the pressure before proceeding.
Low gas pressure causes poor oven performance. High pressure is dangerous and can damage internal components. If you notice any issues during the oven hookup, stop and get professional help.
Sealing and Securing the Connection
Apply gas leak detector solution or a mix of soap and water to all connections. Turn the gas supply valve back on slowly. Watch each connection point for bubbles. Bubbles indicate a leak and must be fixed immediately.
If you find a leak, turn off the gas and tighten the fitting. Apply more sealant and test again. Repeat until no bubbles appear. A secure connection is the foundation of a safe gas oven setup.
Leveling and Securing the Oven
Positioning the Oven
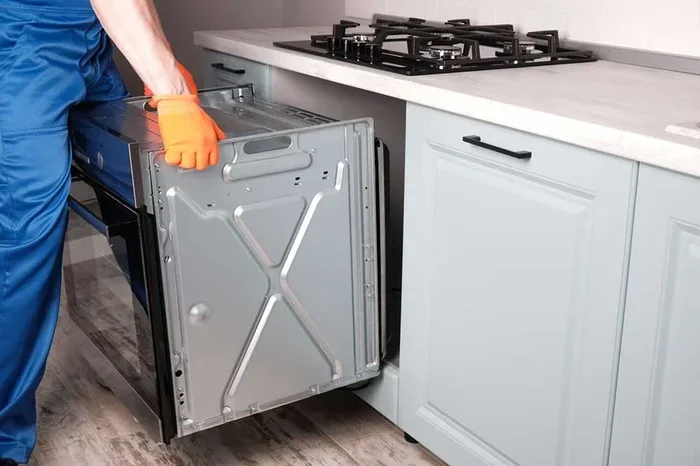
With the gas line connected, carefully slide the oven into position. You may need a second person for this step. Gas ovens are heavy and awkward to move alone. Slide it gently to avoid stressing the gas connection.
Once in place, use a level to check if the oven sits flat. An unlevel oven can cause uneven cooking and put strain on internal components. Adjust the leveling feet or use shims underneath to correct any tilt.
Securing the Oven in Place
Many ovens come with brackets or screws for wall support. Check your oven manual for specific mounting instructions. Secure the oven to the wall or countertop if required. This prevents tipping and adds stability during daily use.
Make sure the oven door opens fully without hitting nearby cabinets. You need at least 24 inches of clearance in front for safe operation. Test the door swing before finalizing the placement.
Testing and Safety Checks
Running a Test Burn
Before you use the oven for real cooking, run a test burn. Turn on the oven to a low temperature and let it run for 15 minutes. Watch the flame color. A blue flame indicates proper combustion. Yellow or orange flames suggest a problem with the gas-air mixture.
During the test burn, check for any unusual smells or sounds. A slight gas odor when first turning on the oven is normal. A strong gas smell is not. If you notice a persistent odor, turn off the oven and check your connections again.
Verifying the Ignition System
Modern gas ovens use either a glow bar or spark ignition system. Watch the oven ignite during the test burn. It should light within a few seconds. If the oven takes too long to ignite or fails to light, check the igniter or consult your manual.
A working shut-off valve is essential for safety. Test it by turning the valve off and confirming the oven stops receiving gas. This valve will be your first line of defense in any emergency.
Final Safety Inspection
Do a final walkthrough before considering the gas oven installation complete. Check all connections one more time with leak detector solution. Confirm the oven is level and securely mounted. Make sure the area around the oven is clear of flammable materials.
Ventilation is critical. Turn on your range hood or open windows when using the oven. Proper airflow removes combustion byproducts and keeps your kitchen air clean and safe.
When to Call a Professional
Signs You Need Expert Help
Some situations require a licensed professional. If you smell gas persistently after checking connections, call a pro immediately. Gas leaks are dangerous and should never be handled without proper training.
You should also call a professional if your gas line needs modifications. Adding a new gas line or relocating the existing one requires permits and expertise. A licensed gas fitting technician ensures the work meets local codes and safety standards.
Understanding Local Codes and Permits
Many areas require permits for stove installation. Check with your local building department before starting the project. Some jurisdictions also require a professional inspection after gas appliance installation. Failing to follow local codes can result in fines and safety hazards.
Even if your area allows DIY gas oven installation, do not hesitate to call a professional for the gas line connection. A small investment in professional help can prevent serious accidents and give you peace of mind.
Common Mistakes to Avoid
Skipping the Leak Test
The most common mistake is skipping the gas leak detector test. Always test every connection before using the oven. A small leak can lead to serious consequences including fire or explosion.
Using the Wrong Connector
Not all gas connectors are the same. Using the wrong size or type can cause leaks and improper gas flow. Always match the connector to your specific gas type and oven model.
Ignoring the Oven Manual
Every oven is different. The oven manual contains specific instructions that override general guidelines. Ignoring it can void your warranty and lead to improper installation.
Placing the Oven Too Close to Walls
Insufficient clearance causes overheating and fire hazards. Always follow the manufacturer’s recommended clearances. Proper ventilation keeps your oven running safely and efficiently.
Quick Tips for a Smooth Installation
- Always work with a partner for heavy lifting.
- Keep the gas supply valve off until you are ready to test.
- Take photos of connections before disassembly if replacing an old oven.
- Keep a gas leak detector on hand even after installation.
- Read the entire oven manual before starting any work.
- Never use force on gas fittings. If something does not fit easily, stop and reassess.
- Label your gas shut-off valve so everyone in the home knows where it is.
Conclusion
Installing a gas oven is a rewarding DIY project when done correctly. You save money, learn a valuable skill, and gain confidence in your home maintenance abilities. Follow each step carefully, prioritize safety at every stage, and do not hesitate to call a professional when needed.
The key to a successful gas oven installation lies in preparation and patience. Gather your tools, read your manual, test every connection, and never rush the process. Your oven will serve you well for years when installed properly. Enjoy your new appliance and the delicious meals it will help you create.
Frequently Asked Questions
Can I install a gas oven by myself?
Yes, many homeowners successfully install a gas oven themselves. You need basic tools, a gas leak detector, and careful attention to safety steps. However, if you are uncomfortable working with gas lines, hiring a professional is always a smart choice.
What type of gas connector do I need for my oven?
The connector type depends on whether you have natural gas or propane. Check your oven manual for the correct fitting size and type. Using the wrong connector can cause leaks and improper gas flow to the appliance.
How do I know if there is a gas leak after installation?
The best way to detect a leak is by applying gas leak detector solution to all connections. Bubbles forming at any point indicate a leak. You may also notice a sulfur or rotten egg smell, which is the odor added to natural gas for safety.
Do I need a permit to install a gas oven?
Permit requirements vary by location. Many areas require a permit and inspection for gas oven installation. Contact your local building department to find out what is needed in your area before starting the project.
How long does it take to install a gas oven?
A straightforward gas oven installation typically takes 1 to 3 hours. The time depends on your experience level, the condition of the gas line, and whether any adjustments are needed. Allow extra time if this is your first time doing the job.
What should I do if the oven flame is yellow instead of blue?
A yellow flame indicates incomplete combustion, which can produce carbon monoxide. Turn off the oven and check the air shutter on the burner. If adjusting the shutter does not fix the issue, contact a professional technician. A proper blue flame means safe and efficient operation.