What Oven Temp For Seasoning Cast Iron The Right Way
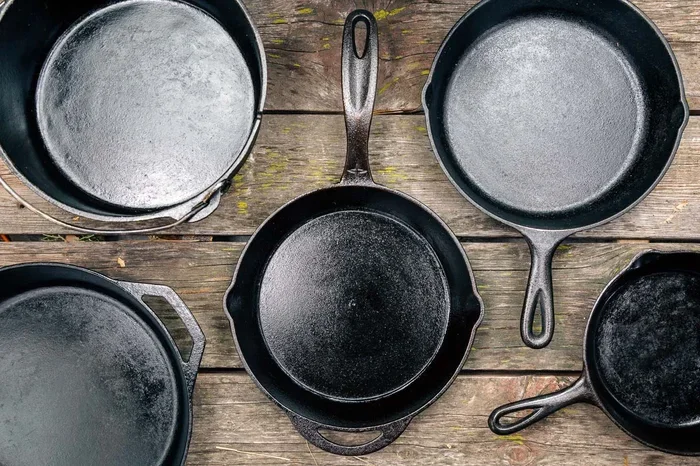
Seasoning cast iron in the oven is the easiest and most effective way to build a rock-solid non-stick surface. The ideal oven temp for seasoning cast iron is between 450°F and 500°F, which allows oil to polymerize into a durable protective layer. Whether you own a Lodge skillet or a vintage piece, this guide walks you through every step. You will learn which oils work best, common mistakes to avoid, and how to maintain your seasoning for years. With the right oven temp for seasoning cast iron, your pan will perform like a brand-new piece.
There is something deeply satisfying about cooking with a well-seasoned cast iron skillet. The food releases effortlessly, the browning is incredible, and the pan just keeps getting better with age. But here is the thing — many people struggle with the seasoning process. They wonder if they are doing it right, if the temperature is correct, or if they even need an oven at all.
If you have ever asked yourself, “What oven temp for seasoning cast iron is actually correct?” you are not alone. The answer might surprise you. It is simpler than you think, but small details make a huge difference. This guide breaks down everything you need to know about oven temp for seasoning cast iron so your pan develops a beautiful, long-lasting coating.
Whether you just bought your first piece of bare cast iron or you are trying to rescue a neglected skillet, this article has you covered. We will walk through temperatures, oils, techniques, and mistakes to avoid. By the end, you will feel confident enough to season your pan like a pro.
Key Takeaways
- 450°F to 500°F is the sweet spot: This temperature range ensures oil polymerizes properly without burning or leaving sticky residue.
- Thin layers matter: Applying a light, even coat of oil produces the smoothest and most durable seasoning.
- Canola and flaxseed oils are top choices: They have high smoke points and create strong polymerized layers.
- Repeat the process multiple times: Three to four rounds build a robust seasoning base that lasts for years.
- Avoid common mistakes: Using too much oil, skipping the cooling phase, or wiping improperly leads to sticky or flaky seasoning.
- Maintenance is simple: Regular use and proper cleaning keep your cast iron in excellent condition without frequent re-seasoning.
📑 Table of Contents
Why Oven Seasoning Is The Best Method
You have probably heard of stovetop seasoning, and it works fine. But oven seasoning offers advantages that make it the preferred method for most cooks and experts alike. Let us explore why putting your pan in the oven is such a great idea.
Even Heat Distribution
An oven surrounds your cast iron with heat from all sides. This means the seasoning layers cure evenly across the entire surface. When you use a stovetop, the heat comes mostly from below. That creates an uneven coating where some spots are thicker than others.
With oven seasoning, you get consistent results every single time. The even heat also helps the oil reach the right temperature for polymerization. This is the chemical process where liquid oil transforms into a hard, plastic-like coating bonded to the metal.
Hands-Off Convenience
Another big reason people love oven seasoning is that it requires very little hands-on time. You wipe on the oil, place the pan in the oven, and let the heat do the work. You can go about your day while the seasoning process happens on its own.
This is especially helpful if you are seasoning multiple pieces at once. You can stack or place several cast iron items on oven racks and season them together. It saves time and energy, which everyone appreciates in the kitchen.
Better Build-Up Over Time
Each time you season in the oven, you add another protective layer. Over multiple rounds, these layers build up to create a thick, resilient surface. This is called polymerized oil, and it is what gives seasoned cast iron its famous non-stick properties.
The oven environment encourages each layer to bond strongly to the previous one. Stovetop seasoning can sometimes produce a softer coating that wears away faster. Oven seasoning tends to last longer and withstand more cooking abuse.
The Best Oven Temp For Seasoning Cast Iron
Now let us get to the heart of the matter. What is the right temperature to use? The answer depends on a few factors, but there is a clear sweet spot that works for almost everyone.
Recommended Temperature Range
The ideal oven temp for seasoning cast iron falls between 450°F and 500°F. Most experts and manufacturers recommend 450°F as the starting point. This temperature is high enough to fully polymerize most cooking oils without burning them.
Some people prefer to go up to 500°F for a faster cure. This works well with oils that have a high smoke point. However, going above 500°F is generally not recommended. Excessive heat can cause the oil to burn before it fully polymerizes, leaving a rough and uneven coating.
Here is a quick reference for common oven settings:
- 450°F: The most recommended temperature. Safe for all oils and produces excellent results.
- 500°F: A good option for high-smoke-point oils like flaxseed. Slightly faster cure time.
- 350°F to 400°F: Too low for proper polymerization. The oil may not fully cure and can remain sticky.
Why Temperature Matters So Much
The temperature you choose directly affects how the oil behaves inside the oven. At too low a temperature, the oil simply sits on the surface and never hardens. At too high a temperature, the oil burns and turns black and flaky.
The right oven temp for seasoning cast iron hits the perfect balance. It heats the oil hot enough to trigger polymerization but not so hot that it combusts. The result is a smooth, hard, and durable coating that bonds tightly to the iron.
Keep in mind that every oven is slightly different. Some run hotter than the set temperature, while others run cooler. If you are unsure, an oven thermometer is a cheap and useful tool. Place it inside your oven to verify the actual temperature before you start.
How Long To Bake At This Temperature
Once your oven reaches the target temperature, place your oiled cast iron inside and bake for about one hour. Some guides recommend 30 minutes, but an hour gives each layer more time to fully cure. This is especially important for your first seasoning round.
After the hour is up, turn off the oven but leave the pan inside. Let it cool completely inside the oven. This gradual cooling helps the seasoning set properly. Removing the pan while it is still hot can cause thermal shock, which may crack or weaken the coating.
Step-By-Step Guide To Oven Seasoning
Now that you know the right temperature, let us walk through the entire process step by step. Following these instructions carefully will give you the best possible results.
Step One: Prepare Your Cast Iron
Start with a clean piece of cast iron. If the pan is new, wash it with warm water and a small amount of mild dish soap. Yes, you can use soap on new cast iron — the old myth about never using soap is outdated. For older or neglected pans, scrub off any rust or built-up residue with steel wool or a stiff brush.
After cleaning, dry the pan thoroughly with a towel. Then place it on the stove over low heat for a few minutes. This evaporates any remaining moisture. Water is the enemy of bare cast iron because it causes rust. Make sure the pan is completely dry before moving to the next step.
Step Two: Apply The Oil
Choose your oil carefully. Not all oils work equally well for seasoning. More on that in the next section. For now, use a clean cloth, paper towel, or your bare hands to apply a very thin layer of oil to the entire pan.
Cover the outside, the inside, the handle, and even the bottom. The key word here is thin. If the oil pools anywhere, wipe it off. Too much oil creates a sticky, uneven coating that peels easily. A light, almost invisible layer is exactly what you want.
Many people make the mistake of using too much oil. If the pan looks wet or glossy after wiping, you have used too much. Go back and wipe it down again with a dry cloth.
Step Three: Place In The Oven Upside Down
Flip your oiled pan upside down and place it on the middle oven rack. This position allows excess oil to drip off during baking. Place a sheet of aluminum foil or a baking sheet on the rack below to catch any drips. This keeps your oven clean.
Set your oven to the recommended oven temp for seasoning cast iron — between 450°F and 500°F. Once the oven reaches temperature, slide the pan inside and start your timer for one hour.
Step Four: Cool Down Inside The Oven
After one hour, turn off the oven. Do not open the door. Let the pan sit inside as the oven cools down naturally. This slow cooling process is important because it allows the seasoning to fully harden.
Once the oven is completely cool, remove your pan. It should feel smooth and dry to the touch. You may notice a slight change in color, which is completely normal and expected. This is your first seasoning layer, and it is already doing its job.
Step Five: Repeat For Better Results
For the best results, repeat the entire process three to four times. Each round adds another layer of protection. Multiple layers create a thicker, more durable seasoning that resists scratching and wear.
Some people season their cast iron five or six times for a brand-new pan. There is no harm in doing extra rounds. More layers simply mean better performance and longer-lasting seasoning. Think of it as building a foundation — the more layers, the stronger the base.
Which Oil To Use For Seasoning Cast Iron
Choosing the right oil is just as important as getting the temperature right. Different oils behave differently under heat, and some create much better seasoning than others.
Best Oils For Seasoning
Not all cooking oils are created equal when it comes to seasoning cast iron. The best oils have a few things in common: a high smoke point and a high percentage of polyunsaturated fats. These fats are what create the hard, durable polymerized layer.
Here are the top choices:
- Canola oil: Affordable, widely available, and works very well. A great everyday option.
- Grapeseed oil: High smoke point and light flavor. Produces a smooth, hard seasoning layer.
- Flaxseed oil: Creates the hardest and most durable coating. Many professional cooks swear by it.
- Crisco (vegetable shortening): A classic choice that has been used for decades. Very reliable results.
- Sunflower oil: Another good option with a high smoke point and easy availability.
Oils To Avoid
Some oils simply do not work well for cast iron seasoning. They may leave a sticky residue, produce a weak coating, or smell bad during the process.
- Olive oil: Has a relatively low smoke point and does not polymerize well. It can leave a gummy residue.
- Butter or margarine: Contains dairy solids that will burn and create a messy, unpleasant coating.
- Coconut oil: Despite its popularity, it does not create a strong polymerized layer and can feel waxy.
- Low-quality or blended oils: These often have inconsistent smoke points and may not cure properly.
Stick with one of the recommended oils, and your seasoning a cast iron pan experience will be much smoother. The right oil combined with the right oven temp for seasoning cast iron gives you the best possible outcome.
Common Mistakes To Avoid
Even experienced cooks sometimes make mistakes when seasoning cast iron. Knowing what to avoid saves time, oil, and frustration.
Using Too Much Oil
This is the number one mistake people make. It is tempting to slather the pan with oil, thinking more is better. But more oil does not mean better seasoning. Excess oil pools during baking and creates sticky, flaky spots that peel off easily.
Remember: thin layers are the key. Wipe the oil on, then wipe off the excess. The pan should look almost dry after you apply it. Trust the process — a little oil goes a long way.
Skipping The Cooling Phase
Some people pull the pan out of the oven immediately after baking and place it on the counter. This is a mistake. The sudden temperature change can cause the seasoning to crack or chip. Always let the pan cool inside the oven, even if it takes several hours.
Patience pays off here. The slow cool-down allows the polymerized oil to set firmly against the iron. This small step makes a noticeable difference in the durability of your seasoning.
Not Preheating The Oven Fully
Putting your oiled pan into a cold or lukewarm oven leads to poor results. The oil does not reach the right temperature all at once, which means it does not polymerize correctly. Always wait until the oven has fully preheated to the target oven temp for seasoning cast iron before you insert the pan.
Seasoning In A Dirty Oven
If you have drips on your oven floor from previous seasoning attempts, they can smoke and create odors. Place a sheet of foil or a baking sheet below the rack to protect your oven. This simple step keeps cleanup easy and prevents smoke alarms from going off.
Using The Self-Cleaning Cycle
Some people wonder if they can use their oven’s self-cleaning cycle to season cast iron. The answer is no. Self-cleaning cycles reach temperatures of 800°F or higher, which is far too hot. The oil will burn completely and leave a carbonized mess rather than a smooth, polymerized coating.
Always use a controlled temperature between 450°F and 500°F. This gives you precise control over the curing process and ensures consistent, high-quality results every time.
How Often Should You Re-Season Cast Iron
Once your cast iron is properly seasoned, you might wonder how long it lasts and when you need to do it again. The good news is that a well-maintained seasoning can last for years with proper care.
Signs Your Seasoning Is Wearing Off
Watch for these telltale signs that your pan needs attention:
- Food sticking frequently: If things are no longer releasing easily, the seasoning may be thinning.
- Rust spots appearing: Any sign of orange or brown rust means the protective layer has been compromised.
- Dull or rough surface: A healthy seasoning should look smooth and slightly glossy. If it looks matte or rough, it needs refreshing.
- Metallic taste in food: This can indicate that bare iron is exposed and reacting with acidic ingredients.
Quick Maintenance Tips
Keeping your cast iron in great shape is surprisingly simple. Follow these tips to extend the life of your seasoning:
- Clean your pan with warm water and a brush after each use. Avoid long soaks in water.
- Dry the pan immediately and thoroughly after washing. Never let it air dry.
- Apply a very thin layer of oil after cleaning before storing it.
- Cook fatty foods regularly. Bacon, eggs, and sautéed vegetables naturally help maintain and build seasoning.
- Store the pan in a dry place with the lid off or slightly open to allow airflow.
With these habits, your cast iron care routine becomes second nature. You will spend less time re-seasoning and more time cooking delicious meals.
Expert Tips For Perfect Seasoning Every Time
Over the years, seasoned cooks and cast iron enthusiasts have shared their best tips. Here are some expert insights that can elevate your seasoning game.
Use a convection setting if your oven has one. The circulating air helps the oil cure more evenly and can reduce the number of rounds you need. The fan distributes heat consistently around the pan, which means fewer hot spots and a more uniform coating.
Season your pan outdoors if possible. The process can produce some smoke, especially during the first few rounds. Doing it outside or near an open window prevents smoke alarms and keeps your kitchen fresh.
Do not season enameled cast iron. If your pan has a factory enamel coating, you do not need to season it. Enameled cast iron, like Le Creuset or Staub, has a non-reactive coating already built in. Seasoning it would be unnecessary and could actually damage the finish.
Be patient with the first few rounds. Your first seasoning may not look perfect, and that is completely okay. Each subsequent round improves the coating. Most experts recommend at least three rounds before you start cooking regularly with a newly seasoned pan.
Trust the process. Seasoning cast iron is not an exact science — it is more of an art that improves with practice. Every pan is slightly different, and your technique will evolve over time. The important thing is to start and keep going.
FAQ Section
Can I season cast iron at 350 degrees?
While you can technically season at 350°F, it is not the ideal temperature. The oil may not fully polymerize at this lower oven temp for seasoning cast iron, which can leave a sticky or weak coating. For best results, aim for 450°F to 500°F where the oil properly cures into a hard, durable layer.
How many times should I season my cast iron in the oven?
For a brand-new pan, three to four rounds is the sweet spot. Each round adds another protective layer. If your pan is heavily rusted or neglected, you may want to do five or six rounds to build a strong foundation. More layers mean better performance and longer-lasting seasoning.
Do I need to use a specific type of cast iron for oven seasoning?
No, any bare cast iron works for oven seasoning. This includes Lodge, vintage pieces, and hand-me-down skillets. The process works the same regardless of brand or age. Just make sure the pan is clean and free of rust before you begin.
Can I season cast iron in the oven with the self-cleaning cycle?
Absolutely not. The self-cleaning cycle reaches temperatures of 800°F or higher, which is far too extreme. The oil will burn instead of polymerizing, leaving behind a carbonized mess. Always use a controlled temperature between 450°F and 500°F for safe and effective seasoning.
Why is my seasoning sticky after oven seasoning?
Sticky seasoning is almost always caused by using too much oil. When excess oil does not fully cure, it remains tacky and soft. Next time, apply an even thinner layer and make sure to wipe off any visible excess before placing the pan in the oven.
How do I know when my cast iron is fully seasoned?
A fully seasoned cast iron pan has a smooth, slightly glossy appearance and food releases easily without sticking. The surface should feel dry and almost waxy to the touch. If you notice food sticking or rust forming, it is time to add another seasoning layer using the proper oven temp for seasoning cast iron.
Conclusion
Getting the oven temp for seasoning cast iron right is one of the most important skills any cast iron owner can learn. The ideal range of 450°F to 500°F creates the perfect conditions for oil to polymerize into a hard, durable, and naturally non-stick surface. Combined with the right oil, thin application, and patient cooling, this simple process transforms a bare piece of iron into a kitchen workhorse that lasts for generations.
Remember the key points: use a thin layer of high-quality oil like canola or flaxseed, bake for one hour at the correct temperature, and repeat the process multiple times for the best foundation. Avoid common mistakes like using too much oil or skipping the cooling phase. And once your seasoning is built, maintain it with simple care habits that keep your pan performing beautifully every single day.
Your cast iron skillet is an investment that rewards you with better cooking results over time. Take the time to season it properly, and it will serve you well for decades. Now you have all the knowledge you need to get it done right. Happy cooking!