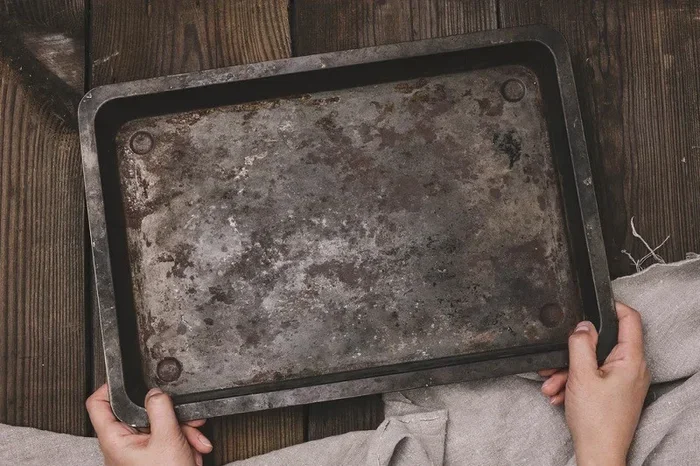
How To Clean Burnt Toaster Oven Tray With Baking Soda
Cleaning a burnt toaster oven tray is easier than you think with just baking soda. This guide shows you a simple, affordable method to remove tough stains, grease, and baked-on food from your oven tray. You will learn proven steps, helpful tips, and prevention tricks to keep your tray looking new.
There is nothing worse than opening your toaster oven and seeing a tray covered in burnt, blackened mess. Whether you forgot about a dish or cooked something at too high a temperature, a burnt tray can feel overwhelming. The good news is that you do not need expensive cleaners or harsh chemicals to fix this.
Baking soda is one of the most effective and affordable ways to clean a burnt toaster oven tray. It is a natural, safe, and powerful cleaner that breaks down grease and burnt food with ease. In this guide, we will walk you through every step of the process. By the end, you will know exactly how to bring your tray back to life.
This article covers everything you need to know. From understanding why food burns so badly to the step-by-step cleaning method and tips to prevent future messes. We also share alternative cleaning methods and advice on when it is time to replace your tray. Let us get started.
Key Takeaways
- Baking soda is a powerful, natural cleaner: It breaks down burnt food and grease safely without harsh chemicals.
- Soaking is key: Letting your tray soak in a baking soda solution loosens even the toughest burnt-on residue.
- You need minimal supplies: Baking soda, warm water, a scrubber, and a little patience are all you need.
- Prevention saves time: Regular cleaning and using foil or liners reduce future build-up significantly.
- Alternative methods work too: Vinegar, hydrogen peroxide, and commercial cleaners offer extra cleaning power when needed.
- Know when to replace: Deeply damaged trays can affect cooking performance and should be swapped out.
📑 Table of Contents
- Why Does Food Burn So Easily on a Toaster Oven Tray?
- What You Need Before You Start Cleaning
- Step-by-Step: How To Clean Burnt Toaster Oven Tray With Baking Soda
- Alternative Cleaning Methods for Stubborn Stains
- Tips to Prevent Burnt Messes on Your Toaster Oven Tray
- When Should You Replace Your Toaster Oven Tray?
- Expert Tips for Keeping Your Toaster Oven Tray in Top Shape
- Common Mistakes to Avoid When Cleaning Burnt Trays
- Frequently Asked Questions
- Conclusion
Why Does Food Burn So Easily on a Toaster Oven Tray?
Before you start cleaning, it helps to understand what causes burnt-on messes. When food spills or drips onto the tray, the heat dries it out. Over time, this creates a hard, black crust that sticks tightly to the surface. Grease adds another layer of difficulty because it bonds with the burnt food particles.
Toaster ovens heat up quickly and at high temperatures. This makes them great for cooking but tough on trays. Small crumbs and spills can burn within minutes. If you do not clean them right away, they build up layer after layer. The result is a tray that looks nearly impossible to clean.
The good thing is that burnt food is not permanent. With the right approach, you can remove it without scratching or damaging the tray. Baking soda works gently but effectively to lift even the worst stains.
The Science Behind Baking Soda Cleaning
Baking soda, also known as sodium bicarbonate, is a mild alkali. This means it can dissolve grease and break down acidic food residues. When mixed with water, it creates a gentle paste that works on burnt surfaces. The slight roughness of baking soda also acts as a mild abrasive. This helps scrub away stuck-on bits without harming the tray surface.
Another benefit is that baking soda neutralizes odors. If your tray smells like burnt food, baking soda will help eliminate that smell too. It is truly one of the best household cleaning solutions available.
What You Need Before You Start Cleaning
Gathering your supplies before you begin makes the process smooth and efficient. You do not need anything fancy or expensive. Here is what you will need:
- Baking soda — at least half a cup for the cleaning paste
- Warm water — enough to make a thick paste and for soaking
- A soft scrub brush or sponge — non-abrasive to protect the tray surface
- A plastic scraper or old toothbrush — for stubborn spots
- White vinegar — optional but helpful for extra cleaning power
- Dish soap — mild, for the final wash
- A clean cloth or towel — for drying
- Rubber gloves — to keep your hands clean and protected
Having everything ready means you can focus on the cleaning without interruptions. Lay out your supplies on a kitchen counter or in a sink area where you can comfortably work.
Step-by-Step: How To Clean Burnt Toaster Oven Tray With Baking Soda
This is the core of the guide. Follow these steps carefully for the best results. The process is simple but requires a little patience, especially for heavily burnt trays.
Step 1: Remove Loose Debris
Start by taking the tray out of the toaster oven. Let it cool down completely before you touch it. Once it is cool, flip the tray over and tap it gently. This removes any loose crumbs or food particles. You can also use a soft brush to sweep away debris.
Do not use sharp objects like metal forks or knives to scrape off food. These can scratch the tray surface and make future cleaning harder. Always use soft tools like a plastic scraper or an old toothbrush.
Step 2: Make the Baking Soda Paste
In a small bowl, mix three tablespoons of baking soda with a few tablespoons of warm water. Stir until you get a thick paste consistency. The paste should be thick enough to spread on the tray but loose enough to apply easily.
If the burnt stains are really bad, you can make a slightly thicker paste with more baking soda. The key is to have enough paste to cover all the burnt areas generously. Do not add too much water, or the paste will be too runny to stick.
Step 3: Apply the Paste to the Tray
Spread the baking soda paste evenly across the entire surface of the tray. Focus on the areas with the worst staining and burnt-on food. Use your fingers or a spatula to apply the paste. Make sure every burnt spot is covered with a good layer.
For extra tough areas, you can pile a little extra paste on top. Let the paste sit for at least fifteen to twenty minutes. This gives the baking soda time to break down the burnt residue and grease.
Step 4: Let It Soak
After applying the paste, fill your sink or a large basin with warm water. Place the tray in the water and let it soak for at least one hour. For heavily burnt trays, soaking overnight works even better.
The warm water helps soften the burnt food while the baking soda continues to work on the stains. Soaking is one of the most important steps in the entire process. It saves you a lot of scrubbing effort later.
Step 5: Scrub the Tray
After soaking, put on your rubber gloves and remove the tray from the water. Use a soft scrub brush or sponge to gently scrub the surface. The burnt food should come off much more easily now. For stubborn spots, use an old toothbrush to work the paste into the stain.
If some areas are still really tough, make a fresh batch of baking soda paste and apply it directly to those spots. Scrub gently in circular motions. Be patient and do not press too hard. You want to clean the tray, not damage it.
Step 6: Rinse and Wash
Once you have scrubbed away most of the burnt residue, rinse the tray thoroughly under warm running water. Use your hands or a sponge to remove any remaining baking soda paste. Next, wash the tray with a small amount of mild dish soap and warm water. This removes any leftover grease and baking soda residue.
Rinse again with clean water and dry the tray with a soft cloth or towel. Your tray should now look significantly cleaner and smell fresh.
Step 7: Deal With Remaining Stains
Sometimes, a few stubborn stains may still remain after the basic cleaning. Do not worry. You can repeat the baking soda paste process on those specific spots. For extra cleaning power, try these additions:
- Vinegar spray: After applying the baking soda paste, spray a little white vinegar on top. The fizzing reaction helps lift stains.
- Hydrogen peroxide: Apply a small amount of hydrogen peroxide to tough stains and let it sit for ten minutes before scrubbing.
- Lemon juice: The natural acid in lemon juice helps dissolve burnt food. Apply it with the baking soda paste for added cleaning power.
These extra steps can make a big difference. Most burnt trays come clean after one or two rounds of treatment.
Alternative Cleaning Methods for Stubborn Stains
While baking soda is the star of this guide, there are other methods you can try if the stains just will not budge. Each method has its own strengths and works well for different levels of burnt mess.
Method 1: Baking Soda and Vinegar Soak
This method adds vinegar to the mix for extra cleaning power. Fill your sink with hot water and add half a cup of baking soda. Then pour in half a cup of white vinegar. The mixture will fizz and bubble, which helps loosen burnt food. Let the tray soak for thirty minutes to an hour, then scrub and rinse.
Method 2: Commercial Oven Cleaners
If the burnt stains are extremely severe, a commercial oven cleaner can help. These products are designed to dissolve tough, baked-on grease and food. However, they contain harsh chemicals, so use them in a well-ventilated area. Always wear gloves and follow the product instructions carefully. Rinse the tray very thoroughly after using any chemical cleaner.
Method 3: The Boiling Water Method
Fill your sink or a large pot with boiling water and add a few tablespoons of baking soda. Submerge the tray and let it sit for several hours. The hot water helps loosen even the most stubborn burnt-on food. After soaking, scrub the tray with a sponge and rinse clean.
Method 4: Steam Cleaning
Another effective approach is to use steam. Place the tray in a large pot with a small amount of water at the bottom. Bring the water to a boil and let the steam work on the burnt surface for about twenty minutes. The steam softens the burnt food, making it much easier to scrub away.
| Method | Best For | Time Required | Effort Level |
|---|---|---|---|
| Baking Soda Paste | Light to medium burns | 1-2 hours | Low |
| Baking Soda + Vinegar | Medium burns with grease | 30-60 minutes | Medium |
| Commercial Cleaner | Severe, baked-on stains | 15-30 minutes | Low (but harsh) |
| Boiling Water Soak | Heavy burnt residue | 2-4 hours | Medium |
| Steam Cleaning | Moderate to heavy burns | 20-30 minutes | Low |
Each method has its place. Choose the one that best fits the condition of your tray and how much time you have. For most everyday burnt messes, the baking soda paste method works wonderfully.
Tips to Prevent Burnt Messes on Your Toaster Oven Tray
Cleaning is important, but prevention is even better. Here are some simple habits that will keep your tray cleaner for longer and reduce the need for deep cleaning sessions.
Use Aluminium Foil or Parchment Paper
Lining your toaster oven tray with aluminium foil or parchment paper catches drips and spills before they burn onto the surface. This is one of the easiest prevention tricks. Just make sure the foil does not touch the heating elements. Parchment paper is a safer option since it can withstand high temperatures without catching fire.
Clean Spills Right Away
The longer food sits on the tray, the harder it gets to clean. Whenever you notice a spill, let the tray cool slightly and wipe it with a damp cloth. Even a quick wipe after cooking can prevent build-up over time.
Use a Lower Temperature When Possible
Cooking at extremely high temperatures increases the chances of food burning onto the tray. Try using lower temperatures and longer cooking times when you can. This reduces the amount of burnt residue that forms.
Place a Baking Sheet Under Your Dish
If you are cooking something that tends to bubble over or drip, place a separate baking sheet underneath your dish. This acts as a barrier and catches most of the mess before it reaches the tray.
Do a Quick Clean After Every Use
Get into the habit of giving your tray a quick wipe after each use. A little maintenance goes a long way. This simple habit prevents heavy build-up and makes deep cleaning sessions much less frequent.
When Should You Replace Your Toaster Oven Tray?
Even with the best cleaning methods, some trays become too damaged to restore. Here are signs that it is time to replace your tray:
- Deep scratches and grooves: If the surface is deeply scratched, food will keep getting trapped and burning in those grooves no matter how much you clean.
- Warped or bent shape: A warped tray does not sit properly and can cause uneven cooking. It also traps food in the warped areas.
- Discoloured or flaking coating: If the tray has a non-stick coating that is peeling or flaking, it is no longer safe for cooking. Replace it immediately.
- Persistent odours: If the tray keeps smelling like burnt food even after thorough cleaning, the material may have absorbed odours permanently.
- Rust or corrosion: Any signs of rust mean the tray is deteriorating and should be replaced for safety reasons.
Replacing a tray is usually affordable and easy to find. Check your toaster oven manual or the manufacturer’s website for the right replacement part. A new tray can make your toaster oven feel like brand new again.
Expert Tips for Keeping Your Toaster Oven Tray in Top Shape
Here are some bonus tips from kitchen experts that will help you maintain your tray and keep it looking great:
- Never use steel wool or metal scrubbers: These scratch the tray surface and make future staining worse. Always use soft sponges or brushes.
- Dry the tray completely after washing: Moisture left on the tray can cause rust, especially with metal trays. Always dry it thoroughly with a clean towel.
- Store the tray properly: When not in use, store the tray in a dry place. Avoid stacking heavy items on top of it, which can cause warping.
- Season your tray: For metal trays, a light coating of cooking oil after cleaning can help protect the surface and prevent food from sticking.
- Clean the toaster oven interior regularly: A clean oven interior means less mess falls onto the tray in the first place. Wipe down the inside of the oven every few weeks.
These small habits make a huge difference over time. Your tray will stay cleaner, and your toaster oven will perform better.
Common Mistakes to Avoid When Cleaning Burnt Trays
Even with the best intentions, people sometimes make mistakes that can damage their trays or make cleaning harder. Here are common errors to avoid:
- Using abrasive cleaners: Harsh scouring powders can scratch and damage the tray surface. Stick to gentle methods like baking soda.
- Soaking a hot tray in cold water: This can cause warping or even cracking in some materials. Always let the tray cool before soaking.
- Skipping the soak: Some people try to scrub without soaking first. This leads to a lot of unnecessary elbow grease and often incomplete results.
- Using too much water with baking soda: If the paste is too runny, it will not stick to the tray and will not clean effectively.
- Ignoring safety: Always wear gloves when using cleaning solutions, and make sure the tray is completely cool before you start.
Avoiding these mistakes will make your cleaning process faster, safer, and more effective. A little care goes a long way in preserving your tray.
Frequently Asked Questions
Can I use baking powder instead of baking soda to clean my burnt tray?
No, baking powder is not the same as baking soda. Baking soda is the active cleaning ingredient that breaks down grease and burnt food. Baking powder does not have the same cleaning properties and will not be effective for this purpose. Always use pure baking soda for the best results.
How long should I soak the tray in the baking soda solution?
For moderately burnt trays, one hour of soaking is usually enough. For heavily burnt trays with thick, crusty residue, soaking overnight works best. The longer the soak, the easier the scrubbing will be. If you are short on time, try the boiling water method for faster results.
Will baking soda scratch my toaster oven tray?
No, baking soda is a gentle cleaner that will not scratch your tray when used correctly. It is much safer than harsh chemical cleaners or abrasive scrubbers. Just make sure you use a soft sponge or brush and avoid using metal tools during scrubbing.
Can I clean a non-stick toaster oven tray with baking soda?
Yes, baking soda is safe for non-stick trays. In fact, it is one of the recommended cleaning methods because it is non-abrasive. Just be sure to use a soft sponge and avoid scrubbing too aggressively. Harsh scrubbing can damage the non-stick coating over time.
What if the burnt stains do not come out after one cleaning attempt?
Do not worry. Some trays need more than one cleaning session. You can repeat the baking soda paste process on the remaining stains. You can also try combining baking soda with vinegar or hydrogen peroxide for extra cleaning power. Persistence usually pays off with even the worst burnt trays.
Is it safe to use vinegar with baking soda on my oven tray?
Yes, combining vinegar with baking soda creates a fizzing reaction that helps lift stains and grease. This is a safe and effective cleaning method. Just apply the baking soda paste first, then spray or drizzle vinegar on top. Let the reaction work for a few minutes before scrubbing and rinsing.
Conclusion
Cleaning a burnt toaster oven tray with baking soda is simple, effective, and affordable. You do not need expensive products or harsh chemicals to get the job done. With just baking soda, warm water, and a little patience, you can remove even the worst burnt stains from your tray. The step-by-step method in this guide works for light, medium, and heavy burnt messes alike.
Remember, prevention is the best strategy. Clean spills quickly, use liners, and develop a habit of quick post-cooking wipes. These small actions will save you from deep cleaning sessions in the future. And when a tray is truly beyond saving, do not hesitate to replace it. A new tray can restore your toaster oven to peak performance.
Now that you know how to clean burnt toaster oven tray the right way, you are ready to tackle any burnt mess. Grab some baking soda, follow the steps, and enjoy a clean, fresh tray. Your kitchen — and your toaster oven — will thank you.