How To Fix Chicken Thighs In The Oven For Beginners
Learning how to fix chicken thighs in the oven is easier than you think. This beginner-friendly guide covers everything from prep and seasoning to the perfect oven temperature and timing. You will discover simple tricks to get crispy skin and juicy meat every single time. Whether you are new to cooking or just need a refresher, these tips will transform your oven-baked chicken.
Cooking chicken thighs in the oven does not have to be scary. If you have ever pulled out a tray of dry, overcooked pieces, you are not alone. Many beginners struggle with this cut of meat. The good news is that fixing chicken thighs in the oven is a skill anyone can learn. This guide will walk you through every step with clear, simple instructions.
Chicken thighs are one of the most forgiving cuts you can cook. They have more fat than chicken breast, which means they stay juicy even if you slightly overcook them. The dark meat is flavorful and tender. When you learn how to fix chicken thighs in the oven properly, you will never go back to dry, boring chicken again.
In this article, we will cover everything you need to know. From choosing the right pieces to setting the perfect oven temperature, we have you covered. You will learn how to prep, season, cook, and store your chicken thighs like a pro. Let us get started.
Key Takeaways
- Room temperature prep matters: Letting chicken thighs sit out for 20-30 minutes leads to even cooking.
- Oven temperature is key: 400°F to 425°F is the sweet spot for crispy skin and juicy meat.
- Bone-in, skin-on thighs are best: They stay moist and develop better flavor than boneless options.
- Resting is non-negotiable: Letting the chicken rest for 5-10 minutes keeps the juices locked in.
- Avoid common mistakes: Overcooking, skipping the rest, and using the wrong pan all lead to dry results.
- Season generously: A good dry rub or brine takes your chicken thighs in the oven from bland to amazing.
- Use a meat thermometer: The internal temperature should reach 165°F for safe, perfectly cooked chicken.
📑 Table of Contents
- Why Chicken Thighs Are Perfect for Oven Cooking
- How to Prep Chicken Thighs Before Baking
- The Best Oven Temperature and Timing for Chicken Thighs
- Step-by-Step: How to Fix Chicken Thighs in the Oven
- Common Mistakes and How to Fix Them
- Delicious Seasoning and Flavor Variations for Chicken Thighs in the Oven
- How to Tell When Chicken Thighs Are Done and How to Store Leftovers
- Frequently Asked Questions
- Final Thoughts
Why Chicken Thighs Are Perfect for Oven Cooking
Chicken thighs are a favorite for home cooks everywhere. They are affordable, flavorful, and hard to ruin. The dark meat has more connective tissue and fat than white meat. This makes it naturally juicier and more tolerant of cooking variations. If you are new to cooking, bone-in skin-on chicken thighs are the best place to start.
Unlike chicken breast, which can turn dry in minutes, thighs are hard to overcook. The fat renders slowly during baking, keeping the meat moist from the inside out. The skin crisps up beautifully in a hot oven. This combination of crispy exterior and tender interior is what makes oven-baked chicken thighs so special.
Another big advantage is versatility. You can use a simple seasoning blend or go bold with spices. They work for meal prep, weeknight dinners, and family gatherings alike. Whether you are cooking for one or feeding a crowd, chicken thighs in the oven deliver consistent results.
Bone-In vs. Boneless: Which Is Better?
Bone-in chicken thighs have a bone running through the center. This bone helps insulate the meat, keeping it juicy during cooking. The skin-on version adds extra flavor and texture. When the skin crisps up in the oven, it creates a satisfying crunch that many people love.
Boneless chicken thighs cook faster but can dry out more easily. They also lack the flavor that the bone and skin provide. For beginners, we strongly recommend bone-in skin-on pieces. They are more forgiving and produce better results. You can always remove the bone later if needed.
How to Prep Chicken Thighs Before Baking
Proper prep is the secret to great chicken thighs in the oven. Skipping this step is one of the most common mistakes home cooks make. Taking just a few extra minutes before baking makes a huge difference in the final result.
Bring the Chicken to Room Temperature
Take your chicken thighs out of the refrigerator about 20 to 30 minutes before cooking. This lets the meat cook more evenly. Cold chicken placed directly in a hot oven cooks unevenly. The outside overcooks while the inside stays underdone. Room temperature pieces bake more consistently throughout.
Place the chicken on a plate and let it sit uncovered. This also helps dry the surface slightly, which leads to crispier skin. Do not leave it out for more than 30 minutes for food safety reasons.
Pat Dry and Season Generously
Use paper towels to pat the chicken thighs dry. Moisture on the surface creates steam instead of crispiness. The drier the skin, the crispier it will get in the oven. This is a simple step that many people skip, but it makes a big difference.
Next, season your chicken generously. A simple salt, pepper, and garlic powder blend works wonders. You can also use a store-bought dry rub or make your own seasoning blend. Massage the seasoning into every piece, making sure to cover both sides. The seasoning blend adds flavor to the surface and helps the skin crisp up.
Should You Brine Your Chicken Thighs?
Brining is an optional step that takes your chicken to the next level. A quick brine involves soaking the chicken in salted water for 30 minutes to 2 hours. The salt helps the meat retain moisture during cooking. This means your chicken thighs in the oven will be extra juicy even if you cook them a few minutes too long.
To make a simple brine, dissolve 1/4 cup of salt in 4 cups of water. Add the chicken and let it soak. Rinse and pat dry before seasoning and baking. This small extra step can transform dry chicken into tender, flavorful perfection.
The Best Oven Temperature and Timing for Chicken Thighs
Getting the oven temperature right is the most important factor in cooking chicken thighs in the oven. Too low and the skin stays soggy. Too high and the outside burns before the inside is cooked through. The sweet spot is between 400°F and 425°F.
Why 425°F Works So Well
At 425°F, the oven is hot enough to crisp up the skin quickly. The high heat also renders the fat under the skin, creating a crispy, golden exterior. Meanwhile, the inside cooks through evenly. This temperature gives you the best of both worlds: crispy skin and juicy meat.
If you prefer a slower cook, 400°F works well too. It gives you a little more flexibility with timing. The chicken will still come out juicy and flavorful. Just add a few extra minutes to the cooking time.
How Long to Cook Chicken Thighs in the Oven
The cooking time depends on whether your chicken thighs are bone-in or boneless. Bone-in skin-on thighs need about 35 to 45 minutes at 425°F. Boneless thighs cook faster, usually in 25 to 35 minutes. Always use a meat thermometer to check for doneness.
The internal temperature should reach 165°F at the thickest part of the meat. Insert the thermometer into the meat, not touching the bone. The bone conducts heat differently and can give a false reading.
Should You Flip the Chicken Halfway Through?
Flipping the chicken thighs halfway through cooking is a great tip for even browning. Use tongs to carefully turn each piece over. This ensures both sides get crispy and golden. If you forget to flip, the chicken will still cook fine. It just may not be as evenly browned.
Some cooks also move the baking dish from the top rack to the bottom rack halfway through. This helps the bottom skin crisp up if it was facing up during the first half of cooking.
| Factor | Bone-In Skin-On | Boneless Skin-On | Boneless Skinless |
|---|---|---|---|
| Oven Temperature | 425°F | 425°F | 400°F |
| Cooking Time | 35-45 minutes | 25-35 minutes | 20-25 minutes |
| Internal Temp | 165°F | 165°F | 165°F |
| Flip Halfway? | Yes | Yes | Optional |
| Rest Time | 5-10 minutes | 5-10 minutes | 5 minutes |
Step-by-Step: How to Fix Chicken Thighs in the Oven
Now that you understand the basics, let us walk through the full process. This step-by-step guide will show you exactly how to fix chicken thighs in the oven for perfect results every time.
- Preheat your oven to 425°F. Let the oven fully heat up before putting the chicken in. A hot oven is essential for crispy skin.
- Line a baking dish with parchment paper. This prevents sticking and makes cleanup a breeze. You can also use aluminum foil, but parchment paper gives better results.
- Pat the chicken thighs dry with paper towels. Remove as much moisture as possible from the surface. Dry skin equals crispy skin.
- Season generously. Use your favorite seasoning blend, salt, pepper, garlic powder, and paprika. Massage the seasoning into every piece.
- Place the chicken skin-side up in the baking dish. Make sure the pieces are not touching. Space them out for even air circulation and crisping.
- Bake for 35-45 minutes. Check at the 35-minute mark. The skin should be golden and crispy. Use a meat thermometer to check the internal temperature.
- Flip halfway through if desired. Use tongs to turn each piece for even browning on both sides.
- Rest the chicken for 5-10 minutes. This is a crucial step. The juices redistribute throughout the meat, making it more tender and flavorful.
Following these steps guarantees delicious chicken thighs in the oven. The process is simple, but each step matters. Do not rush through the prep or skip the resting time.
Quick Tips for Better Results
- Use a wire rack placed inside the baking dish for even crispier skin on all sides.
- Brush the skin lightly with olive oil or melted butter for extra crispiness.
- Do not overcrowd the pan. Give each piece space to breathe.
- Let the oven preheat fully before adding the chicken.
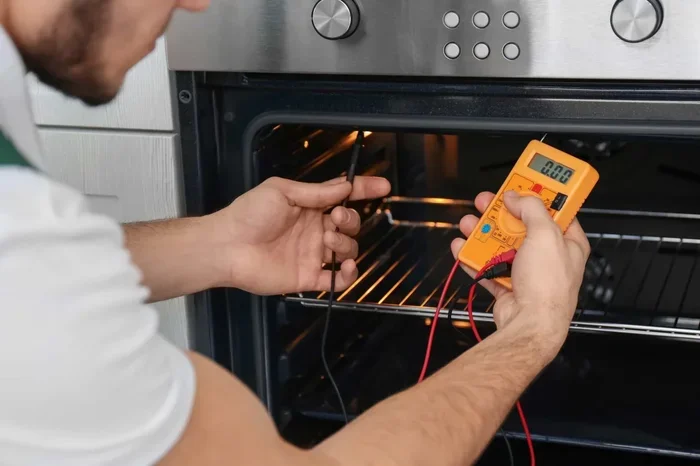
- Use an oven thermometer to make sure your oven is actually reaching the right temperature.
Common Mistakes and How to Fix Them
Even experienced cooks make mistakes with chicken thighs in the oven. Knowing what goes wrong helps you avoid those problems. Here are the most common issues and how to fix them.
Mistake 1: Starting with Cold Chicken
Putting cold chicken straight from the fridge into a hot oven causes uneven cooking. The outside overcooks while the inside stays raw. Always let the chicken come to room temperature for 20 to 30 minutes before baking.
Mistake 2: Not Drying the Skin
Moisture is the enemy of crispy skin. If you skip the pat-dry step, the skin will steam instead of crisp. Take the extra minute to blot each piece thoroughly with paper towels. This single change can dramatically improve your results.
Mistake 3: Overcooking the Chicken
Overcooking is the number one reason people get dry chicken. Dark meat is more forgiving than white meat, but it still has limits. Use a meat thermometer and pull the chicken out as soon as it hits 165°F. The carryover cooking will raise the temperature a few more degrees during resting.
Mistake 4: Skipping the Rest
Cutting into chicken right after it comes out of the oven releases all the juices onto the cutting board. The meat ends up dry and flavorless. Let the chicken rest for at least 5 to 10 minutes before serving. This allows the juices to redistribute and the meat to stay moist.
Mistake 5: Using the Wrong Pan
A deep, covered pan traps steam and prevents the skin from crisping. Use a shallow baking dish or a rimmed sheet pan instead. The more exposed surface area, the crispier the skin will be. Parchment paper or a light coating of oil on the pan also helps prevent sticking.
Expert Insight: Professional chefs often use a two-stage cooking method. They start the chicken thighs in the oven at 425°F for crispiness, then lower the temperature to 375°F if the skin is browning too fast. This technique gives you perfectly cooked meat with golden, crunchy skin every time.
Delicious Seasoning and Flavor Variations for Chicken Thighs in the Oven
One of the best things about chicken thighs in the oven is how versatile they are. You can change the flavor profile simply by switching up your seasoning blend. Here are some delicious variations to try.
Classic Herb and Garlic
Mix olive oil, minced garlic, rosemary, thyme, salt, and pepper. Rub this all over the chicken thighs before baking. The herbs infuse the meat with a savory, aromatic flavor. This is a foolproof combination that works every time.
Spicy Southwest
For a kick, use chili powder, cumin, smoked paprika, garlic powder, and a pinch of cayenne. Add a squeeze of lime juice and a drizzle of honey before baking. The sweet and spicy flavors pair beautifully with the rich dark meat.
Lemon and Herb Mediterranean
Combine lemon zest, oregano, basil, garlic, and olive oil. This light, fresh seasoning lets the natural flavor of the chicken shine through. The lemon adds a bright, zesty note that cuts through the richness of the dark meat.
Asian-Inspired Glaze
Mix soy sauce, honey, sesame oil, ginger, and garlic. Brush this glaze over the chicken during the last 10 minutes of baking. The glaze caramelizes and creates a sticky, flavorful coating. Sprinkle with sesame seeds and green onions before serving.
Experiment with different seasoning blends to find your favorite. The beauty of chicken thighs in the oven is that they pair well with almost any flavor profile. Keep a few go-to blends in your pantry for quick weeknight meals.
How to Tell When Chicken Thighs Are Done and How to Store Leftovers
Knowing when your chicken is done is essential for both safety and quality. Undercooked chicken is a food safety risk, and overcooked chicken is unpleasant to eat. Here is how to get it just right.
Visual and Tactile Cues
The juices should run clear when you pierce the thickest part of the meat. If the juices are pink or cloudy, the chicken needs more time. The meat should also pull away from the bone easily when it is fully cooked.
Use your finger to press the thickest part of the thigh. If the meat feels firm and springs back, it is done. If it feels soft or squishy, it needs more time in the oven.
Using a Meat Thermometer
A meat thermometer is the most reliable way to check doneness. Insert it into the thickest part of the thigh, away from the bone. The internal temperature should read 165°F. This is the USDA-recommended safe temperature for cooked chicken.
Invest in a good instant-read thermometer. It takes the guesswork out of cooking and takes your chicken thighs in the oven from hit-or-miss to foolproof. Even professional chefs rely on thermometers for consistent results.
Storing Leftover Chicken Thighs
Let the chicken cool completely before storing it. Place leftover pieces in an airtight container and refrigerate within two hours of cooking. Properly stored chicken thighs in the oven will keep for 3 to 4 days in the refrigerator.
To reheat, place the chicken in a baking dish, cover with foil, and warm at 350°F for 10 to 15 minutes. The foil tent prevents the skin from drying out. You can also reheat in a skillet on the stovetop for crispy skin that reheats well.
You can also freeze cooked chicken thighs for up to 3 months. Wrap each piece tightly in plastic wrap and place them in a freezer-safe bag. Thaw overnight in the refrigerator before reheating.
Key takeaway: The internal temperature of 165°F is your best friend. Use a thermometer, let the chicken rest, and store leftovers properly. These small habits make a huge difference in flavor and safety.
Can You Reheat Chicken Thighs Without Drying Them Out?
Yes! The key is low and slow reheating. Avoid using the microwave, which tends to dry out chicken quickly. The oven or stovetop are much better options. Adding a splash of broth or a drizzle of olive oil before reheating helps keep the meat moist. Covering the chicken with foil traps steam and prevents the skin from becoming tough.
Frequently Asked Questions
Can I use frozen chicken thighs for this recipe?
Yes, you can cook chicken thighs straight from frozen, but the cooking time will be longer. Add about 10 to 15 extra minutes to the bake time. For best results, thaw the chicken in the refrigerator overnight before cooking. Thawed chicken cooks more evenly and absorbs seasoning better.
What is the best way to get crispy skin on chicken thighs?
The secret to crispy skin is drying the surface thoroughly before seasoning. Pat the chicken with paper towels until the skin feels dry to the touch. Bake at a high temperature of 425°F and avoid covering the pan with foil during cooking. A wire rack also helps air circulate around the skin for extra crispiness.
How do I know if my chicken thighs are undercooked?
Undercooked chicken will have pink juices when cut into, and the meat will feel soft or rubbery. The internal temperature will be below 165°F when checked with a meat thermometer. Always use a thermometer to be sure. When in doubt, cook for a few more minutes and check again.
Can I cook chicken thighs at 350°F instead of 425°F?
Yes, you can cook chicken thighs at 350°F, but the results will be different. The lower temperature takes longer to cook and produces less crispy skin. At 350°F, bone-in thighs will need about 50 to 60 minutes. The meat will still be juicy, but you will miss out on that golden, crunchy exterior.
Is it safe to eat chicken that is slightly pink near the bone?
Sometimes the meat near the bone can remain slightly pink even when the chicken is fully cooked. This is because the bone releases myoglobin during cooking, which can stain the surrounding meat. As long as the internal temperature reaches 165°F, the chicken is safe to eat. Use a thermometer to confirm doneness.
How long can I store cooked chicken thighs in the refrigerator?
Cooked chicken thighs can be stored in the refrigerator for 3 to 4 days. Make sure they are in an airtight container and kept at a temperature below 40°F. If you notice any off smells, sliminess, or discoloration, discard the chicken immediately. When in doubt, throw it out to be safe.
Final Thoughts
Learning how to fix chicken thighs in the oven is one of the most valuable cooking skills you can develop. This cut of meat is forgiving, flavorful, and incredibly versatile. Once you master the basics, you can experiment with endless seasoning blends and cooking techniques.
Remember the key steps: bring the chicken to room temperature, pat it dry, season generously, bake at 425°F, and rest before serving. These simple habits transform ordinary chicken thighs into restaurant-quality meals. The internal temperature of 165°F is your safety net, and a good meat thermometer takes all the guesswork out.
Avoid common pitfalls like overcrowding the pan, skipping the rest, and starting with cold chicken. Each of these mistakes is easy to fix once you know what to look for. With a little practice, you will be able to whip up perfect chicken thighs in the oven without even thinking about it.
Now it is your turn. Grab some bone-in skin-on chicken thighs, preheat your oven, and put these tips into action. You will be amazed at how simple and rewarding oven-baked chicken thighs can be. Enjoy the process, experiment with flavors, and most importantly, have fun in the kitchen. Happy cooking!