How Long To Put Steak In Oven Before Searing Perfectly
Learning how long to put steak in oven before searing is the key to a perfect crust and juicy center every time. The oven-bake-then-sear method gives you even cooking and a beautiful brown finish that tastes amazing. This guide covers exact timing, temperatures, and step-by-step instructions for all steak thicknesses. You will also find pro tips, common mistakes, and expert insights to level up your steak game fast.
Learning how long to put steak in oven before searing is one of the most useful skills you can build in the kitchen. Many home cooks skip the oven step entirely and just toss a cold steak into a hot pan. The result? Uneven cooking, a gray center, and a lot of frustration. But when you use the oven first, everything changes.
The oven method gives you control. You cook the inside gently and evenly, then finish with a quick sear for that crispy, golden-brown crust. It is not hard to do. You just need the right timing and a little patience. This guide will walk you through every step clearly and simply.
Whether you are cooking a thick ribeye, a slim sirloin, or a bone-in strip, the principles stay the same. You will learn the exact times, temperatures, and techniques that work best. By the end of this article, you will feel confident enough to cook steak like a pro. Let us get started.
Key Takeaways
- Thick steaks need 20-25 minutes in a 250°F oven before searing for even cooking.
- Thin steaks only need 5-10 minutes at a lower temperature to avoid overcooking.
- Always use a meat thermometer to check internal temperature before searing.
- A cast iron skillet is the best tool for achieving a perfect steak crust.
- Rest your steak for 5-10 minutes after searing to keep juices inside.
- The reverse sear method works best for steaks thicker than 1.5 inches.
- Bring steak to room temperature before oven use for more even results.
📑 Table of Contents
- What Is the Oven-Before-Searing Method?
- How Long Should You Put Steak in the Oven Before Searing?
- Best Oven Temperatures for Steak Before Searing
- Step-by-Step: Oven to Sear Process
- Common Mistakes to Avoid
- Expert Tips for the Perfect Sear
- How to Know When Your Steak Is Done
- Why the Reverse Sear Method Is Worth Trying
- Final Thoughts on How Long to Put Steak in Oven Before Searing
What Is the Oven-Before-Searing Method?
The oven-before-searing method is exactly what it sounds like. You put the steak in the oven first to cook the inside slowly. Then you take it out and sear it in a hot skillet for a short time. This two-step process is also called the reverse sear method. It has become very popular among steak lovers and home cooks alike.
Why Does This Method Work So Well?
When you sear a cold steak directly in a pan, the outside burns before the inside cooks. The oven-baked steak approach fixes this problem. The low heat warms the meat gently. It brings the steak internal temperature up evenly from edge to edge. Then the quick sear adds flavor and color without overcooking the center.
This method also gives you more control over steak doneness. You can pull the steak out of the oven right when it is 10 degrees below your target temp. Then the sear brings it up the rest of the way. The result is a perfectly pink center with a deep, flavorful crust.
Who Should Use This Method?
Anyone can use this approach. It works especially well for thick cuts of steak. If your steak is 1.5 inches or thicker, the oven method is your best friend. Thinner steaks can still benefit, but you need to watch the timing more closely. We will cover that in detail below.
How Long Should You Put Steak in the Oven Before Searing?
This is the big question, and the answer depends on a few things. The steak thickness matters most. The cut of meat matters too. And your oven temperature plays a big role as well. Let us break it down so it is easy to follow.
For Thick Steaks (1.5 Inches and Up)
Thick steaks need more time in the oven. You want a slow, gentle cook. Set your oven to 250°F. Place the steak on a wire rack over a baking sheet. This lets air flow around the meat evenly.
Here is a simple timing guide:
- 1.5-inch steak: About 20 to 25 minutes in the oven
- 2-inch steak: About 25 to 30 minutes in the oven
- 2.5-inch steak: About 30 to 35 minutes in the oven
- 3-inch steak: About 35 to 40 minutes in the oven
These times are approximate. The real key is checking the internal temperature. Use a meat thermometer to test the thickest part of the steak. You want it about 10 to 15 degrees below your final target before searing.
For Thin Steaks (Under 1 Inch)
Thin steaks do not need much oven time at all. In fact, too much time will dry them out. Set the oven to a lower temperature, around 200°F. Keep a close eye on the meat.
- 0.5-inch steak: Only 5 to 8 minutes in the oven
- 0.75-inch steak: About 8 to 12 minutes in the oven
- 1-inch steak: About 10 to 15 minutes in the oven
For thin steaks, you can also skip the oven entirely. A direct sear in a hot pan might be all you need. But if you want even cooking, a short oven bake works well too. The oven temperature for steak should always be lower for thinner cuts.
A Quick Reference Table
| Steak Thickness | Oven Temp | Time in Oven | Target Temp Before Sear |
|---|---|---|---|
| 0.5 inch | 200°F | 5-8 min | 110°F |
| 0.75 inch | 200°F | 8-12 min | 115°F |
| 1 inch | 225°F | 10-15 min | 120°F |
| 1.5 inches | 250°F | 20-25 min | 125°F |
| 2 inches | 250°F | 25-30 min | 130°F |
| 2.5 inches | 250°F | 30-35 min | 130°F |
| 3 inches | 250°F | 35-40 min | 130°F |
Use this table as your starting point. Every oven runs a little differently. And every steak is a bit different too. The meat thermometer is your best tool for accuracy.
Best Oven Temperatures for Steak Before Searing
Not all oven temperatures work the same way for oven-browned steak. The right temperature depends on the thickness of your cut and how much time you have. Let us look at the best options.
The 250°F Method (Most Popular)
This is the go-to temperature for most people learning how long to put steak in oven before searing. At 250°F, the heat is gentle and steady. The steak cooks evenly without drying out. This method works great for steaks between 1 and 2.5 inches thick.
The low heat slowly raises the internal temperature. You get a uniform pink color from edge to center. When it is time to sear, the outside browns quickly while the inside stays perfectly cooked.
The 200°F Method (For Thinner Cuts)
If your steak is thin, use a lower oven temperature. 200°F gives you more time and less risk of overcooking. This is a great choice for thin steak cooking. The slower heat buildup prevents the edges from turning gray.
The 300°F Method (Faster but Riskier)
Some cooks use a higher temperature to save time. At 300°F, the steak cooks faster. But there is a trade-off. The outer layers can start cooking too much before the center reaches the right temperature. This method works best if you are in a hurry and your steak is not too thick.
Should You Use a Broiler Instead?
Some people ask about using the broiler for broiler steak prep. The broiler gives you top-down heat, similar to a grill. It can work, but it is harder to control. The heat is very intense and uneven. If you use the broiler, keep the steak about 6 inches from the element. Watch it closely and flip halfway through.
For most cooks, a regular oven at 250°F is the safest and most reliable choice. It gives you consistent results every time you cook oven-safe steak cuts.
Step-by-Step: Oven to Sear Process
Now that you know the timing and temperatures, let us walk through the full process. These steps will help you get a perfect result every single time.
Step 1: Prep Your Steak
Take the steak out of the fridge about 30 minutes before cooking. Letting it reach room temperature steak is important. Cold meat cooks unevenly. The outside may burn before the inside warms up. A quick tempering step makes a big difference.
Pat the steak dry with paper towels. Moisture is the enemy of a good crust. Dry meat browns faster and more evenly. Add your steak seasoning at this point. Keep it simple with salt and pepper, or use your favorite blend.
Step 2: Set Up the Oven
Preheat your oven to the right temperature based on steak thickness. Place a wire rack over a baking sheet. The wire rack allows hot air to circulate around the meat. This prevents the bottom from getting soggy.
If you do not have a wire rack, you can place the steak directly on the baking sheet. Just flip it halfway through for even cooking.
Step 3: Bake the Steak
Put the steak in the oven on the middle rack. Set a timer based on the thickness guide above. Do not open the oven door too often. Every time you open it, the temperature drops and cooking slows down.
Use a meat thermometer to check the internal temperature. Insert it into the thickest part of the steak. Pull the steak out when it is 10 to 15 degrees below your target doneness.
Step 4: Sear the Steak
Heat a cast iron skillet over high heat. Add a high smoke-point oil like avocado or grapeseed oil. Wait until the pan is smoking hot. This is the key to a great steak crust.
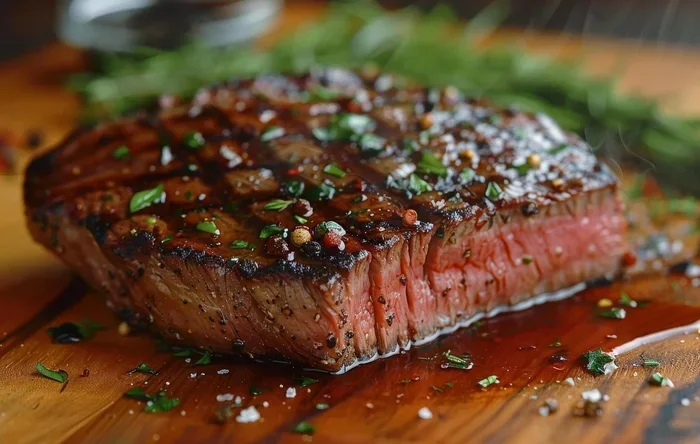
Place the steak in the skillet and press it down gently. Do not move it for 2 to 3 minutes. Let the heat do its work. Then flip and repeat on the other side.
For extra flavor, add a tablespoon of butter, a few crushed garlic cloves, and fresh thyme to the pan. Tilt the pan slightly and use a spoon to baste the steak with the melted butter. This adds richness and a beautiful golden color.
Step 5: Rest the Steak
Once seared, take the steak off the heat. Place it on a cutting board and let it rest steak for 5 to 10 minutes. This step is critical. The juices inside the meat redistribute during resting. If you cut too early, they all run out onto the board.
Cover the steak loosely with foil during resting. This keeps it warm without trapping too much steam. The steak resting time is just as important as the oven time.
Common Mistakes to Avoid
Even experienced cooks make mistakes with the oven-sear method. Here are the most common ones and how to avoid them.
Skipping the Room Temperature Step
Putting a cold steak straight into the oven leads to uneven cooking. The outside may overcook while the center stays cold. Always take the meat out 20 to 30 minutes before cooking. This small step makes a huge difference.
Using the Wrong Pan
A thin, flimsy pan will not hold enough heat for a good sear. You need a heavy cast iron skillet or a thick stainless steel pan. These retain heat well and create an even steak edge sear across the entire surface.
Not Drying the Steak
Surface moisture creates steam instead of a crust. Always pat the steak dry with paper towels before seasoning and searing. This one simple step improves your sear dramatically.
Overcooking in the Oven
The oven is not the final step. It just brings the steak closer to done. Pull it out early and let the sear finish the job. If you wait until the steak reaches the exact target temp in the oven, it will be overcooked after searing.
Cutting Too Early
Resist the urge to cut into the steak right away. The resting steak period allows the juices to settle. Cutting too early gives you a dry, less flavorful piece of meat. Wait at least 5 minutes before slicing.
Expert Tips for the Perfect Sear
Here are some pro-level tips that will take your steak to the next level. These small details make a big impact on flavor and texture.
Season Generously and in Advance
Salt your steak at least 40 minutes before cooking, or right before. Salting early draws out moisture, which then gets reabsorbed. This creates a deeper seasoning throughout the meat. If you are short on time, just salt right before the oven step.
Let the Pan Get Really Hot
The pan needs to be screaming hot for a good sear. Heat it for 3 to 5 minutes over high heat before adding the steak. You should see a slight shimmer in the oil. If the pan is not hot enough, the meat will steam instead of sear.
Do Not Crowd the Pan
Cook one steak at a time if possible. Crowding the pan drops the temperature and creates steam. Give each steak plenty of space. If you must cook multiple steaks, use a larger skillet or work in batches.
Use a Timer for the Sear
Searing goes fast. Set a timer for 2 to 3 minutes per side. This helps you stay consistent. After a few tries, you will know exactly how long to sear by feel. But a timer is a great training tool at first.
Add Fresh Herbs at the End
Fresh thyme, rosemary, or sage added during basting brings amazing aroma and flavor. The butter carries the herb essence into the meat. This is a simple trick that elevates a basic steak into something special.
How to Know When Your Steak Is Done
Checking doneness is the most important part of the whole process. The oven brings the steak close, and the sear finishes it. But you need to know exactly when to pull it out.
Use a meat thermometer for the most accurate results. Here are the target internal temperatures for different levels of doneness:
- Rare: 120-125°F (pull from oven at 105-110°F)
- Medium Rare: 130-135°F (pull from oven at 115-120°F)
- Medium: 140-145°F (pull from oven at 125-130°F)
- Medium Well: 150-155°F (pull from oven at 135-140°F)
- Well Done: 160°F+ (pull from oven at 145°F+)
Remember, the temperature will rise 5 to 10 degrees during searing and resting. This is called carryover cooking. Always pull the steak out a few degrees below your target. The final result will be perfect.
Why the Reverse Sear Method Is Worth Trying
The reverse sear method has gained a lot of fans in recent years, and for good reason. It gives you more control and more consistent results than a direct sear alone. Here is why so many people swear by it.
First, the oven cooks the steak evenly from edge to edge. There is no gray band between the outer and inner parts. Second, the slow heat dries the surface slightly, which helps create an even better crust during searing. Third, you have more time to focus on the sear without worrying about the inside.
This method works especially well for thick steak cooking and high-quality cuts like ribeye, New York strip, and filet mignon. Even a budget-friendly flank steak can benefit from a short oven bake before a hot sear.
Final Thoughts on How Long to Put Steak in Oven Before Searing
How long to put steak in oven before searing really comes down to three things: thickness, oven temperature, and your target doneness. A thick steak needs 20 to 40 minutes at 250°F. A thin steak needs only 5 to 15 minutes at 200°F. Use a meat thermometer, bring the steak to room temperature first, and always let it rest after searing.
The oven-before-sear method is simple, reliable, and produces amazing results. You do not need fancy equipment or years of experience. Just a basic oven, a cast iron skillet, and a little patience. Once you try this method a few times, it will become second nature.
Start with a thick ribeye or strip steak. Follow the timing guide in this article. Check the internal temperature as you go. You will be amazed at how restaurant-quality your steak can taste at home. The perfect crust and juicy center are closer than you think. Happy cooking!
Frequently Asked Questions
Can you sear steak without using the oven first?
Yes, you can sear steak directly in a hot pan without using the oven. This is called a direct sear method. However, it works best for thinner steaks under 1 inch thick. For thicker cuts, the oven-first approach gives you much more even cooking and a better result.
What temperature should steak be before searing?
Your steak should be about 10 to 15 degrees below your target final doneness before you sear it. For example, pull a steak from the oven at 115°F if you want medium rare (130-135°F after searing and resting). A meat thermometer is essential for getting this right.
Do you need to bring steak to room temperature before oven cooking?
Yes, bringing steak to room temperature before oven use is highly recommended. Take it out of the fridge 20 to 30 minutes before cooking. This helps the steak cook more evenly from edge to center. Skipping this step can lead to a cold center and overcooked edges.
How long should you rest steak after searing?
Let your steak rest for 5 to 10 minutes after searing. Place it on a cutting board and cover it loosely with foil. Resting allows the juices to redistribute throughout the meat. Cutting too early causes those juices to run out, leaving you with a drier steak.
Can you use a broiler instead of an oven for the first step?
Yes, you can use a broiler as an alternative to a regular oven. Set the broiler on high and place the steak about 6 inches from the element. Broiling works faster than a conventional oven, so check the steak every 5 to 8 minutes. It gives a slightly different texture but can still produce great results.
What is the reverse sear method exactly?
The reverse sear method means cooking the steak gently in the oven first, then finishing it with a quick, high-heat sear in a cast iron skillet. This approach gives you an even pink interior and a deeply browned crust. It is the best technique for steaks thicker than 1.5 inches and is the method behind how long to put steak in oven before searing perfectly every time.