How Long To Cook Thawed Ribs In The Oven Made Easy
Learning how long to cook thawed ribs in the oven is the key to juicy, tender barbecue ribs at home. Whether you prefer baby back ribs or St. Louis style cuts, this guide covers exact times, temperatures, and pro tips for perfect results. You will find out how to prep, season, wrap, and glaze your ribs like a pitmaster.
Key Takeaways
- Thawed Ribs Cook Faster: Cooking thawed ribs saves hours compared to frozen, with most cuts finishing in 2.5 to 4 hours.
- Low and Slow Is Best: Keeping your oven between 225°F and 275°F delivers tender, fall-off-the-bone texture.
- Internal Temperature Matters: Ribs are done when the internal temp reaches 195°F to 203°F for the most tender bite.
- Wrapping in Foil Helps: The Texas crutch method locks in moisture and speeds up the cooking process.
- Resting Is Essential: Letting ribs rest for 15 to 30 minutes after cooking keeps the juices locked inside the meat.
- Bone-In vs. Bone-Free: Bone-in ribs take slightly longer but offer more flavor and a better bark on the outside.
- Glazing at the End: Applying your favorite barbecue glaze in the last 15 to 20 minutes adds a perfect caramelized finish.
📑 Table of Contents
- Why Oven-Baked Ribs Are a Game Changer
- Understanding Ribs: Types and What to Know Before You Start
- Preparing Your Thawed Ribs for the Oven
- How Long To Cook Thawed Ribs In The Oven: Time and Temperature Guide
- Step-by-Step: The Complete Rib Cooking Process
- Tips for Perfect Oven-Baked Ribs Every Time
- Common Mistakes to Avoid When Cooking Ribs in the Oven
- Serving Your Perfect Oven Ribs
- Final Thoughts on Cooking Thawed Ribs in the Oven
Why Oven-Baked Ribs Are a Game Changer
Cooking ribs in the oven is one of the easiest ways to get restaurant-quality barbecue right at home. You do not need a smoker or a grill. Your oven handles everything with consistent heat and a controlled environment.
Many people think ribs are only for summer cookouts or backyard parties. But with the right approach, you can make incredible ribs any night of the week. The oven gives you hands-off cooking time so you can focus on other things while your ribs slowly transform into tender, flavorful perfection.
Understanding how long to cook thawed ribs in the oven is the single most important factor. Timing affects everything from texture to flavor. Too short and the meat is tough. Too long and it dries out. Getting it just right means juicy, smoky, delicious ribs every single time.
Whether you are a beginner or a seasoned home cook, this guide will walk you through the entire process. We will cover preparation, timing, temperatures, and all the little tricks that separate good ribs from great ones.
Understanding Ribs: Types and What to Know Before You Start
Before we dive into cooking times, it helps to know what kind of ribs you are working with. Different cuts behave differently in the oven. The type of rib you choose affects both the cooking time and the final result.
Baby Back Ribs
Baby back ribs come from the top of the pig’s rib cage, near the backbone. They are smaller, leaner, and cook faster than other cuts. Most baby back ribs take about 2.5 to 3.5 hours in a thawed state at 275°F. They are a popular choice for home cooks because they are widely available and relatively affordable.
St. Louis Style Ribs
St. Louis style ribs are spare ribs that have been trimmed to create a uniform, rectangular shape. They are meatier and fattier than baby backs. Because of the extra fat and connective tissue, they usually need 3 to 4 hours of oven time when thawed. The results are incredibly rich and full of flavor.
Bone-In vs. Boneless Ribs
Bone-in ribs are the traditional choice. The bone adds flavor during the long cooking process and helps protect the meat from drying out. Boneless ribs cook a bit faster since heat penetrates the meat more directly. But many barbecue enthusiasts prefer bone-in for the deeper flavor profile.
No matter which type you choose, make sure your ribs are fully thawed before cooking. Frozen ribs will cook unevenly and throw off your timing completely.
Preparing Your Thawed Ribs for the Oven
Proper preparation sets the stage for perfect ribs. Taking the time to prep your thawed ribs correctly makes a huge difference in the final product. Here is what you need to do before the ribs ever touch the oven rack.
Step 1: Remove the Membrane
The membrane on the back of the rib rack is tough and chewy. It does not break down during cooking, so it is best to remove it. Use a butter knife to loosen one corner, then grip it with a paper towel for better traction. Pull it off in one smooth motion. This simple step improves the texture of your ribs dramatically.
Step 2: Pat Dry and Season
Use paper towels to pat the ribs dry on both sides. Dry meat absorbs seasoning better and develops a better bark. Next, apply your favorite rib rub generously on all sides. A good dry rub typically includes brown sugar, paprika, garlic powder, onion powder, salt, pepper, and a touch of cayenne for heat.
Let the seasoned ribs sit at room temperature for about 30 minutes before cooking. This allows the rub to penetrate the meat and brings the ribs closer to oven temperature, which helps them cook more evenly.
Step 3: Gather Your Tools
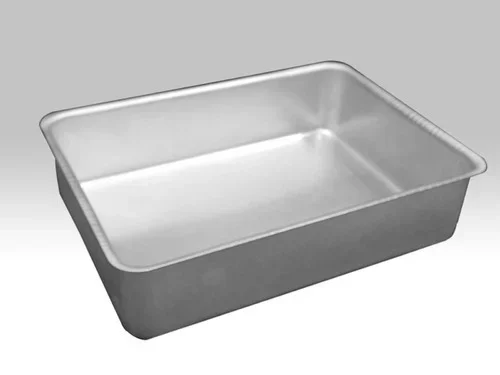
You will need a few basic tools before you start. A rimmed baking sheet or roasting pan works great. Heavy-duty aluminum foil is essential for wrapping. A meat thermometer is non-negotiable if you want perfectly cooked ribs every time. And a basting brush will help when it is time to apply your glaze.
How Long To Cook Thawed Ribs In The Oven: Time and Temperature Guide
This is the heart of the article. When people ask how long to cook thawed ribs in the oven, the answer depends on a few key factors. The type of rib, the oven temperature, and whether you wrap the ribs all play a role in the final cooking time.
Cooking at 225°F: The Low and Slow Method
Cooking ribs at 225°F is the classic low-and-slow approach. This temperature mimics a traditional smoker and produces incredibly tender meat with a deep smoky flavor. At this temperature, thawed baby back ribs take about 3 to 3.5 hours. St. Louis style ribs need closer to 4 to 4.5 hours.
The low heat allows collagen in the connective tissue to break down slowly. This is what gives ribs that melt-in-your-mouth texture. The trade-off is time. If you are short on hours, this method might not be the best choice for a weeknight dinner.
Cooking at 275°F: The Sweet Spot
For most home cooks, 275°F is the ideal temperature. It strikes a perfect balance between speed and tenderness. Thawed baby back ribs finish in about 2.5 to 3 hours at this temperature. St. Louis style ribs take roughly 3 to 3.5 hours.
At 275°F, you still get excellent bark formation and tender meat, but the cooking time is significantly shorter. This temperature is forgiving and gives you a wider window before the ribs start to dry out. Many barbecue experts consider this the best oven temperature for ribs.
Cooking at 325°F: The Faster Option
If you need ribs on the table faster, 325°F is your go-to temperature. Thawed baby back ribs are done in about 2 to 2.5 hours. St. Louis style ribs take around 2.5 to 3 hours.
The higher temperature speeds up the process, but you need to be more careful. Ribs can dry out faster at this heat. Wrapping them in foil partway through helps retain moisture. Keep a close eye on the internal temperature to avoid overcooking.
Quick Reference Cooking Time Table
Here is a simple overview of thawed rib cooking times based on oven temperature and rib type:
- Baby Back Ribs at 225°F: 3 to 3.5 hours
- Baby Back Ribs at 275°F: 2.5 to 3 hours
- Baby Back Ribs at 325°F: 2 to 2.5 hours
- St. Louis Style at 225°F: 4 to 4.5 hours
- St. Louis Style at 275°F: 3 to 3.5 hours
- St. Louis Style at 325°F: 2.5 to 3 hours
These times are estimates. Always use a meat thermometer to check for doneness. The internal temperature of the meat should reach between 195°F and 203°F for the most tender results.
Step-by-Step: The Complete Rib Cooking Process
Now that you understand the timing and temperature, let us walk through the entire cooking process step by step. Follow these instructions for consistently excellent oven ribs.
Step 1: Preheat Your Oven
Set your oven to your chosen temperature. Give it at least 15 to 20 minutes to come to full heat. A properly preheated oven ensures even cooking from the start. Placing ribs in a cold oven throws off the timing and can lead to uneven results.
Step 2: Set Up the Ribs on the Pan
Place the ribs meat-side down on a lined baking sheet or in a roasting pan. The bone side faces up initially. This position protects the meat during the first phase of cooking. If you are using a rack, place the ribs horizontally across it for better air circulation.
Step 3: Cook Unwrapped for the First Hour
Place the ribs in the oven uncovered for the first hour. This initial phase allows the bark to form. The dry heat caramelizes the sugars in your rub and creates that delicious crust on the outside of the ribs. Resist the urge to open the oven door too often. Every time you open it, heat escapes and cooking time increases.
Step 4: Wrap in Foil
After the first hour, remove the ribs and tightly wrap them in heavy-duty aluminum foil. This technique is often called the Texas crutch. The foil traps steam and moisture, which penetrates the meat and speeds up the breakdown of connective tissue.
Add a small splash of apple cider vinegar, apple juice, or broth to the foil before sealing. This adds extra moisture and flavor. Seal the edges tightly to trap all the steam inside.
Step 5: Return to the Oven
Place the wrapped ribs back in the oven and continue cooking. For baby back ribs at 275°F, this adds about 1.5 to 2 hours. For St. Louis style ribs, add about 2 to 2.5 hours. The meat should pull back from the bones by about a quarter inch when it is close to done.
Step 6: Unwrap and Glaze
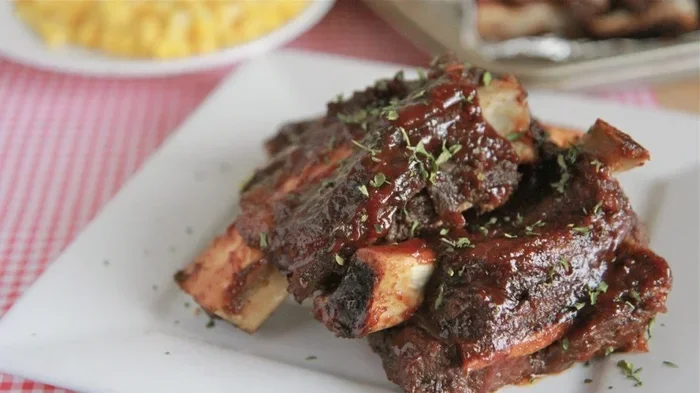
Remove the foil during the last 20 to 30 minutes of cooking. This is when you apply your barbecue glaze or sauce. Brush a thin layer on the meat side and return the ribs to the oven uncovered. The glaze will caramelize and create a beautiful, sticky finish.
Apply the glaze in two or three thin layers, waiting about 5 minutes between each application. Thin layers create a better coating than one thick layer. Too much sauce at once can make the ribs soggy.
Step 7: Rest Before Serving
Once the ribs reach the target internal temperature, take them out of the oven. Let them rest for 15 to 30 minutes before cutting. This resting period allows the juices to redistribute throughout the meat. If you cut too early, the juices run out and the ribs dry out quickly.
Tips for Perfect Oven-Baked Ribs Every Time
Even experienced cooks can run into issues when making ribs in the oven. These practical tips will help you avoid common pitfalls and achieve the best possible results.
Invest in a Good Meat Thermometer
A reliable meat thermometer is the single most important tool for cooking ribs. Visual cues can be misleading. The internal temperature tells you exactly when the ribs are done. Insert the thermometer into the thickest part of the meat, avoiding the bone, for the most accurate reading.
Do Not Skip the Resting Period
Resting is not just a suggestion. It is a critical step. When ribs come out of the oven, the internal temperature continues to rise by a few degrees. This carryover cooking finishes the job. Cutting too early releases all those juices onto the cutting board instead of keeping them in the meat.
Use Apple Cider Vinegar for Better Bark
Spraying the ribs with a mix of apple cider vinegar and water during the unwrapped phase helps build a great bark. It also keeps the surface moist during the longer cooking phases. Spray every 30 minutes during the first 2 hours for the best results.
Choose the Right Rib Rub
A well-balanced rib rub makes a noticeable difference. Look for rubs that combine sweet, smoky, and savory flavors. Brown sugar provides caramelization. Paprika adds color and mild sweetness. Mustard powder brings tang. Garlic and onion powder build depth. Experiment with different combinations to find your perfect blend.
Let the Ribs Come to Room Temperature
Never put cold ribs straight into a hot oven. Let them sit at room temperature for 30 minutes before cooking. This small step ensures more even cooking throughout the rack. The meat cooks more consistently when it starts closer to the target temperature.
Common Mistakes to Avoid When Cooking Ribs in the Oven
Even with the best intentions, it is easy to make mistakes when cooking ribs. Knowing what to avoid saves time, money, and a lot of disappointment.
Cooking at Too High a Temperature
The biggest mistake people make is turning the oven up to speed things along. High temperatures like 375°F or 400°F cook the outside too fast while leaving the inside tough and undercooked. Ribs need gentle, low heat to break down the collagen and render the fat properly. Patience is the secret ingredient.
Using Thin Foil Instead of Heavy-Duty
Regular thin foil tears easily and does not seal in steam effectively. Heavy-duty foil holds up better during the wrapping phase and creates a better seal. Some cooks even use a double layer of regular foil as a substitute. The goal is to trap moisture without any leaks.
Over-Saucing the Ribs
Too much sauce burns in the oven and creates a sticky, caramelized mess that masks the flavor of the meat. Apply sauce sparingly in the final stages of cooking. The ribs already have flavor from the rub and the natural juices of the meat. The sauce is the finishing touch, not the foundation.
Opening the Oven Door Too Often
Every time you open the oven door, you lose heat and extend the cooking time. Try to resist the urge to check on the ribs constantly. Use the oven light to peek inside instead. Trust the process and let the oven do its work.
Not Letting Ribs Thaw Completely
Cooking partially frozen ribs leads to uneven cooking. The outside can dry out while the center remains frozen. Always thaw ribs in the refrigerator for 24 to 36 hours before cooking. Never thaw ribs at room temperature, as this creates a food safety risk.
Serving Your Perfect Oven Ribs
Once your ribs are done, it is time to serve them up. The presentation and sides matter just as much as the cooking process itself.
Slice between the bones to serve individual rib bones. This makes it easy for guests to grab one and enjoy. Place the ribs on a cutting board with a rim to catch any juices. A drizzle of extra sauce on top adds a beautiful shine and extra flavor.
Classic sides that pair perfectly with oven ribs include coleslaw, cornbread, baked beans, and mac and cheese. A crisp green salad balances the richness of the ribs nicely. For drinks, sweet tea, lemonade, or a cold beer complement barbecue ribs beautifully.
Leftover ribs reheat wonderfully in the oven at 250°F for about 15 to 20 minutes. Wrap them in foil with a splash of broth to keep them moist. They taste even better the next day as the flavors continue to develop.
Final Thoughts on Cooking Thawed Ribs in the Oven
Mastering how long to cook thawed ribs in the oven opens up a world of delicious possibilities. With the right temperature, timing, and technique, you can produce ribs that rival your favorite barbecue restaurant. The process is simple but requires patience and attention to detail.
Remember that every rack of ribs is slightly different. Variables like the thickness of the meat, the amount of fat, and your specific oven can all affect the final cooking time. Use the guidelines in this article as a starting point, and always rely on your meat thermometer for the most accurate results.
Start with the 275°F method for the best balance of flavor and convenience. Experiment with different rubs and sauces to find your signature style. And most importantly, enjoy the process. Cooking ribs should be fun, not stressful.
Now that you have all the knowledge you need, it is time to fire up that oven and make some incredible ribs. Your family and friends will thank you. Happy cooking!
Frequently Asked Questions
Can I cook ribs from frozen instead of thawed?
You can, but it is not recommended. Frozen ribs cook unevenly and require much longer cooking times. The outside may dry out before the inside is fully cooked. Always thaw ribs in the refrigerator for 24 to 36 hours before cooking for the best results and food safety.
What is the best internal temperature for ribs?
The ideal internal temperature for ribs is between 195°F and 203°F. At this range, the collagen in the meat has fully broken down, resulting in tender, juicy ribs that pull easily from the bone. Always check multiple spots on the rack for an accurate reading.
Should I wrap ribs in foil during cooking?
Wrapping ribs in foil, also known as the Texas crutch, helps retain moisture and speeds up cooking. It is especially helpful for thicker cuts like St. Louis style ribs. However, some pitmasters prefer cooking ribs uncovered the entire time for a crispier bark. Try both methods to see which you prefer.
How do I know when ribs are done without a thermometer?
You can check doneness by gently twisting a bone. If it wobbles and the meat has pulled back from the bone by about a quarter inch, the ribs are likely done. You can also press the surface of the meat with your finger. If it feels firm but springs back slightly, it is ready. However, a meat thermometer is the most reliable method.
Can I use barbecue sauce during the cooking process?
It is best to apply barbecue sauce only in the last 20 to 30 minutes of cooking. Sauce contains sugar that burns at high temperatures. Applying it too early can cause a bitter, overly caramelized exterior. Add thin layers during the final phase for a perfect glaze without burning.
How long should ribs rest after cooking?
Let ribs rest for 15 to 30 minutes after removing them from the oven. During this time, the juices redistribute throughout the meat, making each bite more flavorful and juicy. Tent the ribs loosely with foil to keep them warm while they rest.
=== CONCLUSION ===
Cooking thawed ribs in the oven is simpler than most people think. With the right temperature, timing, and a little patience, you can create mouthwatering ribs that everyone will love. Remember that how long to cook thawed ribs in the oven depends on the type of rib, the oven temperature, and your personal preference for tenderness. Use the guidelines in this article, trust your meat thermometer, and enjoy the process. Your next batch of ribs will be the best one yet.
=== URL SLUG ===
how-long-to-cook-thawed-ribs-in-oven