How To Use Whirlpool Stove Oven And Get Great Results
Using a Whirlpool stove oven is easier than you think, and this guide walks you through every function step by step. You will learn how to set the right oven temperature, use the broil and convection settings, and keep your cooktop burners running smoothly. By the end, you will feel confident cooking meals that taste amazing every single time.
Cooking at home feels rewarding when your appliances work the way they should. A Whirlpool stove oven gives you the power to bake, roast, broil, and simmer with ease. Whether you are a beginner in the kitchen or a seasoned home cook, knowing how to use every feature makes a big difference.
Many people own a Whirlpool stove oven but only use a few basic functions. They miss out on settings that could make their meals taste better and cook faster. This guide changes that by breaking down every feature into simple, easy-to-follow steps.
You will learn how to set the right oven temperature, position your racks, use the broil and convection cooking modes, and keep your appliance running smoothly. Each section gives you practical tips you can use right away. Let us dive in and help you get the most out of your Whirlpool stove oven.
Key Takeaways
- Know your controls: Understanding the digital control panel and knob settings helps you use your Whirlpool stove oven with confidence.
- Preheat every time: Always preheat your oven for even heat distribution and better baking results.
- Use the right rack position: Placing the oven rack correctly changes how your food cooks and browns.
- Broil for crispiness: The broil function uses top heat to create golden, crispy finishes on meats and vegetables.
- Clean regularly: Running the self-clean cycle and wiping stovetop grates keeps your Whirlpool stove oven performing at its best.
- Troubleshoot smart: Knowing common fixes saves time and money before calling a technician.
- Explore all features: Delay start, keep warm, and temperature probe settings unlock the full potential of your oven.
📑 Table of Contents
- Understanding Your Whirlpool Stove Oven
- Setting Up Your Oven for the First Time
- Mastering Baking and Roasting
- Using the Broil and Convection Functions
- Cleaning and Maintenance Tips
- Troubleshooting Common Issues
- Quick Tips for Great Results
- Common Mistakes to Avoid
- Expert Insights on Getting the Most from Your Whirlpool Stove Oven
- Conclusion
Understanding Your Whirlpool Stove Oven
Before you start cooking, it helps to know what is inside your Whirlpool stove oven. Every model has a few core parts that work together to deliver great results. Once you recognize these components, using the oven becomes second nature.
The Oven Cavity
The oven cavity is the main cooking space inside your Whirlpool stove oven. It holds the heat and surrounds your food with warmth. Most models include an oven light that lets you watch your food without opening the door. Opening the door too often can drop the temperature and affect your cooking time.
The cavity also has a temperature probe on some models. This tool reads the internal heat and helps you cook meat and casseroles to the perfect doneness. Understanding the cavity helps you place food correctly for even heat distribution.
The Cooktop Burners
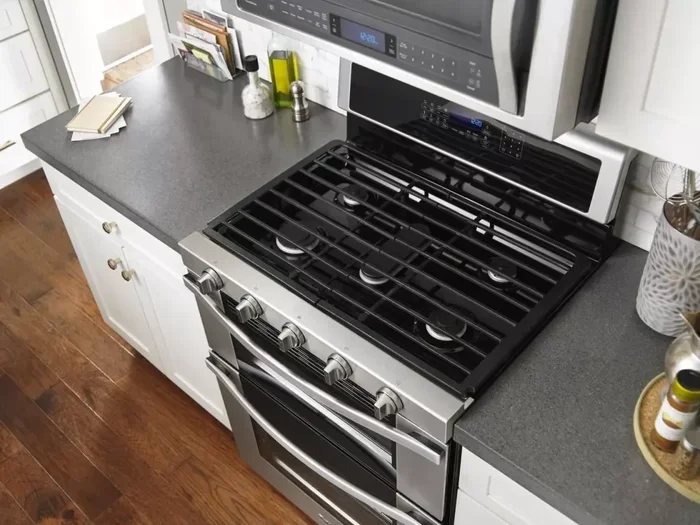
The stovetop portion of a Whirlpool stove oven includes several burners. You will usually find a power burner, simmer burner, and griddle or dual burner. Each cooktop burner serves a different purpose, from bringing water to a boil to gently heating sauces.
The stovetop grates sit on top of the burners and hold your pots and pans in place. These grates need regular cleaning to prevent grease buildup. Keeping them clean also ensures your cookware sits level, which helps food cook evenly.
The Digital Control Panel
Modern Whirlpool stove oven models come with a digital control panel. This panel lets you set the oven mode, temperature, and timer with precision. Some models include a child lock feature for safety, especially helpful in busy households.
The control panel also shows your selected bake settings and cooking time. Learning what each symbol and button means removes the guesswork from your cooking. Spend a few minutes reading the display, and you will feel much more comfortable using your oven.
Setting Up Your Oven for the First Time
Setting up a new Whirlpool stove oven properly ensures safe and efficient cooking from day one. Taking a few extra minutes during setup pays off in better performance and longer appliance life.
Removing Packaging and Protective Coatings
When you first unbox your Whirlpool stove oven, remove all packaging materials. Check inside the oven cavity for any protective tape or stickers. Wipe the interior with a soft, damp cloth to remove any dust or residue from shipping.
Do not use harsh chemicals during this first cleaning. A simple mix of warm water and mild soap works perfectly. Dry the surface thoroughly before turning the oven on for the first time.
Running a First Burn-In Cycle
Most manufacturers recommend running a burn-in cycle before you cook your first meal. Set your Whirlpool stove oven to 400 degrees Fahrenheit and let it run for about 30 minutes. This burns off any remaining manufacturing residues inside the cavity.
You might notice a slight smell during this process. That is completely normal and not a cause for concern. Open a window for ventilation, and your oven will be ready for real cooking afterward.
Positioning the Oven Racks
Oven rack position matters more than most people realize. For bake evenly results, place the rack in the center of the oven cavity. This allows hot air to circulate around your food without blocking heat from the top or bottom elements.
If you are broiling food, move the rack closer to the top. For roasting large items like a whole chicken, place the rack lower so the food has more space. Always check your Whirlpool stove oven manual for the recommended rack positions for each cooking mode.
Mastering Baking and Roasting
Baking and roasting are the most common uses for a Whirlpool stove oven. These methods rely on steady, surrounding heat to cook food thoroughly. Mastering them opens up a world of recipes you can try at home.
Preheating Your Oven
Always preheat your Whirlpool stove oven before baking or roasting. Preheating allows the oven to reach the target oven temperature before your food goes inside. This leads to more consistent results and better heat distribution throughout the cooking process.
Most recipes call for preheating to a specific temperature. Wait until the oven signals that it is ready before placing your dish inside. Skipping this step can lead to undercooked centers or uneven browning on your baked goods.
Choosing the Right Bake Settings
Whirlpool stove oven models offer different bake settings for various cooking needs. The standard bake mode uses both top and bottom heating elements for gentle, even heat. This works well for cakes, cookies, and casseroles.
Some models include a convection cooking option that uses a fan to circulate hot air. Convection cooking reduces cooking time by about 25 percent and promotes golden, even browning. When using convection, lower the temperature by about 25 degrees Fahrenheit for best results.
Using the Delay Start Feature
The delay start feature on many Whirlpool stove oven models lets you set the oven to begin preheating at a later time. This is perfect for preparing meals before you leave the house or waking up to a warm oven for breakfast baking.
Set the delay start time and the desired oven temperature the night before. When the timer begins, your oven will preheat automatically. This feature makes meal planning easier and helps you bake evenly without rushing in the morning.
Using the Broil and Convection Functions
The broil and convection functions on your Whirlpool stove oven take your cooking to the next level. These features are designed for specific tasks and deliver results that standard baking cannot match.
How Broiling Works
The broil function uses intense top heat to cook food quickly. It is perfect for browning the top of casseroles, melting cheese, or creating a crispy finish on steaks and salmon. When you select broil, only the top heating element activates, directing strong heat downward onto your food.
Keep a close eye on food when broiling. Because the heat is so intense, items can go from perfectly browned to burnt in seconds. Place your dish on the upper oven rack for the best broil function results, and use a baking sheet to catch any drips.
Getting the Most from Convection Cooking
Convection cooking uses a rear fan to push hot air around the oven cavity. This creates a more uniform temperature, which means your food bakes evenly on all sides. Convection cooking is excellent for roasting vegetables, baking pastries, and cooking multiple dishes at once.
When using convection cooking, avoid overcrowding the oven. Leave space between pans so the air can flow freely. Also, use low-sided baking sheets or roasting pans to allow the fan to circulate heat without obstruction.
Keep Warm Function
Many Whirlpool stove oven models include a keep warm function that maintains a low temperature after cooking finishes. This feature keeps your meal at the perfect serving temperature without overcooking it.
The keep warm function typically holds food between 150 and 200 degrees Fahrenheit. Use it when you are serving a meal family-style or when you need a few extra minutes to finish preparing sides. It is a simple feature that makes hosting dinners much easier.
Cleaning and Maintenance Tips
Keeping your Whirlpool stove oven clean helps it perform better and last longer. Regular maintenance prevents grease buildup, odors, and uneven heating. A well-maintained oven also cooks food more safely and efficiently.
Using the Self-Clean Cycle
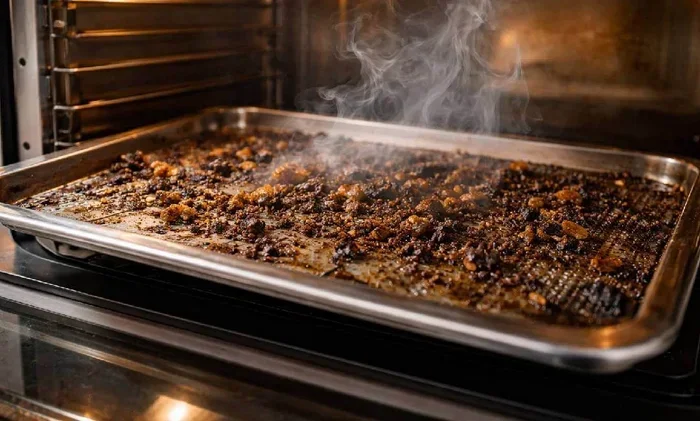
The self-clean cycle is one of the most valuable features on a Whirlpool stove oven. This function heats the oven to a very high temperature, turning food residue into ash that wipes away easily. Start the self-clean cycle when the oven is empty, and remove any large food particles beforehand.
The cycle typically takes two to four hours. Make sure your kitchen is well-ventilated, as some smoke and odor are normal during the process. After the cycle finishes, let the oven cool completely, then wipe out the ash with a damp cloth.
Cleaning the Cooktop Grates
Stovetop grates collect spills and grease over time. Remove them regularly and soak them in warm, soapy water. Use a non-abrasive scrubber to clean off stuck-on residue. Rinse and dry the grates thoroughly before placing them back on the cooktop burner.
For stubborn stains, a paste of baking soda and water works wonders. Apply it to the grates, let it sit for 15 minutes, then scrub gently. This keeps your Whirlpool stove oven cooktop looking and functioning like new.
Wiping the Oven Interior
Between self-clean cycles, wipe down the inside of your Whirlpool stove oven after each use. A quick wipe with a damp cloth removes splashes and prevents them from becoming baked-on stains. Pay extra attention to the area around the oven light and the door seal.
Avoid using abrasive cleaners or steel wool on the interior. These can scratch the surfaces and damage the easy clean coating that helps resist future stains. A gentle approach keeps your oven looking great for years.
Troubleshooting Common Issues
Even the best Whirlpool stove oven can experience occasional issues. Most problems have simple solutions that you can handle without calling a technician. Knowing what to check saves time and keeps your cooking on track.
Oven Not Heating Properly
If your Whirlpool stove oven is not reaching the set oven temperature, check a few things first. Make sure the door closes fully and the seal is intact. A loose door lets heat escape and affects heat distribution inside the cavity.
Next, verify that you are using the correct bake settings. Some modes use only the bottom element, which can feel different from standard baking. If the problem persists, the heating element may need replacement. Contact a qualified technician for safe repairs.
Uneven Cooking Results
Uneven cooking often results from incorrect oven rack position or overcrowding the cavity. Move the rack to the center and make sure pans are not blocking the oven light or each other. If you use convection cooking, ensure the fan is not blocked by cookware.
Another common cause is not preheating long enough. Give your Whirlpool stove oven at least 10 to 15 minutes to reach a stable temperature before placing food inside. This small habit makes a noticeable difference in bake evenly results.
Burner Not Igniting
If a cooktop burner fails to light, check for debris around the gas ignition area. Food particles or grease can block the ignition ports and prevent sparking. Clean the burner cap and base with a dry cloth and a toothpick to remove any obstructions.
Also, make sure the burner is properly seated on the stovetop grates. A slightly misaligned burner can disrupt the gas flow. If cleaning and reseating do not solve the issue, the igniter or spark module may need professional replacement.
Quick Tips for Great Results
Here are some quick tips to help you get the best performance from your Whirlpool stove oven every time you cook:
- Always preheat: Give your oven at least 10 to 15 minutes to reach the target temperature before adding food.
- Use an oven thermometer: Built-in thermostats can be slightly off. A standalone thermometer gives you accurate readings.
- Rotate pans halfway: For even browning, turn your baking pans 180 degrees during cooking.
- Avoid opening the door frequently: Each time you open the door, heat escapes and cooking time increases.
- Clean the stovetop grates weekly: Regular cleaning prevents buildup and keeps burners performing well.
- Use the temperature probe for meats: This ensures your protein reaches a safe internal temperature every time.
- Explore the delay start feature: Plan your meals ahead and let the oven do the work on its own schedule.
Common Mistakes to Avoid
Even experienced cooks make mistakes with their Whirlpool stove oven. Avoiding these common errors helps you get better results and protects your appliance.
One big mistake is skipping preheating. Many people put food into a cold oven and expect good results. This leads to uneven cooking and longer cooking time. Always wait for the preheat signal before loading your dish.
Another mistake is using the wrong rack position. Placing food too high or too low in the cavity affects how it browns and cooks. For most tasks, the center rack is your best friend. Reserve the upper rack for broil function tasks and the lower rack for long roasting jobs.
Overcrowding the oven is also a frequent error. When pans are too close together, hot air cannot circulate properly. This blocks heat distribution and leads to uneven bake evenly results. Give each pan enough space for air to flow around it.
Ignoring the self-clean cycle is a mistake that shortens your oven’s lifespan. Built-up grease and food residue can affect temperature accuracy and create odors. Run the self-clean cycle every few months to keep your Whirlpool stove oven in top shape.
Finally, do not ignore unusual sounds or smells. A Whirlpool stove oven that makes grinding noises or emits a burning smell needs attention. Catching problems early prevents costly repairs and keeps your kitchen safe.
Expert Insights on Getting the Most from Your Whirlpool Stove Oven
Professional chefs often emphasize one key principle: understand your tool before you use it. The same applies to your Whirlpool stove oven. Take time to read the owner’s manual and explore each feature. You will discover capabilities you did not know existed.
Experts also recommend investing in quality cookware. Dark, heavy pans absorb more heat and can cause over-browning. Light-colored aluminum pans reflect heat and promote more even heat distribution. Pairing good pans with a well-maintained oven makes a noticeable difference in your dishes.
Another pro tip is to note your oven’s hot spots. Every oven has slight temperature variations. Place a piece of bread on a baking sheet and toast it across the rack to see which areas brown faster. Once you know the hot spots, rotate your food accordingly for the best bake evenly results.
Finally, do not underestimate the power of the keep warm function. It is a simple feature that makes entertaining much easier. When guests arrive and dinner is ready, set the oven to keep warm and focus on enjoying the moment instead of worrying about cold food.
Conclusion
Using a Whirlpool stove oven becomes second nature once you understand the basic functions and features. From preheating and setting the right oven temperature to using the broil function and convection cooking modes, each feature serves a purpose that improves your meals. Regular cleaning, smart rack placement, and avoiding common mistakes all contribute to better cooking outcomes.
Your Whirlpool stove oven is a powerful kitchen tool that can do so much more than you might think. Take the time to explore its settings, try new recipes, and enjoy the process of creating delicious food. With the tips and guidance in this article, you are well on your way to getting great results every time you cook.
Apply what you have learned here today, and watch your confidence in the kitchen grow. A well-used Whirlpool stove oven is the foundation of countless memorable meals, and now you have the knowledge to make the most of it.
Frequently Asked Questions
How do I set the temperature on my Whirlpool stove oven?
To set the temperature, press the temperature button on the digital control panel or turn the temperature knob. Use the arrow keys or dial to select your desired oven temperature, then press start. The oven will begin preheating and signal when it reaches the target heat.
Can I use aluminum foil inside my Whirlpool stove oven?
Yes, you can use aluminum foil on the oven floor or on a baking sheet, but avoid lining the walls or blocking the vents. Foil can reflect heat and improve heat distribution, but covering vents restricts airflow and can affect cooking performance.
How often should I run the self-clean cycle?
Running the self-clean cycle every two to three months is recommended for most households. If you bake frequently, you may need to run it more often. Regular cleaning prevents grease buildup and keeps your Whirlpool stove oven performing efficiently.
What is the difference between bake and convection modes?
The bake settings use the bottom and top heating elements for gentle, even heat. Convection cooking adds a rear fan that circulates hot air, reducing cooking time by about 25 percent. Convection is ideal for roasting and baking multiple items at once with bake evenly results.
Why does my oven take so long to preheat?
If your Whirlpool stove oven takes longer than 10 to 15 minutes to preheat, the heating element may be weakening. Also, check that the oven door closes tightly, as a loose seal lets heat escape. A temperature probe or oven thermometer can help you verify actual vs. displayed temperature.
Is it safe to leave the house while using the self-clean cycle?
It is best to stay home while the self-clean cycle runs. The oven reaches very high temperatures during this process, and unusual odors or smoke can occur. Staying nearby allows you to respond quickly if anything seems out of the ordinary and keeps your home safe.