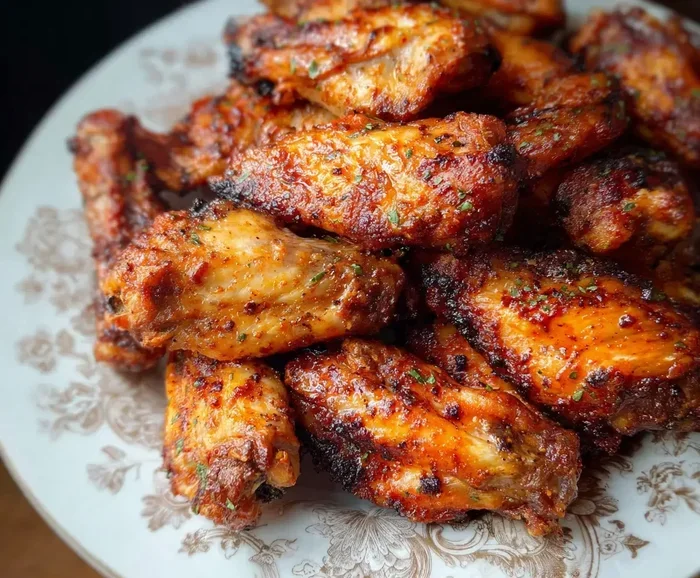
How Hot To Cook Wings In Oven For Crispy Perfection
Achieving crispy baked wings starts with nailing the oven temperature. This guide reveals the exact how hot to cook wings in oven setting for golden, crunchy skin every time. You’ll learn timing, rack placement, and pro tips for restaurant-quality results.
There’s nothing quite like biting into a perfectly crispy wing. The crunch gives way to juicy, tender meat, and the flavor hits you right away. If you’ve ever wondered how hot to cook wings in oven for that ideal texture, you’re in the right place.
Baking wings at home doesn’t require a deep fryer or special equipment. With the right oven temperature and a few simple tricks, you can achieve restaurant-quality crispy chicken wings straight from your baking sheet. This guide covers everything from the best heat setting to timing, rack placement, and sauce tricks.
Whether you’re making classic buffalo wings, honey garlic glaze, or just plain salted crispy wings, the oven method gives you consistent results. You’ll learn the exact how hot to cook wings in oven setting that works every time, plus how to avoid common pitfalls that leave you with soggy skin.
Key Takeaways
- Optimal Temperature: Bake wings at 425°F for the perfect balance of crispy skin and juicy meat.
- Use a Wire Rack: Elevating wings on a rack ensures hot air circulates evenly, preventing soggy bottoms.
- Dry Brine First: Salt wings ahead of time to draw out moisture and achieve crunchier skin.
- Don’t Crowd the Pan: Space wings out so steam escapes, keeping them crispy instead of steamed.
- Check Internal Temp: Wings are done when the thickest part reaches 165°F for safe, tender results.
- Rest Before Saucing: Let wings cool slightly after baking so sauce sticks without making them soggy.
- Convection Setting: Use convection bake if your oven has it for even faster, crispier results.
📑 Table of Contents
How Hot To Cook Wings In Oven: The Perfect Temperature
The short answer is 425°F (220°C). This high heat rapidly renders the fat under the skin and dehydrates the surface, creating that shattering crunch we all love. A lower temperature like 375°F or 400°F can work, but it takes longer and risks steaming the wings instead of crisping them.
Here’s why 425°F is the sweet spot for oven-baked wings:
- Fast cooking: The high heat sets the skin quickly, locking in juices.
- Even browning: Maillard reaction kicks in faster, giving you a deep golden color.
- Fat renders properly: Chicken fat melts and drips away, leaving crispy skin behind.
- Shorter bake time: Less time in the oven means the meat stays moist.
If your oven runs cool, you might need to bump it up to 450°F. Always use an oven thermometer to verify the actual temperature. Guessing can lead to undercooked or overcooked results.
What If You Want Extra Crispy Skin?
For an extra-crunchy finish, try a two-stage method. Bake the wings at 425°F for 20 minutes, then increase the heat to 450°F for the final 10 minutes. The blast of high heat at the end puff up the skin and amplify the crunch. This technique works wonders for crispy baked wings every time.
Quick Tip: Use an Oven Thermometer
Most oven dials are inaccurate. A cheap oven thermometer takes the guesswork out. Place it on the middle rack and check it before you put the wings in. This small step makes a huge difference in your baking wings results.
Baking Time Chart: 400°F vs. 425°F vs. 450°F
The right temperature depends on your wing size and how crispy you like them. Here’s a quick comparison table to guide you.
| Oven Temp | Wing Size | Bake Time | Result |
|---|---|---|---|
| 400°F | Small wingettes | 35–40 min | Good crisp, slightly softer skin |
| 400°F | Large drumettes | 40–45 min | Evenly cooked, moderate crunch |
| 425°F | Small wingettes | 28–32 min | Crispy skin, juicy meat |
| 425°F | Large drumettes | 32–38 min | Great crunch, tender inside |
| 450°F | Any size | 22–28 min | Extra crispy, watch closely |
These times assume you’re using a wire rack and not overcrowding the pan. If you place wings directly on a sheet pan, add 5–10 minutes because the bottom layer will steam slightly.
How to Tell When Wings Are Done
The most reliable way is a meat thermometer. Insert it into the thickest part of the wing, avoiding the bone. The internal temperature should read 165°F (74°C). The skin should be deep golden brown and the juices should run clear, not pink.
Another visual cue is the wiggle test. Grab a wing with tongs and gently shake it. If the joint moves freely and the meat seems set, it’s done. If it feels floppy or jelly-like, give it a few more minutes.
The Secret to Crispy Skin: Dry Brine and Airflow
Getting crispy skin isn’t just about heat. What you do before the wings hit the oven matters just as much. The two biggest factors are moisture control and air circulation.
The Dry Brine Method
Pat the wings completely dry with paper towels. Then toss them in a light coating of salt and baking powder (not baking soda). Spread them out on a rack and let them rest in the fridge for 1–2 hours, or even overnight. The salt draws out surface moisture, which then gets reabsorbed along with the seasoning. When the wings bake, that dry surface turns into an ultra-crispy shell.
This step is the single biggest game-changer for crispy chicken wings. It transforms soggy, steamed skin into something crackling and addictive.
Pat Them Dry and No Crowding
Never skip the patting step. Even a thin film of moisture creates steam, which prevents crisping. And never crowd the pan. Wings need space for hot air to flow around every piece. If you pack them tightly, the steam has nowhere to go and you end up with soft, pale skin.
Use a large wire cooling rack set over a baking sheet. The rack lifts the wings above the rendered fat, allowing it to drip away and the air to circulate underneath. This is the secret to evenly crispy wings on all sides.
Expert Insight: The Role of Cornstarch
Professional kitchens often toss wings in a light dusting of cornstarch before baking. The starch creates a micro-barrier that speeds up dehydration and adds an extra layer of crunch. A 50/50 mix of salt and cornstarch works wonders. Just a thin coating is enough—too much can make the wings taste pasty.
Wire Rack vs. Foil Pan: Which Works Better?
This debate comes up a lot among home cooks. The answer depends on your priorities: maximum crispiness or easy cleanup.
Setting Up Your Baking Sheet
The gold standard for crispy oven-baked wings is a wire rack placed over a baking sheet lined with foil or parchment. The rack does the heavy lifting by elevating the wings, while the foil catches drips for quick cleanup. You get crispy skin on all sides without flipping.
If you don’t have a wire rack, you can crumple a piece of aluminum foil into small balls and place them on the baking sheet, then set the wings on top. This creates mini air gaps that mimic a rack. It’s not as effective, but it’s a solid backup plan.
Lining the Pan for Easy Cleanup
Always line your baking sheet. Baked-on chicken fat is a nightmare to scrub. Parchment paper is the easiest to remove, but foil works well too and can be recycled. Avoid putting wings directly on bare metal—it’s harder to clean and can cause the bottom pieces to stick and steam.
Quick Tip: If you’re using a convection oven, the fan helps circulate heat even more. Reduce the temperature by 25°F and check for doneness a few minutes early. Convection is a fantastic tool for baking wings because it speeds up the crisping process.
Common Mistakes That Ruin Crispy Wings
Even with the right temperature, a few simple errors can sabotage your crispy baked wings. Here’s what to avoid.
Overcrowding the Pan
This is the number one mistake. When wings touch each other, steam gets trapped. The skin turns rubbery instead of crispy. Give each wing at least an inch of space. If you need to bake in batches, that’s fine. It’s better to have fewer crispy wings than a full pan of soggy ones.
Skipping the Rest Time
When wings come out of the oven, resist the urge to sauce them immediately. The residual heat is still cooking the meat, and the sauce will slide right off if the skin is still hot and greasy. Let them rest on the rack for 5–10 minutes. The skin firms up, and the sauce will cling perfectly.
Using Too Much Sauce Too Early
Apply sauce in the last 5–10 minutes of baking, or toss the baked wings in a bowl with sauce. Slathering wings with sugary or wet sauces at the start of the bake will prevent the skin from crisping. The sugar burns, the skin gets sticky, and you lose all that crunch you worked so hard for.
Not Adjusting for Frozen Wings
If you’re using frozen wings, thaw them first or increase the bake time by 10–15 minutes. Cooking frozen wings at high heat can leave the outside burnt and the inside raw. Pat them very dry after thawing, as they release a lot of water.
Flavor Variations and Sauces
Once you’ve mastered the perfect bake, it’s time to play with flavors. The base how hot to cook wings in oven method stays the same, but the sauce makes all the difference.
Classic Buffalo Wings
Toss hot baked wings in a mix of melted butter and hot sauce. The ratio is usually 1 part butter to 3 parts sauce. Adjust the heat level with more or less cayenne pepper. Buffalo wings are best when the sauce is warm, so toss them while they’re still hot from the oven.
Honey Garlic and BBQ Glazes
For a sweeter profile, brush wings with a honey garlic glaze during the last 10 minutes of baking. A mix of honey, minced garlic, soy sauce, and a dash of apple cider vinegar creates a sticky, caramelized coating. For BBQ, use your favorite store-bought or homemade sauce and apply it in the same way. The sugar in these glazes caramelizes quickly at high heat, adding a beautiful lacquer.
Quick Tip: Apply Sauce After Baking
The best method is to toss fully baked wings in a bowl with the sauce. This coats every piece evenly without washing off the crispy skin. If you prefer to brush the sauce on, do it in the final 5 minutes only, and use a light hand.
Conclusion
Getting crispy baked wings at home is simpler than you think. The key is to set your oven to 425°F, use a wire rack, dry the wings thoroughly, and give them enough space. Remember the how hot to cook wings in oven rule: high heat, good airflow, and patience. Follow these steps and you’ll have crunchy, juicy wings that rival any restaurant every single time.
Now that you know the perfect oven temperature and timing, it’s time to fire up your oven. Grab your favorite seasoning, line that baking sheet, and enjoy the process. Great wings start with the right heat, and you’ve got all the tools to make them happen.
Frequently Asked Questions
What is the best temperature to bake chicken wings in the oven?
The best temperature is 425°F (220°C). This high heat renders the fat quickly and dehydrates the skin, creating a crispy exterior while keeping the meat juicy. If you prefer a slightly softer crunch, 400°F works too, but it adds a few extra minutes to the bake time.
How long does it take to bake wings at 425°F?
Small wingettes take about 28–32 minutes, while larger drumettes need 32–38 minutes. Always use a meat thermometer to confirm the internal temperature reaches 165°F. The exact time depends on wing size, whether they are frozen or fresh, and how crowded your pan is.
Should I use a wire rack or place wings directly on the baking sheet?
Always use a wire rack set over a baking sheet. The rack allows hot air to circulate underneath the wings, preventing steam from building up and keeping the skin crispy. Placing wings directly on the pan traps moisture and leads to soggy bottoms.
Can I bake frozen wings without thawing them first?
You can, but it’s not ideal. Frozen wings take significantly longer and may cook unevenly. If you must bake them from frozen, increase the oven temperature slightly and add 10–15 minutes to the bake time. Pat them very dry after thawing to remove excess surface moisture for the best crisp.
Why are my baked wings not crispy?
The most common reasons are overcrowding the pan, not drying the wings thoroughly, or skipping the dry brine step. Steam is the enemy of crispiness. Make sure each wing has space, pat them dry with paper towels, and let them rest uncovered in the fridge before baking.
When should I add sauce to my baked wings?
Add sauce in the last 5–10 minutes of baking, or toss the wings in a bowl with sauce immediately after they come out of the oven. Applying sauce too early washes off the dry surface needed for crunch. The residual heat will help the sauce adhere without making the skin soggy.