How Long To Broil Chicken In The Oven For Juicy Results
Knowing how long to broil chicken in the oven is the key to juicy, flavorful chicken every single time. The broiling method uses high direct heat from above, cooking chicken quickly and creating a beautiful charred exterior. This guide covers timing for every chicken cut, oven settings, and pro tips that guarantee restaurant-quality results at home.
There is something magical about broiled chicken. The high heat creates a slightly crispy outside while keeping the inside tender and juicy. Whether you are cooking for a weeknight dinner or a weekend feast, mastering this technique changes everything.
But here is the thing many people get wrong. They throw chicken under the broiler without a plan. They guess at timing. They hope for the best. And too often, the result is dry, overcooked meat that nobody wants to eat. That is why this guide exists.
We are going to walk through exactly how long to broil chicken in the oven, piece by piece. You will learn about oven settings, rack positioning, and the simple tricks that separate good chicken from great chicken. By the end, you will feel confident walking up to that oven every single time.
Broiling is not the same as baking. Baking uses indirect heat that surrounds the food. Broiling uses intense direct heat from above. This difference matters a lot. It means shorter cook times, a caramelized exterior, and a completely different texture. Once you understand this, you are already ahead.
Key Takeaways
- Timing varies by cut: Chicken breasts take 6-10 minutes, while thighs and wings need 8-12 minutes under the broiler.
- Preheat your broiler first: Always let the oven broiler heat up for 5-10 minutes before placing chicken inside.
- Use a food thermometer: The safe internal temperature for chicken is 165°F (74°C) no matter the cooking method.
- Position matters: Keep chicken 4-6 inches from the broiler element for even cooking and proper charring.
- Flip halfway through: Turning chicken midway ensures both sides get that perfect golden-brown finish.
- Rest your chicken: Letting chicken rest for 5 minutes after broiling keeps juices locked in.
- Marinating adds flavor and moisture: A good marinade prevents dryness and boosts taste significantly.
📑 Table of Contents
- Understanding Your Oven Broiler
- How Long To Broil Chicken In The Oven By Cut
- Factors That Affect Broiling Time
- Step-by-Step Guide to Broiling Chicken
- Common Mistakes When Broiling Chicken
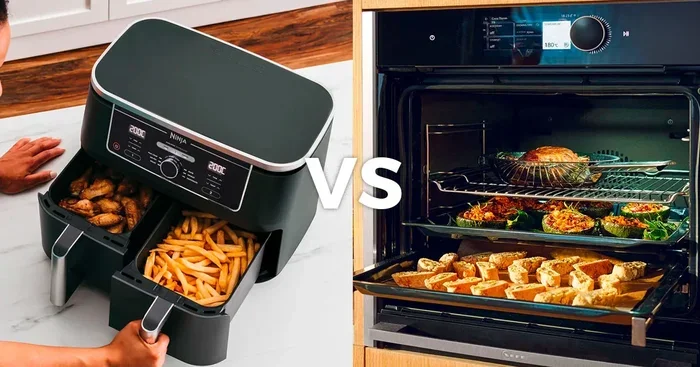
- Broiling vs Baking: Which Is Better for Chicken?
- Expert Tips for Perfectly Juicy Broiled Chicken
- How to Tell When Broiled Chicken Is Done
- Serving Ideas for Broiled Chicken
- Conclusion
Understanding Your Oven Broiler
Before we talk timing, let us talk about your oven. Not all broilers work the same way, and understanding yours makes a huge difference.
Types of Oven Broilers
Most ovens come with a built-in broiler. Some are located at the top of the oven cavity. Others are in a separate drawer at the bottom. Both work, but they heat differently.
Here is a quick look at the two main types:
- Top-mounted broiler: This is the most common type. The heating element sits at the top of the oven. You place your chicken on a rack or pan below it. Heat flows downward directly onto the food.
- Drawer broiler: Found in some stoves, this is a separate compartment below the oven. It works the same way but gives you more space for larger cuts or multiple pieces at once.
Knowing which type you have helps you position the chicken correctly. For top-mounted broilers, you want the rack close to the element. For drawer broilers, the distance is usually already set well.
Preheating the Broiler
Never skip preheating. Just like with a grill, you want that heat ready before the chicken goes in. Turn the broiler on and let it run for 5 to 10 minutes. This ensures even cooking from the moment the chicken touches the heat.
Quick Tip: If your oven has a “high broil” and “low broil” setting, always start with high broil for chicken. The intense heat sears the surface quickly, locking in moisture.
How Long To Broil Chicken In The Oven By Cut
This is the section you have been waiting for. The answer to how long to broil chicken in the oven depends on what cut you are cooking. Thickness matters more than weight, so always check the thickest part of your piece.
Chicken Breast
Chicken breast is the most popular cut, but it is also the most likely to dry out. The good news is that broiling is one of the fastest ways to cook it perfectly.
For boneless, skinless chicken breasts, follow these guidelines:
- Thin breasts (less than 1/2 inch): 4 to 6 minutes total. Flip once halfway through.
- Medium breasts (1/2 to 3/4 inch): 6 to 8 minutes total. Flip once.
- Thick breasts (over 3/4 inch): 8 to 10 minutes total. Flip once and watch carefully.
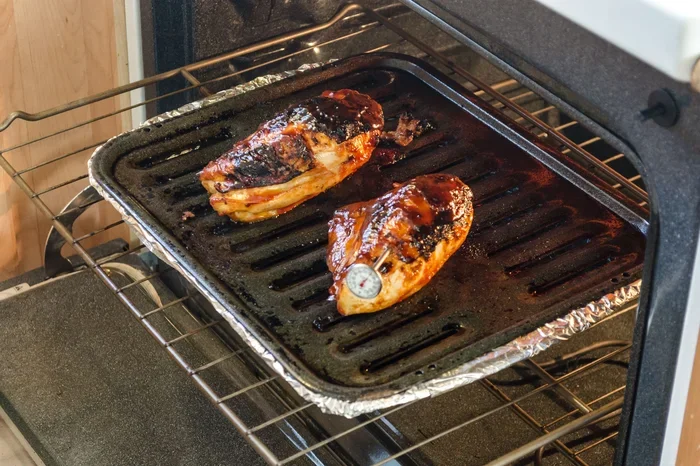
Always use a food thermometer to check the internal temperature. You are aiming for 165°F in the thickest part. If the breast is very thick, consider pounding it to an even thickness before broiling. This prevents the thin end from drying out while the thick end finishes cooking.
Chicken Thighs
Thighs are more forgiving than breasts. The higher fat content keeps them moist even if you cook them a little longer. Bone-in thighs take a bit more time than boneless.
- Boneless thighs: 8 to 10 minutes total. Flip once.
- Bone-in thighs: 10 to 12 minutes total. Flip once halfway through.
Thighs develop a beautiful crispy skin under the broiler. If you want extra crispiness, start with the skin side down for the first half of cooking, then flip to skin-side up for the second half.
Chicken Wings
Wings are a crowd favorite, and broiling them is incredibly fast. They cook quickly because they are small and have lots of surface area.
- Whole wings: 10 to 12 minutes total. Flip once at the 5-minute mark.
- Split wings: 6 to 8 minutes total. Flip once.
Keep an eye on wings because they can go from perfectly crispy to burnt in seconds. The high sugar content in marinades or sauces can also cause them to burn faster.
Chicken Drumsticks
Drumsticks are fun to eat and relatively easy to broil. Their shape can be tricky though, since the narrow part cooks faster than the meaty section.
- Whole drumsticks: 10 to 12 minutes total. Flip once.
- Butterflied drumsticks: 6 to 8 minutes total. No need to flip.
If you butterflied your drumsticks, lay them flat on the pan. This ensures even cooking and maximizes the crispy surface area.
Whole Chicken Under the Broiler
Broiling a whole chicken is not common, but it can be done for smaller birds. A 3 to 4 pound chicken will need about 30 to 40 minutes total, with flipping every 10 minutes. This method works best if you spatchcock the chicken first, removing the backbone and flattening it. This exposes more surface area to the direct heat.
Factors That Affect Broiling Time
Timing is not an exact science. Several factors influence how long your chicken actually needs under the broiler. Understanding these helps you adjust and avoid mistakes.
Chicken Thickness
This is the single biggest factor. A thin chicken breast cooks in half the time of a thick one. If you buy chicken with inconsistent thickness, use a meat mallet to even it out. Pounding to a uniform 3/4-inch thickness is the sweet spot for most breasts.
Oven Temperature and Broiler Strength
Not all ovens heat the same way. Some broilers run hotter than others. Older ovens may have weaker broilers that take longer. Newer models often have powerful broilers that cook fast.
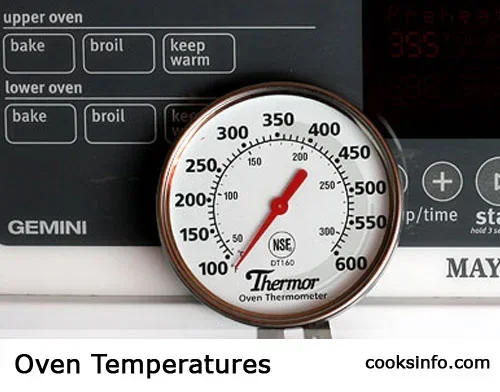
If your oven has a “broil” setting with a temperature choice, 500°F to 550°F is ideal for chicken. If your broiler only has one setting, just watch the chicken more carefully during the first few minutes to learn how your oven behaves.
Rack Position
Where you place the oven rack matters a lot. For most broilers, the top rack position is best. You want the chicken about 4 to 6 inches from the broiler element.
Too close and the outside burns before the inside cooks. Too far and you lose that direct heat effect, and the chicken starts to roast instead of broil.
Quick Tip: If you notice uneven browning, try moving the pan to a different rack position halfway through cooking.
Starting Temperature of the Chicken
Many people put cold chicken straight from the fridge under the broiler. This is a mistake. Cold chicken takes longer to cook, which means the outside overcooks before the inside reaches 165°F.
Take the chicken out 15 to 20 minutes before cooking. Let it come closer to room temperature. This small step leads to more even cooking and better results.
Use of Marinade or Seasoning
Marinades add flavor and moisture. They also affect cooking time slightly because sugars in the marinade caramelize faster under high heat. If you use a sweet marinade or a glaze, reduce the cooking time by a minute or two and watch the chicken closely near the end.
Step-by-Step Guide to Broiling Chicken
Now that you understand the basics, let us put it all together. Here is a simple, foolproof method for broiling chicken in your oven.
Step 1: Prep the Chicken
Pat the chicken dry with paper towels. This removes surface moisture and helps create that crispy exterior. Season generously with salt, pepper, and any spices you like. If you have time, marinate the chicken for 30 minutes to 2 hours beforehand for extra flavor.
Step 2: Preheat the Broiler
Turn the broiler to high. Place the oven rack in the top position, about 4 to 6 inches from the heating element. Let the broiler preheat for 5 to 10 minutes.
Step 3: Arrange the Chicken on the Pan
Use a broiler pan or a wire rack set over a baking sheet. The wire rack allows heat to circulate underneath, which is important for even cooking. Do not crowd the pan. Leave space between pieces so heat reaches all sides.
Step 4: Broil and Flip
Place the pan in the oven and start your timer. Cook for about half the total time, then open the oven and flip each piece. This ensures both sides get that appetizing char.
Watch the chicken closely during the last 2 minutes. Broiling happens fast, and chicken can go from perfect to burnt quickly.
Step 5: Check the Internal Temperature
Insert a food thermometer into the thickest part of the chicken. The temperature must read 165°F. If it is not there yet, give it another 1 to 2 minutes and check again.
Step 6: Rest the Chicken
Remove the chicken from the oven and let it rest for 5 minutes. This allows the juices to redistribute throughout the meat. Cutting into it too soon releases those juices onto the cutting board instead of keeping them in the chicken.
Common Mistakes When Broiling Chicken
Even experienced cooks make mistakes with the broiler. Here are the most common ones and how to avoid them.
Not Paying Attention
The broiler is fast. It is not like baking, where you can set a timer and walk away. Broiling requires your attention. Stay near the oven and watch the chicken closely. Flames can flare up from dripping fat, and burnt chicken happens in seconds.
Using the Wrong Pan
Do not use a glass pan or a dark, nonstick baking sheet directly under the broiler. Dark pans absorb too much heat and can cause the bottom of the chicken to burn. Use a light-colored metal pan, a broiler pan, or a wire rack set over a baking sheet.
Skipping the Flip
Some people leave the chicken on one side the entire time. This creates one perfectly charred side and one pale, unevenly cooked side. Flipping halfway through is essential for even cooking and that attractive golden color on both sides.
Overcrowding the Pan
It is tempting to fit as much chicken as possible on the pan. Overcrowding blocks heat circulation and leads to steaming instead of broiling. Give each piece room. If you need to cook more, use two pans or cook in batches.
Ignoring the Thermometer
Visual cues are helpful but not always accurate. The inside of chicken can look done but still be under 165°F. A simple instant-read thermometer takes the guesswork out completely. It is the single best tool for perfectly cooked chicken.
Broiling vs Baking: Which Is Better for Chicken?
People often ask whether broiling or baking is the better method for chicken. The answer depends on what you want.
Broiling is faster. It uses direct top-down heat that sears the surface quickly. You get a crispy, charred exterior in a fraction of the time. Broiling works best for thinner cuts like breasts, thighs, and wings.
Baking is slower and more even. Heat surrounds the chicken from all sides. It is better for larger, thicker pieces or a whole chicken. Baking gives you more consistent results with less risk of burning.
Here is a quick comparison:
| Factor | Broiling | Baking |
|---|---|---|
| Cook Time | 6-12 minutes | 20-45 minutes |
| Heat Source | Direct heat from above | Indirect heat all around |
| Texture | Crispy, charred exterior | Even, golden exterior |
| Best For | Thin cuts, wings, thighs | Whole chicken, thick breasts |
| Attention Required | High, must watch closely | Low, set and forget |
| Char Flavor | Strong, smoky | Mild, subtle |
For juicy results with minimal effort, broiling is hard to beat. It is one of the fastest ways to cook delicious chicken in your kitchen.
Expert Tips for Perfectly Juicy Broiled Chicken
Here are some insider tips that will take your broiled chicken to the next level.
- Brine for extra juiciness: Soak chicken in a saltwater solution for 30 minutes to 2 hours before cooking. This helps the meat retain moisture during the high heat of broiling.
- Use a wire rack: It lifts the chicken off the pan and allows hot air to flow underneath. This prevents soggy bottoms and promotes even browning.
- Baste during cooking: Brush a little olive oil or melted butter on the chicken halfway through. This adds flavor and helps the surface brown evenly.
- Let the broiler do the work: Do not press down on the chicken or poke it with a fork. You want to preserve those juices inside.
- Add sauce at the end: If you want a glaze or sauce, apply it in the last 1 to 2 minutes of cooking. Sugary sauces burn quickly under the broiler, so late application is key.
How to Tell When Broiled Chicken Is Done
Timing gives you a good starting point, but the only way to know for sure is to check the internal temperature. A food thermometer is your best friend here.
Insert it into the thickest part of the meat, avoiding bone if possible. The temperature should read 165°F for all cuts of chicken. If you do not have a thermometer, you can check by cutting into the thickest part. The juices should run clear, not pink. The meat should be opaque white all the way through, with no translucent areas.
Another sign is firmness. Properly cooked chicken feels firm but still has a slight give when you press it. If it feels rubbery, it needs more time. If it feels very soft, it may be undercooked.
Expert Insight: The USDA confirms that 165°F is the safe internal temperature for all poultry. This applies to breasts, thighs, wings, and drumsticks alike. Always check every piece, especially when cooking different cuts on the same pan.
Serving Ideas for Broiled Chicken
Broiled chicken pairs well with almost anything. Here are some quick serving ideas:
- Grilled vegetables: Asparagus, zucchini, and bell peppers cooked on the stove complement broiled chicken perfectly.
- Rice or quinoa bowls: Top a bed of fluffy rice with sliced broiled chicken, fresh herbs, and a squeeze of lime.
- Salad: Chop the chicken and toss it over a crisp green salad with a light vinaigrette.
- Tacos: Shred the chicken and serve in warm tortillas with salsa, avocado, and cilantro.
- Pasta: Toss sliced broiled chicken with olive oil, garlic, and your favorite pasta for a quick weeknight meal.
Broiled chicken is versatile, healthy, and delicious. Once you master the timing, you will find yourself making it several times a week.
Conclusion
How long to broil chicken in the oven depends on the cut, thickness, and your specific oven. But with the guidelines in this article, you now have everything you need to cook juicy, flavorful chicken every single time.
Remember the basics: preheat the broiler, position the rack correctly, flip halfway through, and always use a thermometer. Avoid the common mistakes like overcrowding the pan or walking away from the oven. And give your chicken time to rest before cutting into it.
Broiling is one of the simplest and fastest ways to cook chicken. It requires minimal equipment, little preparation, and delivers outstanding results. Whether you are cooking a quick weeknight dinner or feeding a crowd, the broiler is your best tool.
Now go fire up that oven broiler and put these tips to work. Your juicy, perfectly charred chicken is waiting for you.
Frequently Asked Questions
Can I broil frozen chicken?
It is not recommended. Frozen chicken will cook unevenly under the broiler. The outside will burn before the inside thaws and reaches a safe temperature. Always thaw chicken in the refrigerator before broiling for the best and safest results.
Do I need to flip chicken when broiling?
Yes, flipping is important. It ensures both sides get evenly charred and cooked through. Flip the chicken once, about halfway through the total cooking time. This simple step makes a noticeable difference in the final result.
What is the best temperature to broil chicken?
Most ovens have a single broil setting that runs between 500°F and 550°F. If your oven offers a choice, use the high broil setting. This intense heat sears the surface quickly and creates that desirable crispy, charred exterior.
How do I prevent chicken from drying out under the broiler?
Start with properly marinated or brined chicken. Pound thick pieces to an even thickness. Do not overcook, and always use a food thermometer to check for doneness. Letting the chicken rest for 5 minutes after cooking also helps retain moisture.
Can I use a broiler pan for all chicken cuts?
A broiler pan works great for most cuts. For wings and smaller pieces, a wire rack over a baking sheet is even better because it allows air to flow underneath. Avoid dark or glass pans, as they absorb too much heat and can cause burning.
Is broiled chicken healthy?
Yes, broiled chicken is a healthy cooking method. It does not require added fats like frying. The high heat melts away excess fat from the chicken as it cooks. Broiled chicken is high in protein and low in calories, making it an excellent choice for a balanced diet.