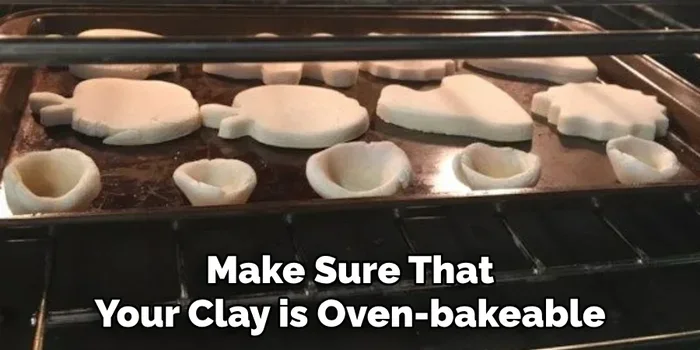
Can You Put Air Dry Clay In The Oven Heres The Answer
Can you put air dry clay in the oven? The short answer is yes, but with important caveats. Air dry clay is designed to dry at room temperature, and using an oven can speed up the process if done carefully. However, too much heat can cause cracking, shrinking, or even fire hazards. This guide covers everything you need to know about drying air dry clay in the oven safely and effectively.
Have you ever been halfway through a clay craft project and thought, “Can I just pop this in the oven to speed things up?” You are not alone. Crafters and hobbyists face this question all the time. The good news is that you can put air dry clay in the oven under the right conditions. But there is a lot more to it than just turning on the heat.
Air dry clay is a popular material for homemade crafts, jewelry making, and sculpture. It dries naturally at room temperature, which makes it beginner-friendly and convenient. However, sometimes you need your project done faster. Maybe you have a deadline, a gift to wrap, or simply impatient hands. That is where the oven comes in. But using heat with air dry clay comes with risks you need to understand first.
In this article, we will explore everything about baking air dry clay in an oven. We will cover safe temperatures, timing, common mistakes, and how to get the best results. Whether you are a seasoned crafter or just starting out, this guide has practical advice you can use right away.
Key Takeaways
- Yes, you can use an oven: Low heat helps air dry clay cure faster when monitored closely.
- Temperature control is critical: Keep it below 200°F to prevent cracking and burning.
- Room temperature drying is safest: Air dry clay cures naturally without any heat at all.
- Polymer clay is different: It requires baking, while air dry clay does not.
- Slow and steady wins: Gradual heating prevents moisture from escaping too fast.
- Watch for warning signs: Cracking, browning, or smoke means you need to stop immediately.
- Finishing touches matter: Proper sealing extends the life of your clay projects.
📑 Table of Contents
- What Is Air Dry Clay and How Does It Work?
- Can You Put Air Dry Clay In The Oven?
- How to Safely Put Air Dry Clay in the Oven
- Common Mistakes When Drying Air Dry Clay in the Oven
- Benefits of Air Drying Clay at Room Temperature
- How to Tell When Air Dry Clay Is Fully Dry
- Finishing and Sealing Your Dried Clay Project
- Expert Tips for the Best Results
- What to Do If Your Clay Cracks
- Is It Safe to Put Air Dry Clay in the Oven?
- Final Thoughts on Putting Air Dry Clay in the Oven
What Is Air Dry Clay and How Does It Work?
Before we talk about ovens, let us understand what air dry clay actually is. Air dry clay is a modeling material that hardens when exposed to air. It does not need any heat to set. The moisture in the clay evaporates over time, leaving behind a solid, lightweight piece.
Most air dry clay is made from natural materials like paper pulp, salt, or clay minerals. Some brands add glue or wax to improve texture and durability. You can shape it by hand, use molds, or sculpt detailed designs. Once exposed to air, the drying process begins.
How Long Does Air Dry Clay Take to Dry?
Drying time depends on several factors. The thickness of your piece matters the most. A thin ornament might dry in 24 hours. A thick sculpture could take two to three days. Humidity and temperature in your room also play a role. A damp basement will slow things down significantly.
Here are some general drying time guidelines:
- Thin pieces (less than 1/4 inch): 12 to 24 hours
- Medium pieces (1/4 to 1/2 inch): 24 to 48 hours
- Thick pieces (over 1/2 inch): 48 to 72 hours or more
- Very large sculptures: Several days to a week
Turning your piece halfway through helps it dry evenly. This prevents one side from drying faster than the other, which can cause warping.
Air Dry Clay vs Polymer Clay
It is easy to confuse air dry clay with polymer clay. They look similar when raw, but they are very different. Polymer clay is made from PVC and plasticizers. It must be baked in an oven at around 275°F to harden properly. Air dry clay, on the other hand, hardens through evaporation. You do not need any oven for it at all.
Using the wrong method can ruin your project. Baking air dry clay at high heat will not make it stronger. In fact, it can cause it to crack, burn, or release unpleasant fumes. Always check the label on your clay package to know which type you are working with.
Can You Put Air Dry Clay In The Oven?
So, can you put air dry clay in the oven? Yes, you can. But the key word is “can,” not “should.” Air dry clay is not designed to be baked. However, a warm oven can speed up the drying process if you are careful. The goal is to remove moisture gently without overheating the clay.
Many crafters use the oven as a shortcut. It works, but only when you follow the right steps. The oven method is not ideal for every project. For thin, simple pieces, room temperature drying is perfectly fine. But for thicker items or time-sensitive projects, a low-heat oven can help.
Why Would You Use an Oven for Air Dry Clay?
There are a few reasons crafters choose to use an oven:
- Speed: The oven dries clay much faster than air drying alone.
- Even drying: A controlled oven environment reduces the risk of warping.
- Humidity control: In humid climates, an oven can bypass slow, uneven air drying.
- Finishing quality: Some crafters find oven-dried pieces have a smoother surface.
Despite these benefits, there are real risks involved. You need to understand them before you turn on the heat.
How to Safely Put Air Dry Clay in the Oven
If you have decided to use the oven, follow these steps carefully. Safety and patience are your best friends here. Rushing the process is the number one cause of cracked or ruined clay.
Step 1: Preheat the Oven to a Low Temperature
Set your oven to the lowest possible temperature. Most ovens have a setting around 170°F to 200°F. Never exceed 200°F when drying air dry clay. Higher temperatures will cause the outside to harden too fast while trapping moisture inside. This creates steam, which leads to cracking.
If your oven does not go below 200°F, you can prop the door open slightly. This helps release heat and keeps the temperature lower. Use a wooden spoon or a heat-safe wedge to hold the door ajar.
Step 2: Place the Clay on a Baking Sheet
Line a baking sheet with parchment paper or a silicone mat. This prevents the clay from sticking and makes cleanup easy. Place your clay piece on the sheet, making sure it is not touching any other pieces. Leave space around each item for air to circulate.
Do not place the clay directly on the oven rack. The gaps in the rack can cause the piece to sag or deform while it is still soft.
Step 3: Put the Clay in the Oven
Place the baking sheet on the middle rack of the oven. The middle position allows for the most even heat distribution. Avoid opening the oven door frequently, as this lets out heat and creates temperature fluctuations.
Set a timer for 15 to 20 minutes. You are not baking the clay. You are gently warming it to help moisture escape. Keep the temperature low and the time short.
Step 4: Check the Clay Regularly
After 15 minutes, open the oven and check the clay. It should feel warm but not hot to the touch. If it is starting to brown or smell burnt, remove it immediately. Use oven mitts to handle the baking sheet safely.
For thicker pieces, you may need to repeat this process several times. A cycle of 15 to 20 minutes, followed by a rest period at room temperature, works best. This slow approach prevents moisture from building up inside the piece.
Step 5: Let It Cool Completely
Once the clay feels dry and firm, turn off the oven and let the piece cool inside. This gradual cooling prevents thermal shock, which can cause cracks. After the oven has cooled completely, remove your creation and inspect it.
A properly dried piece should feel light and sound hollow when tapped. If it still feels damp or cool in the center, it needs more drying time.
Common Mistakes When Drying Air Dry Clay in the Oven
Even with the best intentions, mistakes happen. Knowing what to avoid saves time, money, and frustration. Here are the most common errors crafters make.
Setting the Temperature Too High
This is the biggest mistake people make. High heat causes the surface of the clay to harden too quickly. Moisture trapped inside turns to steam, and steam creates cracks. Your piece might look fine when you take it out, but hours later it splits apart. Always keep the temperature below 200°F.
Skipping the Parchment Paper
Putting clay directly on a bare baking sheet creates problems. The clay can stick and tear when you try to remove it. Parchment paper or a silicone mat provides a non-stick surface and protects your piece from uneven heating.
Leaving the Clay in Too Long
More heat does not mean better results. Leaving air dry clay in the oven for hours will dry it out too much. Over-dried clay becomes brittle and prone to breaking. It can also discolor or burn. Stick to short intervals and check frequently.
Ignoring the Clay Label
Not all clay labeled “air dry” is the same. Some brands are more heat-resistant than others. Always read the manufacturer’s instructions before applying any heat. Some brands explicitly warn against using an oven. Respect those guidelines.
Drying Uneven Pieces
Thick and thin sections of the same piece dry at different rates. A thick base with thin arms will cause the thin parts to dry too fast while the base remains wet. Try to keep your sculpture an even thickness throughout. If that is not possible, dry the thicker parts longer.
Benefits of Air Drying Clay at Room Temperature
While the oven method has its place, room temperature drying remains the safest and most recommended approach. Here is why many crafters prefer it.
- No risk of burning: Your piece will never overheat or scorch.
- Even drying: Gentle air exposure dries the entire piece uniformly.
- No equipment needed: You do not need to monitor an oven or worry about temperature settings.
- Better for beginners: It removes the stress of timing and heat control.
- Preserves details: Fine details and textures stay intact without the risk of heat distortion.
If you have the time, room temperature drying is the way to go. Place your clay piece on a wire rack to allow air circulation on all sides. Keep it in a dry, well-ventilated room away from direct sunlight. Direct sunlight can cause uneven drying and fading.
How to Tell When Air Dry Clay Is Fully Dry
Knowing when your clay is completely dry is important for the final result. Under-dried clay is weak and prone to mold. Over-dried clay is brittle and cracks easily. Here is how to tell if your piece is ready.
- Touch test: The surface should feel cool and dry, not damp or cool in the center.
- Tap test: Lightly tap the piece with your fingernail. A hollow sound means it is dry inside.
- Weight: A dry piece feels noticeably lighter than a wet one.
- Color: The color should be consistent throughout. Darker spots may indicate trapped moisture.
- Flexibility: Thin pieces should feel firm but not brittle. Thick pieces should not flex at all.
If you are unsure, let the piece dry for another few hours. It is always better to wait than to seal in moisture.
Finishing and Sealing Your Dried Clay Project
Once your clay project is fully dry, you can finish it in several ways. Finishing not only improves the look but also adds durability. Here are some popular options.
- Sanding: Use fine-grit sandpaper (220 or higher) to smooth out any rough spots or fingerprints.
- Priming: A coat of primer helps paint adhere better and gives a uniform base.
- Painting: Acrylic paints work great on dried air dry clay. Apply thin layers and let each one dry completely.
- Sealing: A clear sealant protects your piece from moisture and damage. Use a matte or gloss sealant depending on your desired finish.
- Varnishing: For pieces that will be handled often, like clay jewelry, a varnish adds extra protection.
Always let your piece dry completely before applying any finish. Sealing damp clay traps moisture inside and can lead to mold growth over time.
Can You Put Air Dry Clay in the Oven for Jewelry?
Many crafters make clay jewelry and wonder if oven drying works for small pieces. The answer is yes, with caution. Small, thin pieces like earrings and pendants dry quickly and handle low heat well. However, even with jewelry, keep the temperature low and the drying time short. A quick 10 to 15 minute session at 170°F is usually sufficient.
Expert Tips for the Best Results
Experienced crafters have learned a few tricks over the years. Here are some tips that can help you get the best outcome every time.
- Work in a dry environment: High humidity slows drying and can cause mold. Use a dehumidifier if needed.
- Use a fan: A gentle fan circulating air around your piece speeds up room-temperature drying significantly.
- Keep pieces uniform in thickness: Use spacers or rolling guides to maintain even thickness across your entire project.
- Store unused clay properly: Wrap leftover clay tightly in plastic wrap or store it in an airtight container to prevent it from drying out prematurely.
- Test a small piece first: If you are new to oven drying, try it on a scrap piece before committing your main project.
- Be patient: The fastest method is not always the best method. Give your clay the time it needs to dry properly.
What to Do If Your Clay Cracks
Cracking is one of the most common problems with air dry clay. It happens when moisture escapes too quickly. Cracks can occur during air drying or oven drying. Here is how to fix them.
Small cracks can be repaired by mixing a tiny amount of water with clay powder to form a paste. Apply the paste to the crack and smooth it out. Let it dry completely before sanding and painting. For larger cracks, you may need to reinforce the piece from the inside with wire or a wooden dowel before adding more clay.
Prevention is always better than repair. Dry your clay slowly and evenly. Avoid high heat, direct sunlight, and drafts. These all cause rapid moisture loss and increase the risk of cracking.
Is It Safe to Put Air Dry Clay in the Oven?
Safety should always come first. Air dry clay is generally non-toxic, but overheating it can release fumes you do not want to breathe. Always work in a well-ventilated area. If your oven smells like burning chemicals or smoke, turn it off immediately and remove the clay.
Never leave the oven unattended while drying clay. Even at low temperatures, things can go wrong quickly. A piece left in too long can scorch, smoke, or even catch fire in extreme cases. Stay nearby and check on your project regularly.
If you have children or pets, make sure the oven is out of reach while in use. Set a timer so you do not forget about the clay inside. Simple precautions make the process safe and enjoyable.
Final Thoughts on Putting Air Dry Clay in the Oven
The answer to can you put air dry clay in the oven is yes, but it requires care and attention. Air dry clay is designed to cure at room temperature, and that remains the safest method. Using an oven is a viable shortcut when done correctly, but it comes with risks you must manage.
Keep the temperature low, the time short, and the process gradual. Always check your piece frequently and never walk away from the oven while clay is inside. With patience and the right approach, you can speed up your clay crafts without ruining your hard work.
Remember that every piece is different. Thickness, humidity, clay brand, and oven type all affect the outcome. What works for one project may not work for another. Trust your instincts, do the touch and tap tests, and when in doubt, let it dry naturally. Your patience will pay off with a beautiful, durable finished piece you can be proud of.
Air dry clay is a wonderful medium for creative expression. Whether you choose to let it dry at room temperature or use a low-heat oven to speed things up, the most important thing is that you enjoy the process. Now you have the knowledge and confidence to tackle any clay project that comes your way.
Frequently Asked Questions
Can you bake air dry clay in the oven at 200 degrees?
Yes, 200°F is the maximum safe temperature for drying air dry clay in an oven. Keep it at or below this temperature and limit the drying time to 15 to 20 minutes per session. Higher temperatures will cause cracking and burning.
What happens if you put air dry clay in the oven too hot?
Too much heat causes the outside of the clay to harden quickly while moisture stays trapped inside. This creates steam, which leads to cracking, warping, or even splitting the piece apart. In extreme cases, the clay can burn or release smoke.
Is air dry clay the same as polymer clay?
No, they are completely different. Air dry clay hardens through evaporation at room temperature. Polymer clay is made from PVC and requires baking in the oven at around 275°F to cure. Using the wrong method will damage your project.
Can you put air dry clay in the oven to make it waterproof?
Oven drying does not make air dry clay waterproof. The clay remains porous even after drying. To make it water-resistant, you need to seal it with a waterproof sealant or varnish after it is completely dry.
How long should you put air dry clay in the oven?
Limit oven sessions to 15 to 20 minutes at 170°F to 200°F. For thicker pieces, you can repeat the process in multiple short sessions, allowing the clay to rest at room temperature between each session. This slow approach prevents cracking.
Does air dry clay shrink when dried in the oven?
Yes, all air dry clay shrinks slightly as it dries. Oven drying can accelerate shrinkage, which may cause minor size changes. The shrinkage is usually minimal but can be more noticeable in thicker pieces. Room temperature drying produces the most consistent results with minimal shrinkage.
=== CONCLUSION ===
Can you put air dry clay in the oven? Yes, you can, and now you know exactly how to do it safely. The oven method is a useful tool for crafters who need faster drying times. But it requires patience, low heat, and constant monitoring. The safest approach is always room temperature drying, and that should be your first choice whenever possible.
Use the tips and guidelines in this article to get the best results from your air dry clay projects. Avoid common mistakes, finish your pieces properly, and most importantly, enjoy the creative process. With the right knowledge and a little care, your clay crafts will turn out beautifully every time.