What Makes Bread Rise In The Oven And Why It Puffs Up
Bread rises in the oven because of a magical combination of yeast, gluten, heat, and steam. The process called oven spring gives loaves their final puff and shape. Understanding these simple science-backed steps helps you bake better bread at home every single time.
Have you ever watched a plain lump of dough transform into a fluffy, golden loaf right before your eyes? It feels like magic. But the truth is, there is a fascinating science behind what makes bread rise in the oven and why it puffs up so beautifully.
The process involves tiny living organisms, protein networks, and precise heat levels all working together. Whether you bake sourdough or sandwich bread, understanding these basics will change the way you approach baking. Let us break it down in simple, practical terms.
The journey of bread rising starts long before the loaf hits the oven. It begins with ingredients mixing, dough resting, and careful proofing. Every step sets the stage for that final dramatic puff. In this article, we will explore the full science behind what makes bread rise in the oven and give you tips to improve your baking results starting today.
Key Takeaways
- Yeast is the engine: It eats sugars and releases carbon dioxide, which creates air pockets inside the dough.
- Gluten provides structure: It stretches and traps gas so the bread can hold its shape while rising.
- Oven spring is the final puff: Heat causes the dough to expand rapidly before the crust sets.
- Steam keeps the crust soft: This allows the bread to expand fully before a hard crust forms.
- Temperature matters a lot: The right baking temperature ensures even rising and a golden crust.
- Proofing is essential: Properly risen dough before baking leads to a better final loaf.
- Different leavening agents work differently: Yeast, baking soda, and baking powder each create rise in their own way.
📑 Table of Contents
- The Science Behind Bread Rising
- The Role of Yeast in Bread Rising
- How Gluten Helps Bread Puff Up
- What Is Oven Spring and Why Does It Matter
- Leavening Agents That Make Bread Rise
- Tips for Perfectly Risen Bread Every Time
- Common Mistakes That Prevent Bread From Rising
- Expert Insights on Bread Rising
- Key Takeaways
- Conclusion
The Science Behind Bread Rising
Bread rising is not guesswork. It is chemistry and biology working together inside your dough. When you understand the basic principles, baking becomes much less intimidating and way more fun.
The main goal of rising is to create gas bubbles inside the dough. These bubbles expand when heated, giving bread its light, airy texture. Without this process, bread would be a dense, hard brick. Not exactly appetizing, right?
How Gas Forms Inside Dough
Gas formation starts during mixing and proofing. Yeast cells feed on sugars in the flour. As they eat, they produce two things: carbon dioxide and alcohol. The carbon dioxide gets trapped inside the dough. This is what makes the dough expand.
The alcohol mostly evaporates during baking. So you do not need to worry about your bread tasting boozy. The gas bubbles act like tiny balloons, stretching the dough and creating that soft crumb we all love.
Why Dough Needs Time to Rise
Rushing the rising process is one of the biggest mistakes home bakers make. Dough needs time for yeast to work and for gluten to develop. During this rest period, the dough becomes more elastic and capable of holding gas.
Most recipes call for a first rise and a second rise. The first rise builds flavor and structure. The second rise shapes the final texture. Skipping either one can lead to flat, dense bread that does not puff up properly.
The Role of Temperature in Rising
Temperature plays a huge role in how well bread rises. Yeast works best in warm environments, usually between 75 and 85 degrees Fahrenheit. Too cold and the yeast slows down. Too hot and it dies off entirely.
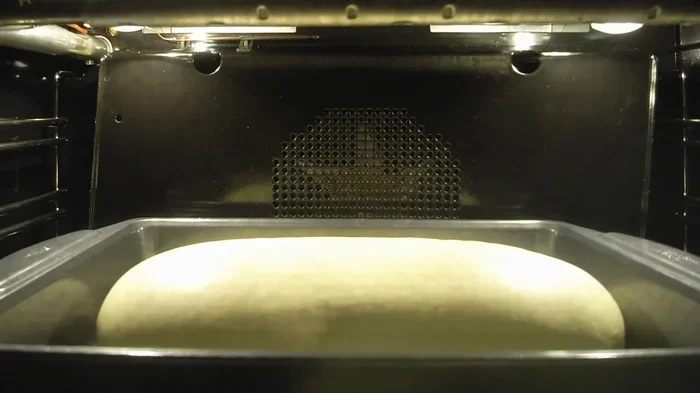
This is why many bakers let dough rise in a warm spot in the kitchen. Some even use their oven with just the light on to create a cozy environment. Getting the temperature right during proofing sets you up for success when the dough goes into the hot oven.
The Role of Yeast in Bread Rising
Yeast is the star player when it comes to what makes bread rise in the oven. These tiny single-celled organisms are alive and working hard every moment you are not watching. Understanding yeast helps you troubleshoot problems and bake with more confidence.
Active Dry Yeast vs Instant Yeast
Not all yeast is the same. Active dry yeast needs to be dissolved in warm water before use. Instant yeast can be mixed directly into flour. Both produce the same result, but instant yeast works faster and is more forgiving.
If you are new to baking, instant yeast is a great place to start. It reduces the steps and takes some of the pressure off timing. Active dry yeast, on the other hand, gives you a visual cue when it is working. The foam on top of the water tells you the yeast is alive and ready.
How to Activate Yeast Properly
Activating yeast is simple but important. Warm water, about 100 to 110 degrees Fahrenheit, wakes up the yeast. Add a pinch of sugar to feed them. Within five to ten minutes, you should see a foamy layer on top.
No foam means the yeast is dead or too old. Always check your yeast before mixing it into dough. Expired yeast will not produce enough gas, and your bread will not rise properly. It is an easy step that saves a lot of frustration.
Yeast and Fermentation
Fermentation is the process where yeast breaks down sugars. This does two critical things. First, it produces carbon dioxide gas. Second, it develops flavor compounds that give bread its characteristic taste.
This is why slow-fermented breads taste so much better. Longer fermentation allows yeast to create more complex flavors. Many artisan bakers use cold overnight rises to build depth and richness into their loaves. The result is bread with a tangy, slightly sweet flavor that store-bought loaves simply cannot match.
How Gluten Helps Bread Puff Up
Gluten is the protein network that gives bread its structure. Without gluten, all that gas produced by yeast would escape, and the dough would collapse. Gluten is what traps the bubbles and holds the bread up.
What Is Gluten and How Does It Form
Gluten forms when two proteins in flour, glutenin and gliadin, mix with water. When you knead the dough, these proteins link together and create a stretchy, elastic network. This network is strong enough to hold gas bubbles while remaining flexible enough to expand.
The more you knead, the stronger the gluten becomes. This is why bread dough needs more kneading than pastry dough. Strong gluten development is essential for loaves that rise high and hold their shape.
Gluten and Dough Elasticity
Elasticity is the dough’s ability to stretch without tearing. Good elasticity means the dough can expand as gas builds up inside. If the gluten is weak, the dough will tear and the gas will escape.
You can test gluten strength with the windowpane test. Take a small piece of dough and stretch it gently. If it stretches thin enough to see light through without tearing, your gluten is well developed. If it tears right away, keep kneading.
Flour Choice Matters for Gluten Development
Not all flours create the same gluten network. Bread flour has a higher protein content than all-purpose flour, which means stronger gluten and better rise. Whole wheat flour has more bran and germ, which can interfere with gluten development.
If you bake with whole wheat, you may need to add extra water or let the dough rest longer. This gives the gluten time to form properly despite the bran particles cutting through the network. Understanding your flour is a simple way to improve your bread significantly.
What Is Oven Spring and Why Does It Matter
Oven spring is the final dramatic rise that happens when dough goes into the hot oven. It is one of the most exciting parts of baking bread. The loaf can nearly double in size during the first few minutes of baking.
What Causes Oven Spring
Oven spring happens because of a perfect storm of events. First, the heat causes the yeast to become very active one last time. They produce a burst of carbon dioxide. Second, the moisture in the dough turns to steam. Third, the gases expand as temperature increases.
All of this expansion happens before the crust sets. Once the crust reaches a certain temperature, it hardens and the rising stops. This is why timing and temperature are so important. If the oven is too cool, the crust sets too late and the bread spreads out instead of rising up.
How to Maximize Oven Spring
There are several ways to get the most oven spring from your dough. Preheat your oven thoroughly before putting the bread in. A hot oven from the start gives the yeast maximum energy for that final burst.
Use a Dutch oven or baking stone to create intense bottom heat. Steam in the early stages of baking keeps the crust soft and allows maximum expansion. Some bakers spray water into the oven or place a pan of water on the bottom rack. Each of these small steps adds up to a significantly better rise.
Why Some Breads Have More Oven Spring Than Others
Artisan breads with high hydration and strong gluten networks tend to have the most dramatic oven spring. The dough is wet and elastic, which means it can expand freely. Rich, buttery breads like brioche have less oven spring because fat weakens the gluten structure.
Understanding these differences helps you adjust your expectations and techniques. A lean dough will always puff up more than a rich dough. That is not a flaw. It is just how different ingredients behave under heat.
Leavening Agents That Make Bread Rise
Yeast is not the only way to make bread rise. Different leavening agents create rise through different mechanisms. Knowing when to use each one opens up a world of baking possibilities.
Yeast: The Living Leavener
Yeast is a living organism that produces gas through fermentation. It works slowly, which gives bread time to develop flavor and texture. Most traditional breads rely on yeast as their primary leavening agent.
Yeast-leavened breads include sandwich loaves, baguettes, rolls, and focaccia. The slow rise creates complex flavors and a satisfying chewiness that quick breads cannot replicate. If you want artisan-quality bread at home, yeast is your best friend.
Baking Soda: The Quick Chemical Leavener
Baking soda is a base that reacts with acids to produce carbon dioxide. This reaction starts immediately when wet ingredients are added. That is why recipes with baking soda need to go into the oven quickly.
Baking soda works best in recipes that contain acidic ingredients like buttermilk, yogurt, or molasses. The acid triggers the reaction and creates the rise. Without enough acid, baking soda will not work properly, and the bread will taste metallic.
Baking Powder: The All-in-One Leavener
Baking powder contains both a base and an acid. It does not need an external acidic ingredient to work. There are two types: single-acting and double-acting. Double-acting baking powder releases gas in two stages, which makes it more forgiving for home bakers.
Quick breads like banana bread, muffins, and scones rely on baking powder. These breads do not use yeast, so they do not need time to rise. The chemical reaction does the work quickly, giving you fresh bread in under an hour.
Sourdough Starter: Natural Leavening
A sourdough starter is a mixture of flour and water that captures wild yeast and bacteria from the air. It acts as a natural leavening agent and adds a distinctive tangy flavor to bread.
Sourdough fermentation is slower than commercial yeast. This extended fermentation time develops deeper flavors and a more open crumb structure. Many bakers find that sourdough bread has a superior taste and texture compared to yeast-only loaves. Maintaining a starter does take some effort, but the results are worth it.
Tips for Perfectly Risen Bread Every Time
Even with all the science understood, baking great bread still comes down to practice and attention to detail. Here are some practical tips that will help you achieve better rise every time you bake.
Use Fresh, Quality Ingredients
Start with good flour, fresh yeast or starter, and clean water. Old yeast or expired leavening agents are the most common reasons bread fails to rise. Always check expiration dates before you begin.
Bread flour gives you the best rise because of its higher protein content. If you only have all-purpose flour, you can still make great bread, but the crumb may be slightly denser. Adding vital wheat gluten can boost the protein content of any flour.
Do Not Skip the Rest Periods
Rest periods, or bulk fermentation, are when the magic really happens. During this time, gluten relaxes, yeast produces gas, and flavors develop. Skipping this step leads to bread that does not rise well and tastes flat.
Plan your baking around rest times. Most recipes call for one to two hours of bulk fermentation. In cooler kitchens, this can take longer. Learning to read your dough instead of watching the clock is a skill that improves with practice.
Shape Your Dough Properly
Shaping creates surface tension that supports oven spring. A well-shaped loaf holds its form and rises upward instead of spreading out. Use a bench scraper to tighten the dough as you shape it.
For round loaves, pull the edges into the center and flip the dough seam-side down. For batards or oval loaves, fold the dough in thirds and roll it tightly. These simple techniques make a noticeable difference in the final loaf.
Score the Dough Before Baking
Scoring is the practice of cutting slashes into the top of the dough before baking. This gives the bread a controlled place to expand during oven spring. Without scoring, the bread may burst unpredictably on the sides or bottom.
Use a sharp razor blade or lame for clean cuts. A single slash or an elaborate cross pattern both work well. The cuts also create that beautiful ear that artisan loaves are known for. It is a small step that makes a big visual and functional difference.
Monitor Your Oven Temperature
Many home ovens run hotter or cooler than the dial indicates. An oven thermometer is a cheap and essential tool. Place it inside your oven and check the actual temperature before baking.
Most breads bake best at 375 to 450 degrees Fahrenheit. Starting with a hot oven promotes oven spring. Some bakers start even hotter and then reduce the temperature partway through. Experiment to find what works best in your specific oven.
Add Steam for Better Rise
Steam in the early stages of baking keeps the crust soft and flexible. This allows the dough to expand fully before the crust hardens. The result is a taller, lighter loaf with a crisp exterior.
You can add steam by placing a pan of water on the bottom rack. Spraying water into the oven when you load the bread also works. A Dutch oven traps moisture naturally and creates the perfect steamy environment for artisan-style bread.
Common Mistakes That Prevent Bread From Rising
Even experienced bakers run into problems from time to time. Knowing what goes wrong helps you avoid the same mistakes and fix issues quickly.
Using Dead or Old Yeast
Old yeast is the number one culprit behind flat bread. Always test your yeast before using it. If it does not foam in warm water with a pinch of sugar, it is no longer active and needs to be replaced.
Store yeast in a cool, dry place. Once opened, keep it in the refrigerator and use it within a few months. Proper storage extends the life of your yeast and prevents wasted batches of dough.
Kneading Too Little or Too Much
Under-kneaded dough has weak gluten and cannot hold gas. Over-kneaded dough becomes tight and tough, which restricts expansion. Both lead to bread that does not rise properly.
Finding the sweet spot takes practice. The dough should be smooth, elastic, and slightly tacky. It should pass the windowpane test. If it feels stiff and resistant, it may be over-kneaded. If it feels loose and sticky, keep kneading.
Baking in a Cold Oven
Putting bread into a cold or lukewarm oven kills the yeast before it can produce that final burst of gas. Always preheat your oven fully before baking. Give it at least 20 to 30 minutes to reach the target temperature.
A hot start is critical for oven spring. The yeast works fastest in the first few minutes of baking, creating maximum expansion before the crust sets. Patience with preheating pays off in a taller, lighter loaf.
Expert Insights on Bread Rising
Professional bakers have spent years mastering the art and science of bread making. Their insights can help you elevate your home baking to the next level.
Patience Is the Secret Ingredient
Most experts agree that patience is the single most important factor in great bread. Rushing the process at any stage leads to disappointing results. Let the dough rise at its own pace, and you will be rewarded with better flavor, texture, and volume.
Cold overnight rises are especially recommended by professionals. The slow fermentation in the refrigerator develops complex flavors and improves the dough’s structure. When you take the dough out the next morning, it will be easier to shape and will rise beautifully in the oven.
Learn to Read Your Dough
Experienced bakers do not just follow the clock. They learn to read the dough by its look and feel. A properly risen dough looks puffy and springs back slowly when gently poked. An under-risen dough looks dense and springs back quickly.
Over-risen dough, on the other hand, looks inflated and fragile. When you poke it, it does not spring back at all. Over-risen dough can collapse in the oven, leading to a flat loaf. Learning these visual cues takes time but transforms your baking completely.
Invest in a Kitchen Scale
Professional bakers measure ingredients by weight, not volume. This ensures consistency and accuracy every single time. Flour can be packed differently depending on how you measure it, which changes the hydration and texture of the dough.
A simple kitchen scale costs very little but makes a huge difference. Use grams instead of cups for more precise measurements. This small change alone can improve your bread’s rise and overall quality significantly.
Key Takeaways
- Yeast is the engine: It eats sugars and releases carbon dioxide, which creates air pockets inside the dough.
- Gluten provides structure: It stretches and traps gas so the bread can hold its shape while rising.
- Oven spring is the final puff: Heat causes the dough to expand rapidly before the crust sets.
- Steam keeps the crust soft: This allows the bread to expand fully before a hard crust forms.
- Temperature matters a lot: The right baking temperature ensures even rising and a golden crust.
- Proofing is essential: Properly risen dough before baking leads to a better final loaf.
- Different leavening agents work differently: Yeast, baking soda, and baking powder each create rise in their own way.
Conclusion
What makes bread rise in the oven is a beautiful combination of biology, chemistry, and heat. Yeast produces gas, gluten traps it, and oven spring gives the loaf its final dramatic expansion. Every step in the process matters, from the moment you mix the ingredients to the moment you pull the golden loaf from the oven.
The science behind bread rising does not have to be complicated. With fresh yeast, properly developed gluten, and the right oven temperature, you can bake loaves that rival any bakery. Start with the basics, practice consistently, and do not be afraid to experiment.
Remember that every batch of bread teaches you something new. Pay attention to how the dough feels, how it rises, and how it looks in the oven. Over time, you will develop an intuition that makes the whole process feel natural and rewarding. The next time your bread puffs up beautifully in the oven, you will know exactly why.
Grab your apron, preheat your oven, and give it a try. Great bread is waiting for you, and now you know exactly how to make it happen.
Frequently Asked Questions
Why does bread rise more in the oven than on the counter?
The heat of the oven causes a final burst of activity from the yeast, known as oven spring. Steam inside the dough expands rapidly, and the gases push the loaf to nearly double its size in just minutes. This dramatic rise happens before the crust hardens and locks the shape in place.
Can bread rise without yeast?
Yes. Baking soda and baking powder are chemical leaveners that create rise through acid-base reactions. Sourdough bread uses wild yeast from a starter instead of commercial yeast. Each method produces a different texture and flavor profile, but all create the airy structure we associate with risen bread.
What temperature is best for bread to rise in the oven?
Most breads bake best between 375 and 450 degrees Fahrenheit. A hot oven promotes oven spring by activating the yeast one final time before the crust sets. Use an oven thermometer to verify your oven’s actual temperature, as many ovens run hotter or cooler than the dial shows.
How long should bread rise before going into the oven?
Most recipes call for a first rise of one to two hours at room temperature, followed by a second rise of 30 to 60 minutes. The dough should roughly double in size during each rise. In cooler environments, rise times will be longer. Always look for visual cues like puffiness and a jiggly texture rather than relying solely on the clock.
Does steam in the oven really help bread rise?
Yes, steam is very important. It keeps the crust soft and pliable during the early stages of baking, which allows maximum oven spring. Without steam, the crust hardens too early and restricts the bread’s expansion. A Dutch oven traps moisture naturally and creates excellent steam for artisan-style loaves.
Why did my bread not rise in the oven?
The most common reasons are old or dead yeast, insufficient kneading, or a cold oven. If the yeast is no longer active, it cannot produce gas. Weak gluten from under-kneading means the dough cannot hold the gas it does produce. And a low oven temperature kills the yeast before oven spring can occur. Check your yeast, preheat properly, and knead thoroughly to avoid this problem.