Ribs Up Or Down In Oven The Answer Might Surprise You
Placing ribs up or down in the oven changes everything about how they cook. The surprising answer depends on the type of ribs and your desired texture. Bone-side down locks in moisture, while meat-side up creates a caramelized crust. This guide covers rack position, temperature, and timing so you can bake ribs like a pro.
Key Takeaways
- Bone-side down is best for most oven-baked ribs: It protects the meat and keeps juices flowing.
- Meat-side up works for a crispy bark: Great if you love a caramelized outer layer.
- Rack position matters more than you think: The middle rack ensures even heat distribution.
- Wrapping in foil halfway through adds moisture: This technique prevents dry, tough ribs.
- Internal temperature is the real doneness clue: Aim for 195 to 203 degrees Fahrenheit for fall-off-the-bone tenderness.
- Resting ribs after baking is essential: Let them sit for 15 to 20 minutes before slicing.
- Different rib types need different approaches: Pork ribs and beef ribs behave differently in the oven.
📑 Table of Contents
- Ribs Up Or Down In Oven: The Answer Might Surprise You
- Why Rib Placement Matters In The Oven
- The Best Rack Position For Baking Ribs
- Oven Temperature And Timing For Perfect Ribs
- How To Achieve Fall-Off-The-Bone Tenderness
- Common Mistakes People Make When Baking Ribs
- Expert Tips For Juicy, Flavorful Ribs Every Time
- Pork Ribs Vs Beef Ribs: Key Differences In Oven Baking
- How To Know When Ribs Are Done
- Final Thoughts On Ribs Up Or Down In Oven
Ribs Up Or Down In Oven: The Answer Might Surprise You
You have spent hours picking the perfect rack of ribs. You have your rub ready and your oven preheated. But then a simple question hits you. Should ribs go in the oven bone side up or bone side down? It seems like a small detail. But it makes a huge difference in how your ribs turn out.
The truth is, most people never think about this. They just toss the ribs in the oven and hope for the best. But here is the thing. Ribs up or down in oven placement affects moisture, browning, and tenderness. Get it right and you have juicy, fall-off-the-bone ribs. Get it wrong and you end up with dry, tough meat. This guide will walk you through everything you need to know.
We will cover bone-side placement, rack position, oven temperature, and timing. By the end, you will know exactly how to bake ribs that rival any barbecue joint. Let us dive in.
Why Rib Placement Matters In The Oven
You might wonder why something so simple matters so much. The answer lies in how heat moves inside your oven. When you place ribs in the oven, the hot air circulates around them. The direction the bones face changes how that heat hits the meat.
If you place ribs meat side up, the heat hits the surface directly. This creates a thicker, more caramelized crust. Think of it like a barbecue bark. If you place them bone side up, the bones act as a shield. The meat sits slightly lower and stays more protected. Moisture stays trapped and the ribs stay juicier.
Oven-baked ribs behave differently than grilled ribs. There is no direct flame or smoke involved. Your oven uses dry, indirect heat. This means placement becomes even more important. A small change in position can completely change the texture and flavor.
Bone Side Up Vs Bone Side Down
Let us break this down clearly. Bone-side up means the curved bones face upward. The meat sits against the pan or rack. Bone-side down means the bones rest on the surface and the meat faces up.
Bone-side down is the most popular choice among home cooks. Here is why. When the meat faces up, it gets direct exposure to the heat source above. This creates a beautiful, crispy exterior. The fat renders slowly and bastes the meat from within. The result is ribs with a great crust and tender, juicy meat underneath.
Bone-side up has its place too. It works well when you want more moisture retention. The bones insulate the meat slightly. This slows down the cooking process just enough to keep things tender. However, the top of the meat may not brown as nicely.
The Best Rack Position For Baking Ribs
Placement inside the oven matters just as much as bone orientation. Where you put the rack determines how much heat the ribs receive. Most oven-baked rib recipes call for the middle rack. This position allows hot air to flow evenly around the meat.
If you place ribs too high, the top dries out quickly. If you place them too low, the bottom can burn or become soggy. The middle rack gives you the best balance. Heat reaches the meat from all sides without scorching any one area.
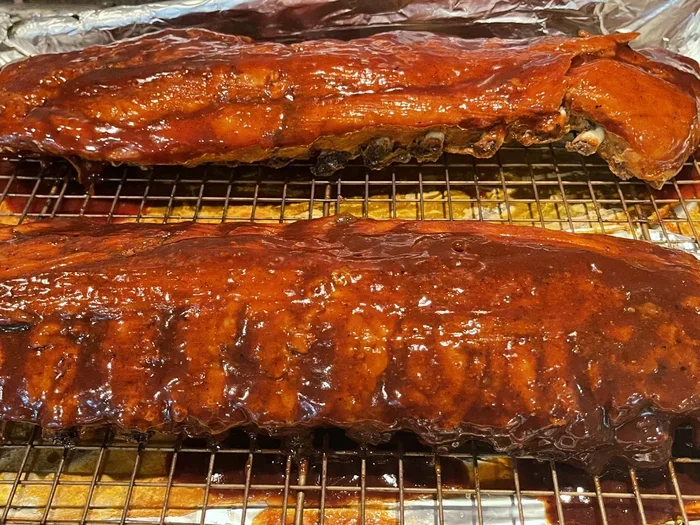
Some people use a rib rack to keep the ribs elevated. This works well for larger racks. A rib rack allows air to circulate underneath, which promotes even cooking. It also keeps the ribs off the pan, which prevents steaming.
Should You Use A Baking Pan Or Foil?
Many baking pan setups involve lining the pan with foil. This makes cleanup easier and catches drips. But it also affects how the ribs cook. Foil traps steam and moisture. This can be a good thing for tender ribs. But too much steam can prevent browning.
A popular technique is the foil wrap method. You bake the ribs unwrapped for the first half. This builds a nice crust. Then you wrap them tightly in foil for the second half. This traps moisture and softens the meat. The result is ribs that are both crispy and tender.
Some cooks skip the foil entirely. They prefer a dry bake that produces a firm bark. This works well at slightly higher temperatures. The key is to monitor the internal temperature closely.
Oven Temperature And Timing For Perfect Ribs
Getting the temperature right is critical for oven ribs. Too hot and the outside burns before the inside cooks. Too low and the ribs take forever and turn rubbery. The sweet spot for most pork ribs is between 275 and 325 degrees Fahrenheit.
Low and slow is the golden rule of slow cook ribs in the oven. At 275 degrees, a full rack of pork ribs takes about three to four hours. At 325 degrees, it takes closer to two and a half hours. The lower temperature breaks down collagen slowly. This is what makes ribs tender and juicy.
Beef ribs need a different approach. They are thicker and have more connective tissue. Beef ribs in the oven often need to bake at 300 degrees for four to five hours. Some cooks go even lower at 250 degrees for extra tenderness.
Internal Temperature: The Real Indicator
Time is just a guideline. The real indicator of done ribs is internal temperature. You want the thickest part of the meat to reach between 195 and 203 degrees Fahrenheit. At this range, the collagen has fully broken down. The meat should pull back from the bone slightly.
Use a reliable meat thermometer. Do not rely on the oven timer alone. Every oven runs differently. Factors like oven calibration, rack position, and rib thickness all affect cooking time.
Here is a quick reference for oven-baked ribs timing:
- Pork spare ribs: 275 degrees for 3.5 to 4 hours, or 325 degrees for 2.5 to 3 hours.
- Pork baby back ribs: 275 degrees for 2.5 to 3 hours, or 325 degrees for 2 to 2.5 hours.
- Beef back ribs: 300 degrees for 4 to 5 hours.
- Short ribs: 300 degrees for 3 to 4 hours depending on thickness.
How To Achieve Fall-Off-The-Bone Tenderness
Everyone wants ribs that fall apart at the touch. This is the hallmark of perfectly baked ribs. But achieving this texture requires patience and the right technique.
The secret is collagen breakdown. Ribs contain a lot of connective tissue, especially near the bone. When you cook them low and slow, this collagen turns into gelatin. Gelatin is what gives ribs that silky, melt-in-your-mouth texture.
Here are the key steps to get there:
- Remove the membrane. Flip the ribs bone side up and peel off the thin membrane on the back. This allows rub and heat to penetrate deeper.
- Apply a generous rub. Use a mix of brown sugar, paprika, garlic powder, salt, and pepper. Let the ribs sit for at least 30 minutes or overnight.
- Wrap in foil halfway through. This is the Texas crutch method. It adds moisture and speeds up the tenderizing process.
- Check the internal temperature. Do not pull them out too early. Wait for 195 to 203 degrees.
- Rest before slicing. Let the ribs sit for 15 to 20 minutes after removing them from the oven.
The Role Of BBQ Sauce
BBQ sauce is a beloved addition to barbecue ribs. But when should you add it? Applying sauce too early can cause it to burn. The sugars in sauce caramelize quickly and can turn bitter.
The best approach is to brush sauce on during the last 15 to 20 minutes of baking. This gives it time to thicken and stick without burning. You can also serve sauce on the side for people who like extra.
If you want a deeper flavor, try layering sauce. Apply a thin coat early to build a glaze. Then add a thicker coat at the end. This creates a complex, sweet, and slightly sticky finish.
Common Mistakes People Make When Baking Ribs
Even experienced cooks make mistakes. Here are the most common errors when baking pork ribs or beef ribs in the oven.
Skipping The Membrane Removal
The membrane on the back of the ribs blocks seasoning from reaching the meat. It also creates a chewy layer that nobody wants to bite into. Use a butter knife to loosen one corner and peel it off. It takes ten seconds and makes a big difference.
Opening The Oven Too Often
Every time you open the oven door, heat escapes. This drops the temperature and slows cooking. Try to resist the urge to check on the ribs constantly. Use the oven light to monitor progress instead.
Using Too Much Rub Or Sauce
More is not always better. A thick layer of rub can turn bitter when exposed to long heat. A heavy coat of sauce can make ribs soggy. Less is more. Apply a thin, even layer and build flavor gradually.
Not Letting Ribs Rest After Baking
Resting is not just for steaks. Ribs need time to redistribute their juices. If you cut into them immediately, the juices run out and the meat dries out. Give them at least 15 minutes before slicing.
Wrong Rack Position
Placing ribs on the top or bottom rack leads to uneven cooking. The top rack scorches the meat. The bottom rack leaves it undercooked. Always use the middle rack for the best results.
Expert Tips For Juicy, Flavorful Ribs Every Time
Here are some pro tips that take oven ribs from good to great.
- Brine overnight. Soak ribs in a saltwater solution for 4 to 12 hours before baking. This adds moisture deep into the meat.
- Use a rib rack. It keeps ribs elevated and promotes airflow. This leads to more even browning.
- Pat ribs dry before rubbing. Dry meat absorbs seasoning better and browns more evenly.
- Add liquid smoke for depth. A few drops in your rub mimics a smoky barbecue flavor without a smoker.
- Let ribs come to room temperature. Take them out of the fridge 30 minutes before baking. This promotes more even cooking.
- Rotate the pan halfway through. Ovens have hot spots. Rotating ensures even exposure to heat.
Quick Tip: If you want crispy ribs without foil wrapping, try baking at 350 degrees for the last 20 minutes. This crisps up the top layer without overcooking the inside.
Pork Ribs Vs Beef Ribs: Key Differences In Oven Baking
Pork and beef ribs are not the same. They require different approaches when you bake them in the oven.
| Factor | Pork Ribs | Beef Ribs |
|---|---|---|
| Cooking Time | 2.5 to 4 hours | 4 to 5 hours |
| Best Temperature | 275 to 325 degrees | 275 to 300 degrees |
| Best Placement | Bone side down | Bone side down |
| Texture | Tender and juicy | Rich and hearty |
| Foil Wrap | Recommended | Essential |
| BBQ Sauce | Classic pairing | Pair with tangy sauce |
Pork ribs are leaner and cook faster. They respond well to the foil wrap method. Beef ribs are fattier and need longer cooking times. The extra fat keeps them moist, but they still benefit from wrapping.
For pork belly style ribs, a slightly different approach works. These are not traditional rib cuts. They are thicker and have more fat. Bake pork belly ribs at 300 degrees for about 2.5 to 3 hours. The high fat content means they stay moist even without wrapping.
How To Know When Ribs Are Done
Knowing when tender ribs are ready is a skill every cook should develop. There are three reliable methods.
The Bend Test. Pick up the rack from one end with tongs. If it bends and cracks slightly on the surface, it is done. If it stays stiff, it needs more time.
The Meat Thermometer Test. Insert a probe into the thickest part of the meat. When it reads 195 to 203 degrees, the ribs are ready. This is the most accurate method.
The Toothpick Test. Insert a toothpick into the meat between bones. If it goes in easily, the collagen has broken down. The meat should feel tender and almost falling apart.
No single method is perfect on its own. Use a combination for the most reliable results.
Final Thoughts On Ribs Up Or Down In Oven
The answer to whether ribs should go up or down in oven is not a simple one-size-fits-all. It depends on what you value most. If you want juicy, moist ribs, bone-side down is your best bet. If you want a thick, caramelized crust, meat-side up delivers.
For most home cooks, bone-side down with the ribs on the middle rack is the winning combination. This setup promotes even cooking, retains moisture, and still allows for a nice bark to form. Add the foil wrap method and you are well on your way to restaurant-quality ribs at home.
Remember, oven-baked ribs are all about patience. Low and slow wins the race. Do not rush the process. Use a thermometer. Let the ribs rest. And most importantly, enjoy the process. Baking ribs is one of the most rewarding things you can do in the kitchen.
Next time someone asks you about ribs up or down in oven, you will know the answer. And more importantly, you will know why. Happy baking.
Frequently Asked Questions
Should ribs be placed bone side up or bone side down in the oven?
Bone-side down is the recommended placement for most oven-baked ribs. It protects the meat and allows the top to develop a crispy, caramelized crust. Place the ribs meat-side up with the bones resting on the pan or rack for the best results.
What oven temperature is best for baking ribs?
The ideal temperature range is 275 to 325 degrees Fahrenheit. Low and slow cooking breaks down collagen and creates tender, juicy ribs. Avoid temperatures above 350 degrees as they can dry out the meat before it cooks through.
How long does it take to bake ribs in the oven?
Pork ribs typically take 2.5 to 4 hours depending on the type and oven temperature. Baby back ribs cook faster at around 2.5 to 3 hours. Spare ribs and beef ribs need 3.5 to 5 hours. Always use an internal temperature of 195 to 203 degrees as your guide.
Should I wrap ribs in foil while baking?
Wrapping ribs in foil halfway through baking is a popular technique. It traps moisture and speeds up tenderizing. This method, known as the Texas crutch, produces very juicy ribs. If you prefer a crispier bark, skip the foil and bake uncovered the entire time.
Can I bake ribs without a rib rack?
Yes, you can bake ribs without a rib rack. Simply place them directly on a baking sheet lined with foil. For best results, elevate them slightly using balled-up foil underneath. This allows air to circulate and promotes even cooking on both sides.
How do I know when oven ribs are done?
The best way to check is with a meat thermometer. Insert it into the thickest part of the meat and look for 195 to 203 degrees Fahrenheit. You can also do the bend test by lifting one end with tongs. If the rack bends and cracks slightly, the ribs are ready to come out.
=== CONCLUSION ===
Baking ribs in the oven is both an art and a science. The simple question of ribs up or down in oven opens the door to better texture, juicier meat, and more flavor. Bone-side down gives you the best balance of moisture and browning for most home cooks. Combine this with the right oven temperature, proper rack position, and the foil wrap technique, and you will never serve dry ribs again.
Remember to remove the membrane, use a good rub, and monitor internal temperature closely. Patience is your best tool. Low and slow is the way to go. Whether you are cooking pork ribs, beef ribs, or even pork belly style cuts, these principles apply.
Now that you know the surprising answer about rib placement, it is time to put it into practice. Fire up your oven, grab your favorite rack of ribs, and give these tips a try. You will taste the difference in every bite. Happy cooking and enjoy those perfectly oven-baked ribs!