How To Cook Barbecue Spare Ribs In The Oven Like A Pro
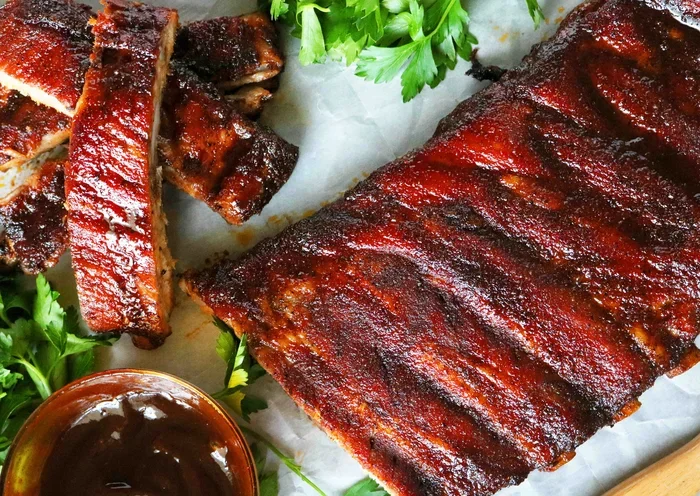
Discover how to cook barbecue spare ribs in the oven like a pro with our foolproof guide. You will learn the best rib rub recipes, ideal oven temperatures, and timing tricks that deliver fall-off-the-bone tender pork ribs every time. Whether you are a beginner or a seasoned griller, this method guarantees juicy, caramelized ribs with minimal effort.
There is nothing quite like the smell of barbecue ribs filling your kitchen. The aroma alone can make everyone in the house gather around the oven. If you have ever wondered how to cook barbecue spare ribs in the oven like a pro, you are in the right place.
This guide walks you through every single step. From choosing the best rack of ribs to pulling them out of the oven perfectly done, we cover it all. You do not need a smoker or a fancy grill. Your regular oven can produce restaurant-quality ribs with the right technique.
Oven-baked ribs might sound unusual if you are used to grilling outdoors. But here is the truth: oven cooking gives you more control over temperature and timing. You get consistent results every time. No flare-ups, no weather worries, and no guessing games.
Whether you are cooking for a family dinner, a weekend gathering, or just treating yourself, this method delivers. The ribs come out tender, juicy, and loaded with flavor. Let us dive in and get started.
Key Takeaways
- Low and slow is the secret: Cooking ribs at 275°F to 300°F in the oven creates the perfect tender texture.
- The 3-2-1 method works wonders: This tried-and-true technique ensures smoky, juicy barbecue spare ribs every time.
- Remove the membrane first: Peeling the thin inner membrane lets flavors penetrate deep into the meat.
- Use a meat thermometer: Internal temperature of 195°F to 203°F signals perfectly done ribs.
- Wrap in foil partway through: The Texas crutch keeps moisture locked in for succulent results.
- Let ribs rest before slicing: Resting for 15 to 20 minutes redistributes juices for a better bite.
📑 Table of Contents
- Choosing the Right Spare Ribs for Oven Cooking
- Preparing Your Ribs Before They Hit the Oven
- The Perfect Oven Temperature and Timing
- Using Foil and the Texas Crutch Technique
- Saucing and Finishing Your Ribs
- Resting and Serving Your Ribs
- Common Mistakes to Avoid
- Expert Tips for Next-Level Ribs
- Frequently Asked Questions
- Final Thoughts
Choosing the Right Spare Ribs for Oven Cooking
Types of Pork Ribs You Can Buy
Not all ribs are created equal. When you walk into the butcher counter or grocery store, you will see several options. The two most popular choices for oven-baked ribs are baby back ribs and spare ribs.
Baby back ribs come from the top of the pig’s rib cage. They are smaller, leaner, and cook faster. Spare ribs come from the lower belly area. They have more fat and connective tissue, which makes them incredibly juicy when cooked low and slow.
For this guide, we focus on barbecue spare ribs. They are meaty, forgiving, and perfect for oven cooking. If you are a beginner, spare ribs are your best bet. They are less likely to dry out compared to leaner cuts.
What to Look for When Buying
Pick ribs that have a good amount of meat covering the bones. Avoid ribs where the bones stick out too much. The meat should look pink and moist, not gray or dry.
Here are a few quick tips for selecting the best rack:
- Choose ribs with a thick layer of meat, at least a quarter inch.
- Look for even coloring across the entire rack.
- Check the date on the package for freshness.
- If possible, buy from a local butcher who cuts to order.
- One full rack usually feeds two to three people generously.
How Much Meat Per Person
A good rule of thumb is one full rack of ribs per two adults. If you are serving a crowd, plan for half a rack per person. Kids usually eat less, so adjust accordingly. It is always better to have a little extra than to run out.
Preparing Your Ribs Before They Hit the Oven
Removing the Membrane
This is the step most people skip, and it makes a huge difference. The rib membrane is that thin, translucent layer on the back of the rack. It blocks rub and smoke from reaching the meat. Removing it lets flavors penetrate deep into the bone.
To remove it, flip the rack so the bone side faces up. Use a butter knife to gently lift one corner of the membrane. Once you have a grip, use a paper towel for traction and pull it off in one smooth motion. It takes about 30 seconds per rack.
Applying the Dry Rub
A great dry rub is the foundation of amazing ribs. You can buy pre-made rubs at the store, but making your own is easy and far superior.
Here is a simple rub recipe that works beautifully on oven-baked ribs:
- Two tablespoons brown sugar
- One tablespoon smoked paprika
- One tablespoon garlic powder
- One tablespoon onion powder
- One teaspoon chili powder
- One teaspoon cumin
- One teaspoon black pepper
- Half a teaspoon cayenne pepper (optional for heat)
- Salt to taste
Mix all the ingredients together in a small bowl. Pat the ribs dry with paper towels first. Then apply a thin layer of yellow mustard on both sides. This acts as a glue for the rub. Sprinkle the mixture generously over the entire rack and press it in with your hands.
For the best results, let the rubbed ribs sit in the fridge for at least one hour or overnight. The longer they marinate, the deeper the flavor goes.
Bringing Ribs to Room Temperature
Never put cold ribs straight into the oven. Take them out about 30 minutes before cooking. Letting them come to room temperature ensures even cooking throughout. Cold spots in the center lead to uneven texture and longer cook times.
The Perfect Oven Temperature and Timing
Why Low and Slow Works Best
The key to tender, fall-off-the-bone ribs is patience. Cooking at a low temperature for a longer time breaks down the collagen in the connective tissue. This is what makes ribs so tender and juicy.
Set your oven to 275°F for the best results. This temperature is low enough to slowly render fat and soften tough connective tissue, but high enough to develop a good bark on the outside. Some cooks go as low as 250°F for even more tender results, but 275°F is the sweet spot for most home ovens.
If you are in a hurry, you can increase the temperature to 325°F. But the ribs will cook faster and you need to watch them more closely to prevent drying out.
The 3-2-1 Method Explained
The 3-2-1 method is the gold standard for cooking ribs in the oven. Here is how it works:
- First 3 hours: Cook the ribs unwrapped in the oven at 275°F. This develops the bark and starts the rendering process.
- Next 2 hours: Wrap the ribs tightly in heavy-duty aluminum foil with a splash of apple juice or cider vinegar. This steams the meat and makes it incredibly tender.
- Final 1 hour: Unwrap the ribs and return them to the oven. This dries out the surface slightly, which helps the sauce caramelize beautifully.
The entire process takes about six hours. It sounds like a lot, but most of that time is hands-off. You can go about your day while the oven does all the work.
Adjusting for Different Rib Sizes
Baby back ribs usually take about 4 to 5 hours total. Spare ribs need the full 6 hours or sometimes a bit longer. Use a meat thermometer to check doneness rather than relying on time alone. The target internal temperature is 195°F to 203°F.
Using Foil and the Texas Crutch Technique
What Is the Texas Crutch
The Texas crutch is simply the practice of wrapping ribs in foil or butcher paper during the cooking process. It traps steam and moisture, which speeds up cooking and keeps the meat from drying out.
For oven cooking, heavy-duty aluminum foil works perfectly. Regular foil is too thin and may tear during the wrapping process. You want something sturdy that holds in moisture.
When to Wrap
The ideal time to wrap is after about three hours of uncovered cooking. At this point, the bark has started to form and the meat has absorbed the rub flavors. Wrapping now locks in all that hard work.
Here is how to wrap properly:
- Lay out two sheets of heavy-duty foil, overlapping them for strength.
- Place the ribs meat-side down on the foil.
- Add a quarter cup of liquid to the center. Apple juice, broth, or even beer all work well.
- Fold the foil tightly around the ribs, sealing completely.
- Place the wrapped ribs back on the baking sheet and continue cooking.
Why You Should Not Skip the Unwrapping Phase
Some people leave the ribs wrapped the entire time. That produces very tender ribs, but they lack a good bark. The final unwrapped hour is essential for developing that slightly crispy, caramelized exterior. It is the difference between good ribs and great ribs.
Saucing and Finishing Your Ribs
When to Apply the Sauce
Timing your sauce application matters a lot. If you add it too early, the sugars in the sauce burn and turn bitter. The best time to apply barbecue sauce is during the final hour of cooking, after you have unwrapped the ribs.
Brush a thin layer of sauce on both sides. Let it cook for about 15 minutes. Then apply a second coat. Repeat this process two or three times during the last hour. Each layer builds up a sticky, glossy, caramelized coating.
Making a Simple Homemade BBQ Sauce
Store-bought sauce works fine, but a homemade version takes your ribs to the next level. Try this easy recipe:
- One cup ketchup
- Quarter cup apple cider vinegar
- Quarter cup brown sugar
- Two tablespoons molasses
- One tablespoon Worcestershire sauce
- One teaspoon garlic powder
- Half a teaspoon smoked paprika
- Salt and pepper to taste
Simmer everything in a saucepan over medium heat for about 10 minutes until it thickens slightly. Let it cool before brushing onto the ribs. The flavors meld together beautifully during the final hour of cooking.
Checking for Doneness
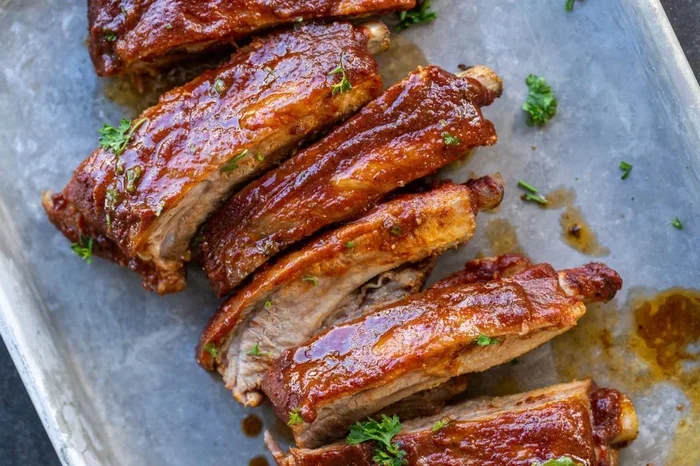
A properly done rack of ribs should bend easily when you pick it up from one end with tongs. The surface should be slightly cracked but not broken apart. Use a meat thermometer inserted into the thickest part of the meat, avoiding bone. You are aiming for 195°F to 203°F.
If the ribs are not quite there yet, just put them back in for another 30 minutes and check again. Patience pays off here.
Resting and Serving Your Ribs
Why Resting Matters
Once your ribs are done, resist the urge to cut into them right away. Resting allows the juices to redistribute throughout the meat. If you slice immediately, those juices run out onto the cutting board instead of staying in the meat.
Wrap the ribs loosely in foil and let them rest for 15 to 20 minutes. This small step makes a noticeable difference in every bite.
How to Cut and Serve
Use a sharp knife to cut between the bones. Each rib bone should come off as a separate piece with a good amount of meat attached. Serve with extra sauce on the side, coleslaw, cornbread, and baked beans for the complete barbecue experience.
Leftover ribs reheat wonderfully in the oven at 300°F for about 15 minutes. Add a splash of water or broth before reheating to keep them moist. They taste just as good the next day, if not better.
Common Mistakes to Avoid
Cooking at Too High a Temperature
This is the number one mistake people make. Cranking the oven up to 400°F or higher will give you tough, dry ribs in no time. The low temperature is non-negotiable if you want tender results. Trust the process and keep it low and slow.
Skipping the Membrane Removal
It only takes 30 seconds and makes a real difference. That membrane blocks flavor and creates a chewy texture that nobody enjoys. Do not skip this step.
Using Too Much Sauce Too Early
Sugar burns at high temperatures. If you slather on the sauce in the first few hours, it will turn black and bitter. Keep the sauce for the final hour only, and apply it in thin layers.
Not Using a Meat Thermometer
Guessing when ribs are done is a recipe for disappointment. A cheap instant-read thermometer takes the guesswork out completely. Invest in one if you do not already have one. Your ribs will thank you.
Cutting Into the Ribs Too Soon
We know the smell is tempting. But cutting too early releases all those hard-earned juices. Wait the full 15 to 20 minutes and you will be rewarded with much better texture and flavor.
Expert Tips for Next-Level Ribs
Add Wood Chips for a Smoky Flavor
You can add a smoky flavor to oven ribs by soaking wood chips and placing them in a foil pouch on the oven floor. Hickory, apple, and cherry wood chips all work beautifully. This simple trick adds depth and complexity that mimics outdoor smoking.
Use Apple Cider Vinegar in the Wrap
A splash of apple cider vinegar in the foil wrap adds a subtle tanginess that cuts through the richness of the pork. It also helps tenderize the meat further during the steaming phase.
Try the Reverse Sear for Extra Crispiness
For an extra crispy bark, finish the ribs under the broiler for 3 to 5 minutes after the final sauce application. Watch them closely so they do not burn. This adds a beautiful charred texture that is absolutely delicious.
Experiment with Different Rub Flavors
Once you master the basic method, start experimenting with different rubs. Coffee rubs, mustard-based rubs, and Asian-inspired spice blends all make fantastic variations on classic barbecue spare ribs.
Frequently Asked Questions
Can I cook ribs in the oven without foil?
Yes, you can cook ribs without foil, but they will cook faster and may dry out more easily. The foil wrap helps retain moisture and speeds up the cooking process. If you skip the foil, reduce your total cook time and check the ribs more frequently to prevent them from drying out.
How long does it take to cook ribs in the oven at 275 degrees?
At 275°F, a full rack of spare ribs takes about 5 to 6 hours total. Baby back ribs usually need 4 to 5 hours. The exact time depends on the thickness of the meat and your specific oven. Always use a meat thermometer to confirm doneness rather than relying on the clock alone.
What is the best temperature for ribs in the oven?
The best oven temperature for barbecue spare ribs is 275°F. This low temperature allows the collagen in the meat to break down slowly, resulting in tender, juicy ribs. You can go as low as 250°F for even more tenderness, or up to 325°F if you are short on time, but 275°F is the ideal balance of flavor and texture.
Do I need to flip my ribs during cooking?
No, you do not need to flip ribs during oven cooking. The oven heats evenly from all sides, so the ribs cook consistently without turning. However, if you notice one side browning faster than the other, you can rotate the pan halfway through for more even coloring.
Can I use frozen ribs for this method?
It is best to thaw ribs completely before cooking. Frozen ribs will cook unevenly and take much longer, increasing the risk of dried-out meat. Thaw them in the refrigerator overnight for the safest and most even results. If you must cook from frozen, add an extra two to three hours to the total cook time and check frequently.
How do I know when ribs are done without a thermometer?
The bend test is the traditional way to check rib doneness. Pick up the rack from one end with tongs. If the surface cracks slightly and the rack bends noticeably, they are done. The meat should have pulled back from the bone tips by about a quarter inch. A meat thermometer is still the most reliable method, targeting an internal temperature of 195°F to 203°F.
Final Thoughts
Cooking barbecue spare ribs in the oven is one of the most rewarding things you can do in the kitchen. It does not require expensive equipment or years of experience. With a little patience and the right technique, you can produce ribs that rival any backyard barbecue or restaurant.
The secret is simple: low temperature, plenty of time, and quality ingredients. Remove the membrane, apply a generous rub, cook low and slow, wrap for tenderness, and finish with a great sauce. Follow these steps and you will never look back.
Now that you know how to cook barbecue spare ribs in the oven like a pro, it is time to put this knowledge into action. Grab a rack of ribs, fire up your oven, and get ready for an incredible meal. Your family and friends will be asking you to make these ribs again and again.
Happy cooking, and enjoy every single bite of those perfectly tender, flavorful ribs.