How To Cook Chicken In A Nuwave Oven The Right Way
Learning how to cook chicken in a Nuwave oven is one of the easiest ways to get delicious, evenly cooked meals at home. The Nuwave oven uses convection cooking and infrared heat to make crispy chicken and juicy chicken without extra oil. Whether you are cooking a whole chicken, chicken breasts, or chicken wings, this guide covers everything you need to know.
Cooking chicken in a Nuwave oven is a game changer for home cooks. If you have been searching for the best way to make crispy chicken without deep frying, you have come to the right place. This guide will walk you through everything from preparation to plating.
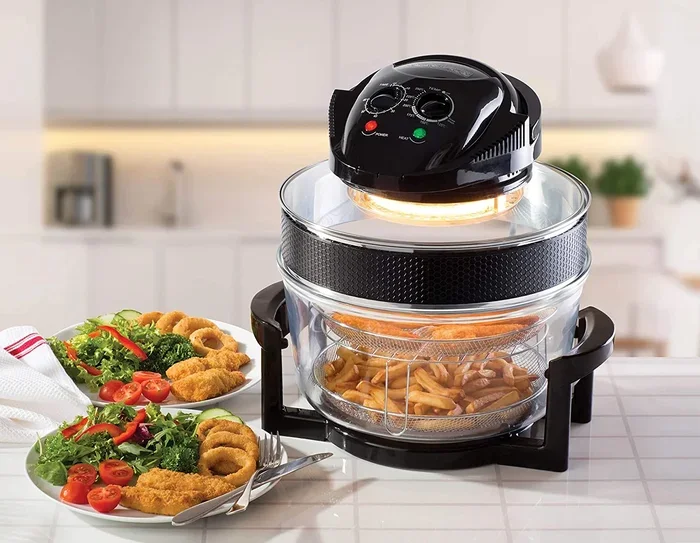
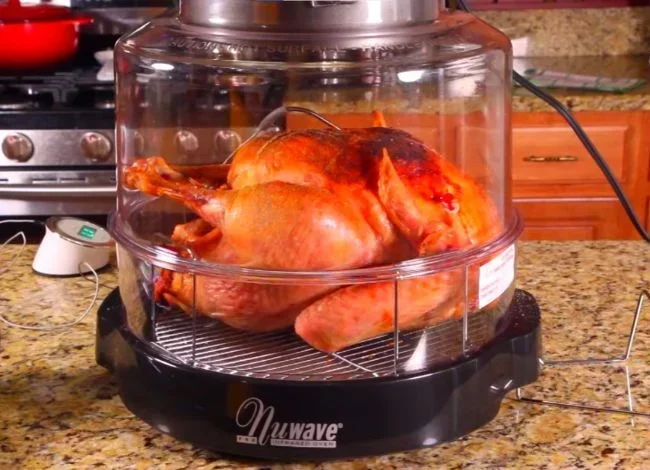
The Nuwave oven is a compact countertop convection oven that uses a combination of infrared heat and hot air circulation. This means your oven-baked chicken cooks faster and more evenly than a traditional oven. You get restaurant-quality results right on your kitchen counter.
In this article, we will cover the complete process of how to cook chicken in a Nuwave oven. You will learn about preparation, seasoning, cooking times, temperatures, and pro tips that make a huge difference. Whether you prefer chicken breast, chicken thighs, or a full whole chicken, this guide has you covered.
We will also share common mistakes to avoid and answer the most frequently asked questions about Nuwave oven recipes. By the end, you will feel confident enough to cook chicken in your Nuwave oven every single day. Let us get started.
Key Takeaways
- Preheat your Nuwave oven before placing chicken inside for even cooking results.
- Use a digital temperature probe to ensure your chicken reaches a safe internal temperature of 165°F.
- Season generously with herbs, spices, and marinades for maximum flavor.
- Rotate chicken during cooking to achieve evenly cooked chicken on all sides.
- Let chicken rest for 5 to 10 minutes after cooking to keep it juicy.
- Avoid overcrowding the non-stick tray so air circulates properly around the chicken.
- Experiment with different Nuwave oven recipes to find your favorite style of oven-baked chicken.
📑 Table of Contents
- Why the Nuwave Oven Is Great for Cooking Chicken
- Preparing Your Chicken for the Nuwave Oven
- Best Nuwave Oven Chicken Recipes
- Temperature and Cooking Time Guide
- Tips for Perfectly Juicy Chicken Every Time
- Common Mistakes to Avoid
- Expert Insights on Nuwave Oven Chicken
- Key Takeaways
- Frequently Asked Questions
- Conclusion
Why the Nuwave Oven Is Great for Cooking Chicken
The Nuwave oven stands out from regular ovens for several reasons. First, it uses convection cooking technology. This means a fan circulates hot air around the food. The result is evenly cooked chicken with a crispy outer layer and a moist inside.
Second, the Nuwave oven cooks faster than a standard oven. It uses infrared heat that penetrates the food directly. This cuts down cooking time significantly. You can roast a whole chicken in about 45 minutes instead of over an hour.
Third, the Nuwave oven is very versatile. You can bake, roast, grill, and even air fry. This makes it perfect for air fryer chicken and many other dishes. It is a great investment if you cook chicken often.
Benefits of Using a Nuwave Oven for Chicken
- Faster cooking times compared to conventional ovens.
- Crispy skin without needing to deep fry.
- Even heat distribution means no more undercooked spots.
- Easy to clean with the non-stick tray and accessories.
- Energy efficient since it preheats and cooks faster.
- Compact size fits easily on any kitchen counter.
- Digital controls make it simple to set time and temperature.
Preparing Your Chicken for the Nuwave Oven
Proper preparation is the first step to great chicken. How you prep your chicken before it goes into the Nuwave oven makes a big difference in flavor and texture. Do not skip this step.
Choose the Right Cut of Chicken
You can cook many different cuts of chicken in the Nuwave oven. Chicken breast is lean and cooks quickly. Chicken thighs are fattier and stay extra juicy. Chicken wings become perfectly crispy. A whole chicken works great for family meals.
Pick the cut that suits your meal plan. Each type of chicken has a slightly different cooking time and temperature. We will cover those details below.
Brine or Marinate for Flavor
Brining your chicken keeps it moist during cooking. A simple brine of water, salt, and sugar works wonders. Soak your chicken for at least 30 minutes or up to overnight.
Marinades add even more flavor. Try olive oil, garlic, lemon juice, and your favorite chicken seasoning. Let the chicken sit in the marinade for at least one hour. The longer it marinates, the more flavorful it becomes.
Pat Dry Before Cooking
This is a step many people skip. Use paper towels to pat your chicken dry before seasoning. Dry chicken skin gets crispier in the Nuwave oven. Wet chicken will steam instead of roast, and you will not get that golden, crispy finish.
Best Nuwave Oven Chicken Recipes
Now that your chicken is prepped, it is time to cook. Here are some of the best Nuwave oven recipes to try at home. Each one is simple and delivers amazing results.
Classic Roast Chicken Breast
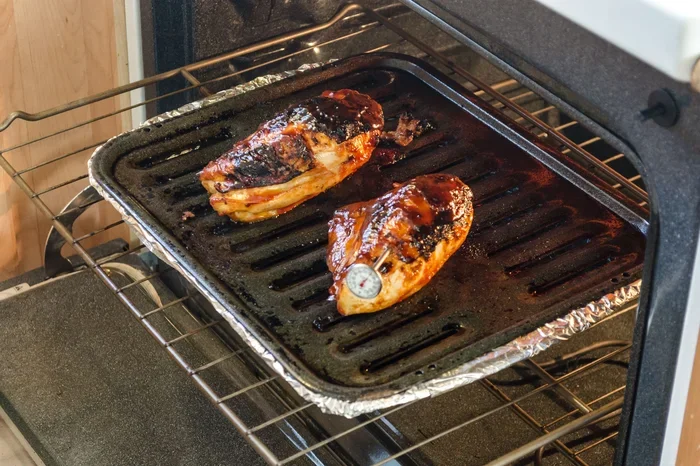
This recipe is perfect for a quick weeknight dinner. Preheat your Nuwave oven to 375 degrees Fahrenheit. Season your chicken breast with olive oil, salt, pepper, garlic powder, and paprika. Place the chicken on the non-stick tray.
Cook for 20 to 25 minutes. Use a digital temperature probe to check that the internal temperature reaches 165 degrees Fahrenheit. Let the chicken rest for 5 minutes before slicing. The result is juicy chicken with a light golden crust.
Crispy Whole Chicken
A whole chicken in the Nuwave oven is impressive but easy. Preheat to 350 degrees Fahrenheit. Rub the entire chicken with butter and your favorite chicken seasoning. Stuff the cavity with lemon halves and fresh herbs.
Place the chicken breast-side up on the roasting tray. Cook for 40 to 50 minutes. Remember to rotate chicken halfway through for even browning. The skin should be golden and crispy when done.
Honey Garlic Chicken Thighs
Chicken thighs are forgiving and full of flavor. Marinate bone-in thighs in a mix of honey, soy sauce, minced garlic, and olive oil. Let them sit for at least two hours.
Preheat the Nuwave oven to 375 degrees Fahrenheit. Place the thighs on the tray and cook for 30 to 35 minutes. The honey glaze caramelizes beautifully in the convection cooking environment. Serve with rice or vegetables for a complete meal.
Buffalo Chicken Wings
Making crispy chicken wings at home is so satisfying. Preheat the Nuwave oven to 400 degrees Fahrenheit. Toss wings in a little oil and your preferred seasoning. Place them on the non-stick tray in a single layer.
Cook for 22 to 28 minutes, flipping halfway through. After cooking, toss the wings in buffalo sauce. These are perfect for game day or a casual dinner with friends.
Breaded Chicken Tenders
Breaded chicken in the Nuwave oven is much healthier than deep fried. Dip chicken strips in beaten egg, then coat with breadcrumbs mixed with Parmesan cheese. Place them on the tray and cook at 400 degrees Fahrenheit for 12 to 15 minutes.
Flip once halfway through. The breading gets golden and crunchy without needing a deep fryer. Kids love these, and they are great for dipping in sauce.
Temperature and Cooking Time Guide
Getting the right cooking temperature and chicken cooking time is essential. Undercooked chicken is unsafe, and overcooked chicken is dry and tough. The Nuwave oven makes this easier because of its precise temperature controls.
Safe Internal Temperature
The USDA recommends cooking all poultry to an internal temperature of 165 degrees Fahrenheit. Always use a digital temperature probe to check the thickest part of the chicken. Do not rely on color alone. Some chicken can look done before it reaches a safe temperature.
General Cooking Time Chart
Cooking times vary based on the cut and size of the chicken. Here is a quick reference guide:
- Chicken breast (boneless): 20 to 25 minutes at 375°F.
- Chicken thighs (bone-in): 30 to 35 minutes at 375°F.
- Chicken wings: 22 to 28 minutes at 400°F.
- Whole chicken (3 to 4 lbs): 40 to 50 minutes at 350°F.
- Breaded chicken tenders: 12 to 15 minutes at 400°F.
These times are guidelines. Always check with a temperature probe for the best results. Factors like the starting temperature of the chicken and your specific Nuwave model can affect cooking time.
How to Check for Doneness
There are three reliable ways to check if your chicken is done. First, use a meat thermometer. Insert it into the thickest part without touching bone. Second, press the chicken. If it feels firm and the juices run clear, it is done. Third, make a small cut into the thickest part. If there is no pink, your chicken is ready.
Tips for Perfectly Juicy Chicken Every Time
Even experienced cooks sometimes end up with dry chicken. These tips will help you get juicy chicken every single time you use your Nuwave oven.
Do Not Overcook
The biggest mistake is cooking chicken too long. Once the internal temperature hits 165 degrees Fahrenheit, take it out immediately. The chicken will continue to cook slightly from residual heat. This is called carryover cooking, and it can dry out your chicken fast.
Use a Non-Stick Tray
The Nuwave oven comes with a non-stick tray. This tray promotes airflow and prevents the chicken from sticking. Make sure you place the chicken on the tray properly. Do not let pieces overlap, or the air will not circulate around them.
Let the Chicken Rest
Resting chicken after cooking is just as important as cooking it properly. Let the chicken sit for 5 to 10 minutes before cutting. This allows the juices to redistribute throughout the meat. The result is much more flavorful and moist chicken.
Season in Layers
For the best flavor, season your chicken in layers. Apply some seasoning before cooking, and add more after. This creates a more complex and deeper flavor profile. Do not be shy with your seasoning. The Nuwave oven’s even heat brings out the best in every spice.
Preheat the Oven
Always preheat your Nuwave oven before adding the chicken. A preheated oven starts cooking immediately. This helps the chicken cook more evenly and get a better sear on the outside. It only takes a few minutes to preheat.
Experiment with Different Chicken Seasoning Blends
Do not get stuck in a rut with the same old seasoning. Try different blends to keep meals exciting. Italian seasoning works great on chicken breast. Cajun spice adds a kick to chicken thighs. Lemon pepper is perfect for whole chicken. The possibilities are endless with Nuwave oven recipes.
Common Mistakes to Avoid
Even with the best oven, mistakes can happen. Here are the most common errors people make when cooking chicken in a Nuwave oven, and how to avoid them.
Skipping the Preheat
Some people put chicken into a cold oven. This leads to uneven cooking and longer cook times. Always preheat your Nuwave oven first. The chicken should go in when the oven is at the right temperature.
Overcrowding the Tray
It is tempting to fit as much chicken as possible on the tray. Overcrowding blocks airflow and causes uneven cooking. Chicken pieces should have space between them. If you need to cook a large batch, use multiple trays or cook in shifts.
Not Using a Temperature Probe
Guessing whether chicken is done is risky. A digital temperature probe takes the guesswork out completely. It is a small investment that pays off in food safety and better results. Get into the habit of using one every time.
Opening the Oven Too Often
Every time you open the Nuwave oven, heat escapes. This extends cooking time and can lead to uneven results. Only open the oven when you need to check or flip the chicken. Trust the process and let the oven do its job.
Forgetting to Flip
Flipping chicken halfway through cooking promotes even browning. If you do not flip, one side may get overly crispy while the other stays pale. Set a timer to remind yourself to flip the chicken at the halfway point.
Ignoring Carryover Cooking
Chicken continues to cook after you take it out of the oven. The internal temperature can rise by 5 to 10 degrees during resting. Pull the chicken off a few degrees early to account for this. Your temperature probe is your best friend here.
Expert Insights on Nuwave Oven Chicken
Cooking chicken in a Nuwave oven is straightforward, but a few expert tips can elevate your results. Professional chefs and home cooking experts share these insights.
First, always bring your chicken to room temperature before cooking. Take it out of the refrigerator 20 to 30 minutes before placing it in the Nuwave oven. Cold chicken cooks unevenly, with the outside overcooked before the inside is done.
Second, use the Nuwave oven’s rotating feature if your model has one. The rotating tray ensures all sides of the chicken get equal exposure to heat. This is especially helpful for a whole chicken or large pieces.
Third, do not be afraid to experiment. The Nuwave oven is forgiving. You can try different temperatures, times, and seasonings to find what works best for your taste. Keep a cooking journal to track what you tried and what you liked.
Key Takeaways
- Preheat your Nuwave oven before placing chicken inside for even cooking results.
- Use a digital temperature probe to ensure your chicken reaches a safe internal temperature of 165°F.
- Season generously with herbs, spices, and marinades for maximum flavor.
- Rotate chicken during cooking to achieve evenly cooked chicken on all sides.
- Let chicken rest for 5 to 10 minutes after cooking to keep it juicy.
- Avoid overcrowding the non-stick tray so air circulates properly around the chicken.
- Experiment with different Nuwave oven recipes to find your favorite style of oven-baked chicken.
Frequently Asked Questions
Can I cook frozen chicken in a Nuwave oven?
Yes, you can cook frozen chicken in a Nuwave oven, but you will need to increase the cooking time. It is best to thaw chicken first for more even cooking. If you cook from frozen, add about 50 percent more time and check the internal temperature frequently to make sure it reaches 165 degrees Fahrenheit throughout.
What temperature should I cook chicken in a Nuwave oven?
The ideal temperature depends on the cut. For chicken breast, cook at 375 degrees Fahrenheit. For whole chicken, use 350 degrees Fahrenheit. For wings and breaded chicken, 400 degrees Fahrenheit works best. Always use a digital temperature probe to confirm the internal temperature reaches 165 degrees Fahrenheit for food safety.
How long does it take to cook a whole chicken in a Nuwave oven?
A whole chicken weighing 3 to 4 pounds typically takes 40 to 50 minutes at 350 degrees Fahrenheit. Larger chickens may need a few extra minutes. The best way to check doneness is to insert a temperature probe into the thickest part of the thigh without touching bone. It should read 165 degrees Fahrenheit.
Do I need to flip chicken when cooking in a Nuwave oven?
Yes, flipping chicken halfway through cooking is recommended for even browning and crispiness. The Nuwave oven circulates hot air from all directions, but flipping ensures both sides get equal exposure. Use tongs to flip gently and avoid piercing the meat.
Is cooking chicken in a Nuwave oven healthier than deep frying?
Absolutely. The Nuwave oven uses hot air circulation to cook food, which means you need little to no oil. This significantly reduces the fat and calorie content compared to deep frying. You still get crispy, flavorful chicken without the extra grease, making it a much healthier choice for everyday meals.
Can I use aluminum foil in a Nuwave oven?
Yes, you can use aluminum foil in a Nuwave oven, but use it sparingly. Covering parts of the chicken with foil can prevent over-browning. However, do not cover the entire tray, as this blocks airflow and affects the convection cooking process. The Nuwave oven works best when air can circulate freely around the food.
Conclusion
Learning how to cook chicken in a Nuwave oven opens up a world of delicious, healthy meal options. The Nuwave oven makes it easy to get crispy chicken, juicy chicken, and perfectly oven-baked chicken every time. From chicken breast to whole chicken, the possibilities are endless.
Remember to always preheat your oven, use a digital temperature probe, and let your chicken rest after cooking. Avoid common mistakes like overcrowding the tray or skipping the flip. With the tips and Nuwave oven recipes shared in this guide, you are well on your way to becoming a confident chicken cook.
The beauty of the Nuwave oven is its simplicity and consistency. You do not need to be a professional chef to make amazing meals. Follow these steps, experiment with different chicken seasoning blends, and enjoy the process. Your family and friends will thank you for the delicious oven-baked chicken on the table. Start cooking today and taste the difference a Nuwave oven can make.