How To Cut Parchment Paper For Dutch Oven Like A Pro
Cutting parchment paper for your dutch oven doesn’t have to be tricky. This guide shows you the exact steps to measure, fold, and cut parchment paper to fit your pot like a pro. You will learn simple tricks that save time, prevent burning, and make clean-up a breeze every single time you cook.
Key Takeaways
- Measure the diameter first: Always measure your dutch oven before cutting to get the perfect fit.
- Use the fold-and-cut method: This simple technique creates a perfect circle every time.
- Match the parchment size to your pot: Different dutch oven sizes need different parchment dimensions.
- Avoid common mistakes: Cutting too small or using the wrong type of parchment causes problems.
- Reuse when safe: Clean parchment paper can sometimes be used a second time for the same recipe.
- Lining both the bottom and lid helps: It prevents sticking on the top and bottom of your food.
📑 Table of Contents
- Why Parchment Paper Is A Game Changer For Dutch Oven Cooking
- Understanding Your Dutch Oven And Parchment Paper Sizes
- Step-by-Step Guide To Cutting Parchment Paper For Your Dutch Oven
- Cutting Parchment For Different Dutch Oven Types And Shapes
- Quick Tips For Perfect Parchment Cuts Every Time
- Common Mistakes People Make When Cutting Parchment Paper
- Comparison: Parchment Paper Vs. Other Lining Options
- How Parchment Paper Improves Your Dutch Oven Recipes
- How To Store Cut Parchment Paper For Future Use
- Frequently Asked Questions
- Conclusion
Why Parchment Paper Is A Game Changer For Dutch Oven Cooking
If you love cooking with a dutch oven, you already know how versatile this pot can be. It bakes bread, roasts meat, and simmers stews beautifully. But cleaning it afterward? That part is not always fun. Food sticks to the bottom. Sauces burn onto the walls. You scrub and scrub, and still see remnants.
This is where parchment paper comes in. It lines the inside of your pot and creates a non-stick barrier. Your food cooks evenly, and your pot stays clean. But here is the thing — parchment paper for dutch oven needs to be cut correctly. If you just tear off a random piece, it will not fit. It will bunch up. It will burn at the edges.
That is exactly why this guide exists. Whether you are a beginner or a seasoned cook, you will find practical steps here. We will walk you through every method, every size, and every tip you need. By the end, you will be cutting parchment like a professional chef.
Dutch oven baking works best when everything is in place before you start. Having your parchment ready means you can focus on the recipe, not on making a liner. Let us get into the details and make your next cook effortless.
Understanding Your Dutch Oven And Parchment Paper Sizes
Before you grab a pair of scissors, you need to know what you are working with. Not all dutch ovens are the same size. And not all parchment paper comes in the same dimensions. Understanding both sides of the equation makes everything easier.
Standard Dutch Oven Sizes
Most dutch ovens come in a few common sizes. The smallest is usually around 3.5 quarts. The most popular size is 5 to 6 quarts. Larger pots can go up to 10 or even 13 quarts. Each size has a different diameter at the top and bottom.
Here is a quick look at common sizes:
- 3.5 quart pot: About 9 to 10 inches in diameter
- 5 quart pot: About 11 to 12 inches in diameter
- 6 quart pot: About 12 to 13 inches in diameter
- 7 quart pot: About 13 to 14 inches in diameter
- 10 quart pot: About 15 to 16 inches in diameter
The parchment paper dimensions you need depend on the diameter of your pot. Always measure the inside of the pot at the top rim for the most accurate reading. The bottom may be slightly smaller, so the top measurement gives you a safe starting point.
Types Of Parchment Paper To Use
Not all parchment paper is created equal. When you are lining a dutch oven, you want food-safe parchment that can handle high heat. Most standard parchment paper can withstand temperatures up to 450 degrees Fahrenheit. That covers most dutch oven recipes.
Here are the types you might encounter:
- Standard parchment sheets: Usually sold in rolls or pre-cut sheets. Great for most needs.
- Pre-cut round parchment: Sold in specific sizes. Convenient but less flexible.
- Reusable silicone liners: Not actual parchment, but a popular alternative.
- Butter paper: Sometimes called parchment in stores, but check the heat rating first.
For cutting your own liner, standard parchment sheets work best. They are easy to handle, widely available, and very affordable. You can find them at any grocery store or online. When you cut parchment paper at home, you control the size and shape exactly.
Step-by-Step Guide To Cutting Parchment Paper For Your Dutch Oven
Now let us get to the main event. This section breaks down the entire process into simple, easy-to-follow steps. You can use this method every single time, no matter the pot size.
Step 1: Measure Your Dutch Oven
Place your dutch oven on a flat surface. Use a measuring tape or ruler to measure the inside diameter at the top rim. Write this number down. It is the key measurement you will use to cut your parchment.
Pro tip: Measure both the top and the bottom. If there is a big difference, use the top measurement. The parchment will drape down the sides, which is exactly what you want.
Step 2: Fold The Parchment Paper Into A Square
Take a sheet of parchment paper and lay it flat on your cutting board. Fold it in half diagonally to form a triangle. Fold it in half again to make a smaller triangle. One more fold gives you an even smaller triangle.
The goal here is to create a folded point that matches or slightly exceeds the radius of your pot. The radius is half the diameter. So for a 12-inch pot, you need the folded point to reach at least 6 inches from the corner.
Step 3: Cut The Corner To Create A Circle
Hold your folded triangle with the pointed end facing up. Place it over your pot or a plate that matches the pot’s diameter. The folded point should sit at the center of the pot.
Now, with your scissors, cut along the curved edge of the pot. Cut through all the layers of parchment at once. When you unfold the paper, you will have a perfect circle. This is the parchment paper circle that will line your pot.
This fold-and-cut method is the most reliable way to get a clean round shape. It works every time and requires no special tools.
Step 4: Check The Fit Before Cooking
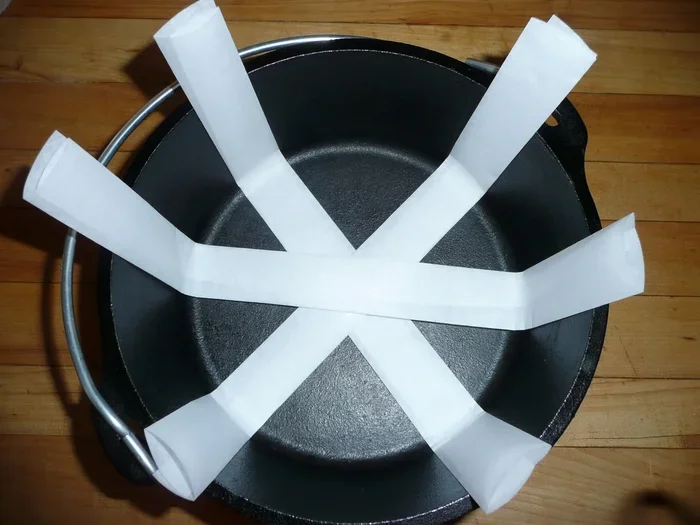
Place the cut parchment inside your dutch oven. It should drape evenly over the sides. If it is too small, it will not reach the edges. If it is too large, it will bunch up in the center.
If the fit is off, trim a little off the edge. It is always better to cut less and adjust than to cut too much. You can always trim more, but you cannot add paper back.
Step 5: Add Your Food And Start Cooking
With the parchment in place, add your ingredients as the recipe directs. The paper will prevent sticking and make cleanup effortless. When you are done cooking, simply lift the parchment out with the food inside. Done.
Cutting Parchment For Different Dutch Oven Types And Shapes
Not every dutch oven is a standard round pot. Some have unique shapes that require a different approach. Let us look at the most common variations.
Round Dutch Ovens
The round dutch oven is the most common type. The fold-and-cut method works perfectly for these. Simply follow the steps above and you will get a great fit every time. Round pots are the easiest to line because the shape is consistent.
Oval Dutch Ovens
An oval dutch oven needs a different cutting approach. You cannot use the fold-and-cut circle method here. Instead, measure the longest and shortest diameters. Cut an oval shape from the parchment by using a template or by freehand cutting.
One trick is to fold a large sheet of parchment in half, place it over the pot, and trace the oval shape with a pencil. Then cut along the line. This gives you a custom-fit liner for oval pots.
Rectangular Or Square Dutch Ovens
Some dutch ovens come in rectangular shapes, especially the smaller ones. For these, you simply measure the length and width and cut a rectangle. The fold-and-cut method still works — just fold the paper to match the corner dimensions and trim accordingly.
Lining The Dutch Oven Lid
Do not forget about the lid! Many people overlook this, but lining the lid helps too. It prevents condensation from dripping back onto your food in an uneven way. It also keeps the lid clean.
To cut parchment for the lid, measure the inside of the lid the same way you measured the pot. The lid is usually slightly smaller, so use that measurement. Cut a circle or shape to fit, and place it inside the lid before cooking.
Quick Tips For Perfect Parchment Cuts Every Time
Small details make a big difference when you are cutting parchment for a dutch oven. Here are some tips that experienced cooks swear by.
- Use a sharp pair of scissors: Dull scissors tear the paper and give you jagged edges. A clean cut makes a better fit.
- Work on a flat surface: Cutting on a wobbly table leads to uneven circles. Use a sturdy cutting board.
- Cut slightly larger if you are unsure: You can always trim down. A slightly large liner is better than one that is too small.
- Keep a template handy: Trace your pot’s outline on cardboard once and keep it. Next time, you just place it on the parchment and cut.
- Use the pencil trace method for oval pots: This gives you the most accurate shape without guesswork.
- Do not use wax paper: Wax paper is not the same as parchment paper. It will melt in a hot dutch oven and create a mess.
Expert Insight
Professional chefs often prepare their parchment liners before they start cooking. This way, everything is ready to go when the pot heats up. Taking two extra minutes to cut your parchment paper for dutch oven ahead of time saves frustration during the actual cooking process. Make it a habit, and you will never think twice about it again.
Common Mistakes People Make When Cutting Parchment Paper
Even experienced cooks sometimes make mistakes with parchment paper. Knowing what to avoid saves you time and ruined meals.
Cutting The Paper Too Small
The most common mistake is cutting the parchment too small. When the paper does not reach the edges of the pot, food sticks to the exposed metal. You end up with burnt residue that is hard to clean. Always measure carefully and cut generously.
Using The Wrong Type Of Paper
Some people confuse parchment paper with wax paper or aluminum foil. Each has a different purpose. Wax paper cannot handle high heat and will smoke or melt in a hot dutch oven. Stick to actual parchment paper for lining.
Forgetting To Account For The Sides
The parchment needs to drape over the sides of the pot. If you only cut to the diameter of the bottom, it will be too small. Always use the top rim measurement, which is larger than the bottom.
Not Adjusting For Different Recipes
Some recipes need the parchment to cover the bottom only. Others need full lining that reaches up the sides. Think about what your recipe requires before you cut. A bread-baking recipe has different needs than a stew recipe.
Reusing Dirty Parchment
You can sometimes reuse clean parchment paper, but not if it is greasy or has burnt food on it. Reusing dirty parchment can affect the taste of your food and may even pose a fire risk in a hot dutch oven.
Comparison: Parchment Paper Vs. Other Lining Options
Curious about how parchment paper compares to other lining options for your dutch oven? Here is a quick side-by-side look.
| Lining Option | Heat Resistance | Reusable? | Ease Of Cutting | Best For |
|---|---|---|---|---|
| Parchment Paper | Up to 450 F | Sometimes | Very Easy | Most dutch oven recipes |
| Aluminum Foil | Up to 1200 F | No | Easy | High-heat roasting |
| Silicone Liner | Up to 500 F | Yes | No Cutting Needed | Frequent bakers |
| Wax Paper | Not heat safe | No | Easy | Cold storage only |
| No Liner | N/A | N/A | N/A | Seasoned cast iron only |
As you can see, parchment paper strikes the best balance for most home cooks. It is easy to cut, safe for dutch oven temperatures, and helps with clean-up. Silicone liners are great if you bake often, but they cost more upfront. Aluminum foil works for high-heat tasks but does not create the same non-stick surface as parchment.
How Parchment Paper Improves Your Dutch Oven Recipes
Using parchment paper inside your dutch oven is not just about easy cleaning. It actually improves your cooking in several ways.
First, it promotes even cooking. The paper creates a gentle barrier between the food and the hot metal. This means your bread bakes evenly on the bottom. Your stew meats do not stick or burn. Your vegetables roast without sticking to the sides.
Second, it helps with dutch oven meal prep. When you line the pot ahead of time, you can cook multiple dishes in the same pot without scrubbing between uses. This is a huge time-saver for busy weeknights.
Third, it keeps your pot’s seasoning intact. Cast iron dutch ovens need proper care to maintain their seasoning. Scrubbing off burnt food can wear down the seasoning over time. Parchment paper protects the surface and helps your pot last longer.
Fourth, it makes dutch oven baking more fun. When you bake bread in a dutch oven, the parchment helps the dough release cleanly. You get a beautiful loaf without tearing or sticking. That alone is worth the extra two minutes of preparation.
How To Store Cut Parchment Paper For Future Use
If you have leftover parchment after cutting a liner, do not throw it away. You can store it for future use. Fold the cut circle or shape and keep it in a dry place. Many people keep a stack of pre-cut parchment circles in a kitchen drawer for quick access.
You can also trace your pot’s outline on a piece of cardboard and use it as a cutting template. This way, next time you need a liner, you just place the template on the parchment and cut. It is fast, easy, and foolproof.
Store your parchment paper in a cool, dry area away from direct heat. Humidity can make it weak and more likely to tear. A kitchen cabinet or drawer works perfectly for this.
Frequently Asked Questions
Can I use regular scissors to cut parchment paper for my dutch oven?
Yes, regular scissors work perfectly fine for cutting parchment paper. Just make sure they are sharp enough to give you a clean edge. Dull scissors can tear the paper and make it harder to get a smooth circle or shape for your pot.
Is parchment paper safe to use in a dutch oven at high temperatures?
Most parchment paper is safe up to 450 degrees Fahrenheit, which covers the majority of dutch oven cooking temperatures. Always check the packaging of your specific parchment brand to confirm the heat rating before using it in a hot pot.
Can I cut parchment paper for a round dutch oven using just my hands?
You can tear parchment by hand, but it will not give you a clean circle. The fold-and-cut method with scissors is much more reliable. It gives you a precise round shape that fits your pot evenly all the way around.
How do I know if my parchment paper is the right size for my dutch oven?
The parchment should drape evenly over the sides of the pot with a small overlap. If it bunches up in the center or does not reach the edges, it is either too small or too large. Trim it until it fits snugly and smoothly.
Can I reuse parchment paper after cooking in my dutch oven?
If the parchment is clean and not greasy or burnt, you can reuse it for a similar recipe. However, for best results and food safety, use fresh parchment each time. Reusing dirty parchment can affect flavor and may pose a safety risk at high temperatures.
What is the best way to cut an oval parchment shape for an oval dutch oven?
The best method is to fold a large sheet of parchment in half, place it over the oval pot or lid, and trace the shape with a pencil. Then cut along the traced line. This gives you an accurate oval shape that matches your pot perfectly every time.
Conclusion
Cutting parchment paper for dutch oven is a simple skill that makes a huge difference in your cooking experience. It saves you time during preparation, protects your pot from wear, and makes cleanup nearly effortless. With the right measurements and a pair of scissors, you can create a perfect liner for any dutch oven size or shape.
Remember to always measure your pot first. Use the fold-and-cut method for round pots and the trace-and-cut method for oval or rectangular ones. Avoid the common mistakes we covered, and you will have great results every time. Keep a few pre-cut circles on hand, and you will be ready to cook at a moment’s notice.
The next time you pull out your dutch oven, take those extra two minutes to cut your parchment paper properly. Your food will cook better, your pot will stay in great condition, and your cleanup will be a breeze. Once you make it a habit, you will wonder how you ever cooked without it.