How To Roast Ribs In The Oven And Get Amazing Flavor
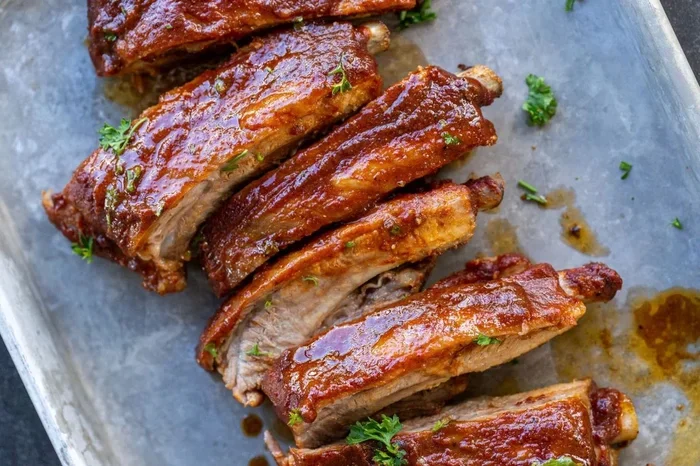
Learning how To Roast Ribs In The Oven is easier than you think. This guide walks you through choosing the best ribs, building a flavorful rub, and cooking them low and slow for fall-off-the-bone results. You will master oven temperature, timing, wrapping tricks, and saucing techniques that turn ordinary ribs into a backyard barbecue masterpiece.
There is something magical about how To Roast Ribs In The Oven. The kitchen fills with a smoky, sweet aroma that makes everyone gather around the counter. Whether you are a beginner or a seasoned home cook, oven-roasted ribs deliver restaurant-quality results without a single flare-up.
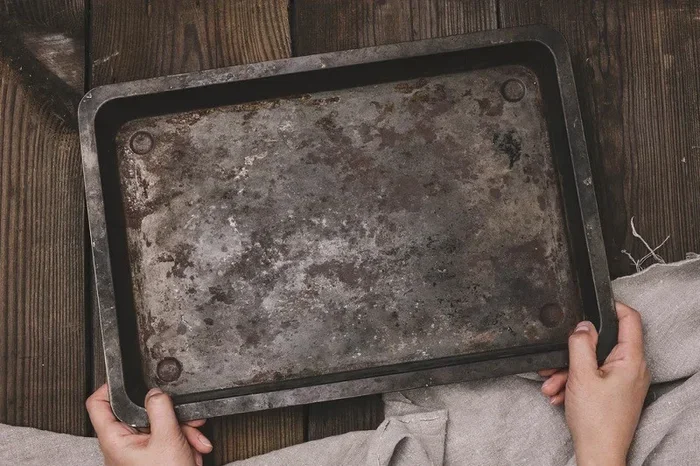
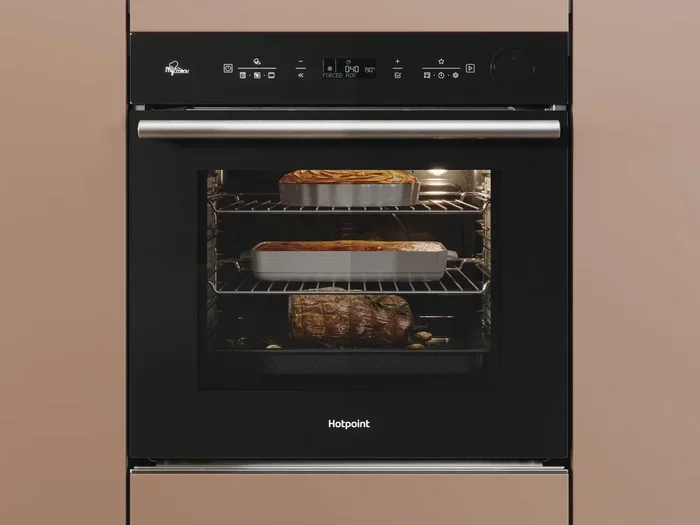
Oven roasting ribs gives you total control over temperature, timing, and flavor. You do not need a smoker or a backyard grill. A standard oven, a baking sheet, and a little patience are all you need. This guide covers everything from selecting the perfect rack to slicing and serving like a pro. By the end, you will feel confident enough to make oven roasted ribs your go-to weekend recipe.
The beauty of baking ribs in the oven lies in the consistency. Unlike grilling, where wind and weather can throw off your cook time, the oven holds a steady temperature. This means evenly cooked meat every single time. You get that beautiful caramelized exterior with a tender, juicy interior. Let us dive into the full process step by step.
Key Takeaways
- Choose the right ribs: Baby back ribs and spare ribs each bring unique flavor and texture to your oven roast.
- Remove the membrane: Peeling off the thin inner membrane lets seasoning penetrate deep into the meat.
- Low and slow is the secret: Cooking ribs at 275°F to 300°F for 3 to 4 hours creates tender, juicy results.
- Build layers of flavor: A dry rub applied hours ahead, combined with a glaze or sauce near the end, makes ribs unforgettable.
- Wrap in foil partway through: The Texas crutch method locks in moisture and speeds up cooking without sacrificing bark.
- Rest before serving: Letting ribs rest for 15 to 20 minutes redistributes juices for a better bite.
- Use a meat thermometer: Internal temperature of 195°F to 205°F means your ribs are perfectly done.
📑 Table of Contents
- Choosing the Best Ribs for Oven Roasting
- Preparing Your Ribs for the Oven
- The Perfect Oven Temperature and Cooking Time
- Building Layers of Flavor with Rubs and Sauces
- Wrapping Techniques for Moisture and Tenderness
- Resting and Serving Your Ribs
- Common Mistakes to Avoid
- Expert Tips for Next-Level Oven Ribs
- Comparing Rib Cooking Methods
- Conclusion
Choosing the Best Ribs for Oven Roasting
Understanding Different Rib Cuts
Not all ribs are created equal. The two most popular choices for oven roasting are baby back ribs and spare ribs. Baby back ribs come from the top of the pig’s rib cage, near the backbone. They are smaller, leaner, and cook faster. Many people prefer them because they are tender and have a mild, sweet flavor.
Spare ribs come from the lower belly area. They are larger, fattier, and packed with more bold flavor. They take a bit longer to cook, but the extra fat keeps them incredibly moist. St. Louis-style spare ribs are spare ribs that have been trimmed for a more uniform shape. They are a favorite for oven barbecue ribs because they lay flat on a baking sheet.
When shopping, look for ribs with a good layer of fat but not too much. The meat should be pink and firm, not gray or slimy. Bone-in ribs are the best choice for oven roasting. The bones act as a natural heat shield, protecting the meat from drying out. Avoid pre-cut or pre-seasoned ribs if you want full control over your flavor profile.
How Many Ribs to Buy
A general rule is about half a pound of raw ribs per person. So if you are feeding four people, grab two pounds of ribs. It is always better to buy a little extra. Leftover ribs taste even better the next day, reheated gently in the oven or on a grill.
Preparing Your Ribs for the Oven
Removing the Membrane
This is the step most people skip, and it makes a huge difference. The membrane is that thin, translucent sheet on the back of the rib rack. It prevents seasoning from reaching the meat and creates a chewy texture that nobody wants. Removing it is simple and takes only a minute.
Turn the ribs bone-side up. Use a butter knife to loosen the membrane at one corner. Once you have a grip, gently peel it off with a paper towel for better traction. Some people use a piece of foil to pull it away. It might not come off in one piece, and that is totally fine. Just get as much of it as you can.
Trimming Excess Fat
While some fat is good, thick pockets can cause flare-ups and greasy ribs. Use a sharp knife to trim any large, hard chunks of fat from the surface. Leave a thin layer so the meat stays moist during the long cook. This is a small step that elevates your slow roast ribs from good to great.
Applying the Dry Rub
A dry rub is the foundation of flavor for oven roasted ribs. You can buy pre-made rubs, but making your own is incredibly easy and worth the effort. A basic rub combines brown sugar, paprika, garlic powder, onion powder, salt, black pepper, and a touch of cayenne for heat.
Mix your rub in a small bowl. Pat the ribs dry with paper towels first. This helps the rub stick better. Sprinkle the rub generously over all sides of the ribs. Press it in with your hands so it adheres to the meat.
For the best results, apply the rub at least one hour before cooking. Even better, wrap the ribs in plastic wrap and refrigerate them overnight. The longer the rub sits, the deeper the flavor penetrates. This is a key secret behind fall off the bone ribs that taste like they came from a competition barbecue pit.
The Perfect Oven Temperature and Cooking Time
Why Low and Slow Works Best
The single most important factor in how To Roast Ribs In The Oven is temperature. Low and slow is not just a catchy phrase. It is the science behind tender, pull-apart ribs. Cooking at too high a temperature dries out the meat before the connective tissue has time to break down.
Set your oven to 275°F. This temperature allows the fat to render slowly and the collagen in the meat to dissolve into gelatin. The result is ribs that are juicy, tender, and full of flavor. If you are in a hurry, you can go up to 300°F, but 275°F is the sweet spot for most pork ribs oven recipes.
How Long to Cook Ribs in the Oven
Cooking time depends on the type and size of your ribs. Here is a general guide:
- Baby back ribs: 2.5 to 3 hours at 275°F
- St. Louis spare ribs: 3 to 3.5 hours at 275°F
- Full spare ribs: 3.5 to 4 hours at 275°F
These times are estimates. The real indicator of doneness is internal temperature. Use a digital meat thermometer inserted into the thickest part of the meat, avoiding bone. You are aiming for an internal temperature between 195°F and 205°F. At this range, the meat should pull back from the bone by about a quarter inch, and the bones should be slightly exposed.
Another test is the bend test. Pick up the rack of ribs from one end with tongs. If the surface cracks slightly, the ribs are done. If they bend without cracking, they need more time. This hands-on approach helps you learn the feel of perfectly cooked oven braised ribs.
Using a Meat Thermometer
A meat thermometer removes all guesswork from rib cooking time. Digital probe thermometers are ideal because you can monitor the temperature without opening the oven door every few minutes. Every time you open the door, heat escapes and your cook time increases. Trust the thermometer, not the clock.
Building Layers of Flavor with Rubs and Sauces
Creating Your Own Dry Rub
A great dry rub balances sweet, savory, smoky, and spicy notes. Here is a simple formula that works beautifully for dry rub ribs:
- 1/4 cup brown sugar
- 2 tablespoons smoked paprika
- 1 tablespoon garlic powder
- 1 tablespoon onion powder
- 1 teaspoon salt
- 1 teaspoon black pepper
- 1/2 teaspoon cayenne pepper (optional)
Mix everything together and store extras in an airtight jar. This rub works on chicken, pork shoulders, and even roasted vegetables. The smoked paprika adds a subtle depth that mimics the flavor of a traditional wood fire.
When to Apply Sauce
Many people make the mistake of putting sauce on too early. Sugar-based sauces burn at high temperatures, leaving a bitter, blackened coating. The best approach is to apply sauce during the last 20 to 30 minutes of cooking. This gives the sauce time to thicken and caramelize without scorching.
Brush on a thin layer of BBQ sauce for ribs, then add another coat every 10 minutes. You want two to three thin layers, not one thick coat. This builds a glossy, sticky glaze that clings to every curve of the rib. For a homemade glaze, mix ketchup, apple cider vinegar, honey, and a splash of Worcestershire sauce. It pairs wonderfully with honey glazed ribs straight from the oven.
Experimenting with Flavor Profiles
Do not be afraid to get creative with your rib seasoning ideas. Here are three flavor variations to try:
- Asian-inspired: Add soy sauce, ginger, and sesame oil to your rub. Glaze with a hoisin and honey mixture.
- Memphis-style: Go heavy on the paprika and black pepper with a tangy tomato-based sauce on the side.
- Kansas City-style: Use a thick, sweet, molasses-based sauce brushed on generously during the last half hour.
Each profile brings a different personality to your oven roasted ribs. Switching between them keeps the recipe fresh and exciting week after week.
Wrapping Techniques for Moisture and Tenderness
The Texas Crutch Method
The Texas crutch is a technique where you wrap ribs in foil partway through the cook. This traps steam, accelerates the breakdown of tough connective tissue, and keeps the meat from drying out. It is one of the most effective ways to achieve fall off the bone ribs in a standard home oven.
After about 2 hours of uncovered cooking, pull the ribs out and lay them on a large sheet of heavy-duty foil. Place the ribs in the center and fold the foil up around them, sealing the edges to create a tight packet. Return the wrapped ribs to the oven for the remaining cook time.
Some cooks add a splash of apple juice, beer, or apple cider vinegar inside the foil before sealing. This adds a subtle moisture and a hint of tang. The liquid creates steam that bastes the meat from the inside. Be careful not to add too much liquid, or you will end up with boiled ribs instead of roasted ones. A few tablespoons is plenty.
Unwrapping for the Bark
Unwrap the ribs during the last 30 to 45 minutes of cooking. This allows the surface to dry out slightly and develop a beautiful bark. The bark is that sticky, caramelized crust that gives oven-roasted ribs their signature texture and visual appeal. Without this step, the ribs can become soft and mushy from too much trapped steam.
When you unwrap, you will notice a burst of smoky, concentrated flavor. This is the moment where the ribs start looking like something from a high-end barbecue restaurant. Apply your sauce during this unwrapped phase for maximum adhesion and flavor.
Resting and Serving Your Ribs
Why Resting Matters
Resting is the final and most overlooked step in how To Roast Ribs In The Oven. When you pull the ribs out, the juices are concentrated near the bone and the center of the meat. If you cut immediately, those juices run out onto the cutting board instead of staying in the meat.
Let the ribs rest for 15 to 20 minutes after removing them from the oven. Tent them loosely with foil to keep them warm. During this time, the temperature equalizes throughout the meat, and the juices redistribute. The result is a more flavorful, juicier bite with every piece.
Slicing and Serving Tips
Use a sharp knife or a pair of heavy-duty kitchen shears to cut between the bones. Slice each rib section apart along the bone line. Serve them bone-up on a platter with extra sauce on the side.
Pair your oven barbecue ribs with classic sides like coleslaw, baked beans, cornbread, or roasted vegetables. A cold drink and a checkered tablecloth set the mood for a meal that feels like a summer cookout, even in the dead of winter.
Storing Leftover Ribs
Leftover ribs keep well in the refrigerator for up to four days. Store them in an airtight container. To reheat, wrap them in foil and warm them in the oven at 250°F for about 15 minutes. This prevents the meat from drying out. You can also freeze cooked ribs for up to three months. Wrap them tightly in foil and place them in a freezer-safe bag.
Common Mistakes to Avoid
Even experienced cooks make mistakes when roasting ribs. Here are a few pitfalls to watch out for:
- Cooking at too high a temperature: This dries out the meat before the collagen breaks down. Patience is everything.
- Skipping the membrane removal: It is a quick step that dramatically improves texture and flavor absorption.
- Adding sauce too early: Sugary sauces burn and turn bitter. Always apply sauce in the final 20 to 30 minutes.
- Not using a thermometer: Relying on time alone is unreliable. Every oven is different, and every rack of ribs varies in thickness.
- Over-wrapping in foil: Too much liquid in the foil packet leads to steamed, mushy ribs instead of roasted ones.
- Cutting too soon: Resting is not optional. It is essential for juicy, flavorful ribs.
Expert Tips for Next-Level Oven Ribs
Take your oven roasted ribs to the next level with these pro tips from barbecue enthusiasts and pitmasters:
- Use a rack over a baking sheet: Elevating the ribs allows hot air to circulate underneath, promoting even cooking and a crispier bottom.
- Add wood chips for smoke flavor: Soak hickory or applewood chips in water for 30 minutes, wrap them in foil with a few holes poked in the top, and place the packet on the oven floor during the first hour of cooking.
- Brush with mustard before the rub: A thin layer of yellow mustard acts as a glue for the dry rub and adds a tangy base note that disappears during cooking.
- Double your rub batch: Making extra rub means you always have it on hand for spontaneous rib nights. It keeps for months in a sealed jar.
- Let the ribs come to room temperature: Taking the ribs out of the fridge 30 minutes before cooking promotes more even cooking throughout the rack.
These small adjustments might seem minor, but they add up to a noticeable difference in flavor, texture, and presentation. Your oven braised ribs will taste like they came from a competition-level smoker, all from the comfort of your kitchen.
Comparing Rib Cooking Methods
While this guide focuses on oven roasting, it helps to understand how it compares to other methods. Here is a quick look at the main approaches:
- Oven roasting: Consistent heat, easy temperature control, no special equipment needed. Best for beginners and busy weeknights.
- Grilling: Adds a smoky char and grill marks. Requires more attention and is weather-dependent.
- Smoking: Delivers the deepest, most complex flavor. Takes 6 to 8 hours and requires a smoker and wood chips.
- Slow cooker: Hands-off and convenient but lacks bark and caramelization. Best for shredded rib recipes.
For most home cooks, oven roasting hits the perfect balance of flavor, convenience, and consistency. It is the method that delivers amazing flavor without requiring a backyard setup or hours of monitoring.
Conclusion
How To Roast Ribs In The Oven is one of the most rewarding cooking skills you can develop. It does not require fancy equipment, expensive cuts, or years of experience. With the right ribs, a simple dry rub, steady oven temperature, and a little patience, you can create ribs that rival any barbecue joint in town.
Start with the basics: remove the membrane, apply a generous rub, cook low and slow at 275°F, wrap partway through, and finish with a flavorful sauce. Master these steps, and you will never go back to dry, tough ribs again. Experiment with different flavor profiles, try the Texas crutch, and use a meat thermometer to nail the perfect internal temperature every time.
The best part about oven roasted ribs is that they are forgiving. Even if you make a small mistake, the long cook time gives you room to recover. So fire up your oven, pull up a chair, and get ready to enjoy some of the most tender, juicy, flavor-packed ribs you have ever tasted. Your family and friends will be asking for this recipe again and again.
Frequently Asked Questions
Can I use frozen ribs for oven roasting?
Yes, but it is best to thaw them first. Thaw ribs in the refrigerator overnight for the most even cook. Cooking from frozen increases the total time and can lead to uneven results, with the outside overcooking before the inside is done.
What is the best wood chip flavor for oven ribs?
Hickory and applewood are the most popular choices for oven roasted ribs. Hickory delivers a strong, classic smoky flavor, while applewood offers a milder, slightly sweet note. Cherry wood is another great option that adds a subtle fruity aroma.
How do I know if my ribs are done without a thermometer?
Use the bend test. Lift one end of the rack with tongs. If the surface cracks slightly and the ribs bend easily, they are done. Another sign is when the meat pulls back from the bone ends by about a quarter inch.
Can I reuse leftover ribs?
Absolutely. Leftover oven braised ribs make incredible sandwiches, chopped rib tacos, or diced toppings for pizza. Reheat them gently in the oven wrapped in foil to keep them moist and tender.
Why are my ribs tough after cooking?
Tough ribs usually mean they were not cooked long enough or at too high a temperature. Connective tissue needs time and low heat to break down into gelatin. Try cooking them longer at 275°F and check the internal temperature with a thermometer.
Can I roast ribs on a wire rack instead of directly on a sheet pan?
Yes, and it is actually recommended. Placing ribs on a wire rack set over a baking sheet allows air to circulate underneath, promoting even cooking and a crispier exterior. It also makes cleanup much easier since the fat drips into the pan below.