How To Self Clean Kenmore Oven With These Simple Steps
Learning how to self clean Kenmore oven is easier than most homeowners think. This step-by-step guide walks you through the entire process, from preparation to post-cleanup. You will discover how the self clean feature works, what to expect during the cycle, and how to keep your oven spotless between deep cleans.
There is nothing worse than opening your oven and being hit with a wave of burnt-on grease and food splatter. Whether you just finished a messy pizza night or have been putting off oven maintenance for weeks, the buildup can feel overwhelming. The good news is that most modern Kenmore ovens come with a built-in self clean feature that handles the heavy lifting for you.
So, how do you actually use this feature without making mistakes? That is exactly what this guide covers. We will walk you through every step of the self clean Kenmore oven process in plain, simple language. By the end, you will feel confident running your first cleaning cycle and keeping your oven in great shape for years to come.
Let us be real for a second. Oven cleaning is not anyone’s favorite chore. But with the right approach, it does not have to be a weekend-long ordeal. The Kenmore oven cleaning process is designed to be as hands-off as possible. You set it, walk away, and let the oven do its thing. All you need to do is prepare properly and handle the aftermath.
Key Takeaways
- Know Your Oven: Understanding your Kenmore appliance’s self clean feature saves time and prevents damage.
- Preparation Matters: Removing racks and clearing debris before starting ensures a thorough oven cleaning cycle.
- Safety First: Always ventilate your kitchen and keep pets away during high heat cleaning.
- Post-Cleanup Is Key: Wiping away ash residue after the cycle keeps your oven interior fresh and ready to use.
- Regular Maintenance: Simple weekly habits reduce the need for deep oven cleaning and extend appliance life.
- Know When to Call for Help: Some tough stains and odors may need a cleaning product oven-safe or professional attention.
📑 Table of Contents
- Understanding the Self Clean Feature on Your Kenmore Oven
- How To Prepare Your Kenmore Oven for Self Cleaning
- How To Start the Self Clean Cycle on Your Kenmore Oven
- What To Expect During the Self Cleaning Process
- How To Clean Up After the Self Clean Cycle
- Tips To Keep Your Kenmore Oven Clean Between Deep Cleans
- Key Takeaways
Understanding the Self Clean Feature on Your Kenmore Oven
Before you dive into the steps, it helps to understand what is actually happening inside your oven during a cleaning cycle. The self clean feature on Kenmore ovens uses extremely high heat to burn off food residue and grease. This process is sometimes called pyrolytic cleaning, and it converts baked-on mess into a powdery white ash that you can easily wipe away.
How the Self Clean Cycle Works
When you activate the oven cleaning cycle, the oven locks its door automatically and heats up to temperatures between 800 and 900 degrees Fahrenheit. At this extreme heat, any organic material inside the oven cavity breaks down into ash. The entire process usually takes between two and four hours, depending on how dirty your oven is. Once the cycle finishes, the oven cools down on its own before the door unlocks.
This is a completely passive process. You do not need to scrub, scrape, or apply any cleaning solutions inside the oven during the cycle. The high heat does all the work. However, preparation and post-cleanup are still important parts of the process.
Different Kenmore Models and Their Cleaning Modes
Not all Kenmore ovens are exactly the same. Some models have a dedicated self clean button on the control panel, while others may use a dial or a digital display to access the feature. Newer Kenmore ovens often include a steam clean oven option as well, which uses lower temperatures and steam to loosen light grime. This is great for quick maintenance but does not replace the deep clean that the pyrolytic cycle provides.
If you are unsure which type of Kenmore appliance you own, check the user manual or look for the oven control panel layout. The self clean function is usually clearly labeled. If you cannot find it, searching for your specific model number online will give you exact instructions.
How To Prepare Your Kenmore Oven for Self Cleaning
Preparation is the most important part of the entire process. Skipping this step can lead to smoke, odors, or even damage to your oven. Taking ten minutes to prep properly will make the cleaning cycle much smoother and safer.
Remove the Oven Racks
First things first, pull out all the oven racks. The extreme heat of the bake oven self clean cycle can warp or discolor metal racks. You should never leave them inside during the cleaning process. Set them aside for separate cleaning. You can wash them by hand with warm soapy water or place them in the dishwasher if they are dishwasher-safe.
While you are at it, remove any baking stones, pizza stones, or oven thermometers. These items should also stay out during the high heat cycle.
Clear the Oven Interior
Next, take a quick look inside the oven cavity. Remove any large pieces of food, oven-safe pans, or aluminum foil. Small crumbs and loose debris are fine and will actually burn away during the cycle. But large chunks of food can create excessive smoke and unpleasant oven odor during cleaning.
Use a damp cloth to wipe out any loose particles from the oven floor and walls. You do not need to scrub hard at this stage. Just a quick sweep of the interior is enough.
Ventilate Your Kitchen
Here is a step many people overlook. Before you start the oven cleaning cycle, open a window or turn on your range hood. The self clean process produces smoke and fumes as the grease and food residue burn off. Good ventilation keeps your kitchen comfortable and prevents smoke alarms from going off.
Also, make sure any pets are kept out of the kitchen during the cycle. The fumes can be irritating to animals, especially birds and small pets. If you have a pet bird, it is best to move it to another room entirely.
How To Start the Self Clean Cycle on Your Kenmore Oven
Now that your oven is prepped, it is time to start the cleaning cycle. The exact steps can vary slightly depending on your Kenmore model, but the general process is very similar across most units.
Step-by-Step Instructions
Follow these steps to get your oven cleaning cycle started:
- Make sure the oven is cool. Do not start the self clean cycle if you just finished baking. Wait for the oven to return to room temperature.
- Close the oven door firmly. The door must be fully closed and latched for the cycle to begin. The oven door lock mechanism will engage automatically once the cycle starts.
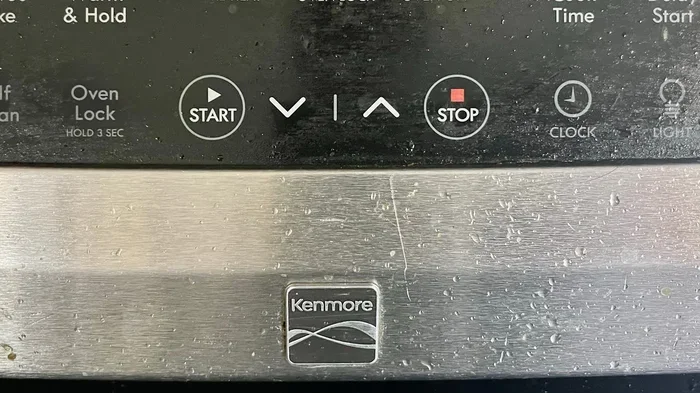
- Locate the self clean control. On most Kenmore ovens, this is a dedicated button labeled “Self Clean.” On models with a dial, turn it to the self clean position. On digital models, navigate to the self clean option using the control panel.
- Set the cleaning time. Some Kenmore models let you choose the duration. For light soil, two hours is usually enough. For heavy buildup, you may need three to four hours. When in doubt, start with two hours.
- Press Start or confirm. The oven will begin heating up. You will hear the door lock engage with a click. The oven temperature will start rising rapidly.
Once you press start, you can walk away. The oven will handle the rest. There is no need to monitor it constantly, though it is a good idea to check on it periodically, especially the first time you use the feature.
What Temperature Does the Oven Reach?
The self clean feature on Kenmore ovens heats the interior to approximately 800 to 900 degrees Fahrenheit. This is significantly hotter than any normal baking or broiling temperature. The extreme heat is what makes the pyrolytic process so effective at breaking down baked-on grease and food particles.
Do not be alarmed if you see smoke coming from the oven during the first 30 minutes or so. This is completely normal. The smoke is the result of food residue and grease burning off at high temperatures. As long as your kitchen is ventilated, this should not be a problem.
What To Expect During the Self Cleaning Process
The self cleaning cycle is designed to be largely hands-off, but knowing what to expect helps you stay calm and avoid unnecessary panic. Here is a breakdown of what happens during and after the cycle.
Understanding the Smoke and Odors
It is completely normal to see smoke and smell odors during the oven cleaning cycle. The smoke comes from the organic material burning off the oven walls. The smell is similar to what you would get from burning food, but it is usually less intense if you have done a decent job of clearing large debris beforehand.
If the smoke seems excessive or the odor is unusually strong, check that you have properly ventilated the room. You can also reduce the cleaning time if your model allows it. Running the cycle for too long on lightly soiled ovens can create more smoke than necessary.
How Long Does Self Cleaning Take?
The oven cleaning time depends on the level of soiling and the specific Kenmore model you own. Here is a general breakdown:
- Light soil: About 2 hours
- Moderate soil: About 3 hours
- Heavy soil: About 3 to 4 hours
After the cleaning time ends, the oven will begin to cool down on its own. The door will remain locked until the interior temperature drops to a safe level. This cooling period can take anywhere from 30 minutes to over an hour. Do not try to force the door open. The lock will release automatically once it is safe to do so.
How To Clean Up After the Self Clean Cycle
Once the door unlocks and the oven has cooled, the real cleanup begins. The good news is that most of the hard work has already been done by the high heat. What remains is a fine white ash that is easy to wipe away.
Wiping Down the Interior
Wait until the oven is completely cool before opening the door. Then, use a damp microfiber cloth or a soft sponge to wipe the interior walls, floor, and ceiling of the oven cavity. The white ash should come off easily with just water and a little gentle pressure.
Avoid using harsh scrubbing pads or abrasive cleaners inside the oven at this stage. The ash is soft and should wipe away without much effort. If you scrub too hard, you risk scratching the oven’s interior coating.
Dealing with Stubborn Residue
Sometimes, the self clean cycle does not remove every trace of grime. You might notice some dark spots or cleaning residue that did not fully burn away. This is especially common in ovens that have not been cleaned in a long time or that have heavy grease buildup.
For stubborn spots, apply a small amount of a gentle cleaning product oven-safe to a damp cloth and gently rub the affected area. Baking soda paste is a great natural option. Mix a few tablespoons of baking soda with a little water to form a paste, apply it to the residue, let it sit for 15 minutes, and then wipe it away.
Never use oven cleaners that contain harsh chemicals inside a self clean oven unless the manufacturer specifically says it is safe. These products can damage the oven’s interior coating and may produce toxic fumes during future high heat cleaning cycles.
Clean the Oven Racks Separately
Now is a great time to clean the racks you removed earlier. Soak them in warm soapy water for 20 to 30 minutes, then scrub with a non-abrasive sponge. For particularly greasy racks, you can use a paste of baking soda and water. Rinse thoroughly and dry them completely before placing them back inside the oven.
Tips To Keep Your Kenmore Oven Clean Between Deep Cleans
The best way to make Kenmore oven cleaning easier is to prevent heavy buildup in the first place. A few simple habits can keep your oven fresh and reduce the frequency of deep cleaning sessions.
Daily and Weekly Maintenance Habits
Incorporating small cleaning routines into your cooking habits goes a long way:
- Wipe up spills immediately. The longer food sits on the oven floor, the harder it is to clean. As soon as the oven cools after a spill, wipe it up with a damp cloth.
- Use a baking sheet or foil. When cooking messy foods like casseroles or roasted vegetables, place a baking sheet or piece of aluminum foil on the rack below to catch drips.
- Do a quick wipe after broiling. Broiling can cause grease splatter on the oven walls. A quick wipe with a damp cloth after broiling prevents buildup.
- Check the oven floor weekly. A quick glance at the oven floor once a week helps you catch small messes before they become big problems.
When To Use a Cleaning Product Instead
The self clean feature is designed for deep cleaning, but it is not always necessary after every use. For light maintenance, a simple wipe-down with warm soapy water is often enough. You can also use a steam clean method by placing a heat-safe bowl of water inside the oven and running it at 250 degrees for 15 minutes. The steam loosens light grime and makes wiping easier.
Save heavy-duty cleaning product oven-safe options for times when the self clean cycle does not fully do the job. Always check that the product is safe for use in self clean ovens to avoid damaging the interior coating.
Common Mistakes To Avoid
Even with the best intentions, people make mistakes when using the self clean Kenmore oven feature. Here are some common errors to watch out for:
- Leaving racks inside during the cycle. This can warp or discolor the metal and may damage the oven’s heating elements.
- Forgetting to ventilate. Without proper airflow, smoke and odors can fill your kitchen and trigger smoke detectors.
- Starting the cycle on a warm oven. Always let the oven cool completely before starting the self clean cycle.
- Using chemical cleaners before self cleaning. Residue from harsh cleaners can produce toxic fumes when exposed to extreme heat.
- Opening the door during the cycle. The door locks automatically for a reason. Opening it releases heat and can interrupt the cleaning process.
Expert Insights on Oven Maintenance
According to appliance repair professionals, regular oven maintenance is the single best way to extend the life of your Kenmore appliance. A self clean cycle every three to six months is generally recommended for most households. If you cook frequently or tend to make messy dishes, you may want to clean more often.
Experts also recommend keeping a box of baking soda in your kitchen specifically for oven maintenance. A simple paste of baking soda and water can handle most light cleaning tasks without the need for commercial products. It is affordable, non-toxic, and safe for all oven types.
If you ever notice that your oven door is not locking properly during the self clean cycle, stop the process and check for obstructions. A misaligned door lock can prevent the cycle from running correctly and may indicate a mechanical issue that needs professional attention.
Key Takeaways
Mastering how to self clean Kenmore oven is one of the simplest ways to keep your kitchen running smoothly. The process is straightforward, safe, and surprisingly easy once you know the steps.
- Preparation prevents problems. Removing racks, clearing debris, and ventilating your kitchen sets you up for success.
- The self clean cycle does the heavy lifting. High heat burns off grease and food residue, leaving only ash behind.
- Post-cleanup is quick and easy. A damp cloth is all you need to wipe away the white ash from the oven interior.
- Regular maintenance reduces deep cleaning needs. Simple weekly habits keep your oven in great shape between self clean cycles.
- Know when to seek help. If your Kenmore appliance is not performing as expected, do not hesitate to consult the manual or call a professional.
The self clean feature on your Kenmore oven is a powerful tool that saves you time, effort, and frustration. By following the steps in this guide, you will get the best results every time. Keep your oven cleaning tips handy, and you will never dread cleaning day again.
Take a few minutes today to familiarize yourself with your oven’s control panel and self clean settings. The more comfortable you are with the process, the easier it becomes. A clean oven not only looks better but also performs better, cooks more evenly, and lasts longer. Your Kenmore appliance deserves regular care, and now you know exactly how to give it that.
Start with your next deep clean and see the difference for yourself. Once you experience how simple and effective the self clean Kenmore oven process is, you will wonder why you ever put it off. Happy cleaning.
Frequently Asked Questions
How long does the self clean cycle take on a Kenmore oven?
The cleaning cycle typically takes between two and four hours. Light soil requires about two hours, while heavy buildup may need three to four hours. The exact oven cleaning time depends on your specific Kenmore model and the level of soiling inside the oven.
Is it safe to use the self clean feature on a Kenmore oven?
Yes, the self clean feature is designed by Kenmore to be safe for regular use. The oven locks its door automatically during the cycle, and the high heat effectively breaks down grease and food residue. Just make sure to remove racks and ventilate your kitchen properly before starting.
Why does my oven smoke during the self clean cycle?
Smoke during high heat cleaning is completely normal. It is caused by food residue and grease burning off the oven walls at extreme temperatures. If the smoke seems excessive, make sure you have ventilated the room well and that there are no large food chunks left inside the oven before starting the cycle.
Can I use commercial oven cleaner instead of the self clean feature?
You can use a cleaning product oven-safe for light cleaning or stubborn spots that the self clean cycle did not fully remove. However, avoid using harsh chemical cleaners inside a self clean oven, as residue from these products can produce toxic fumes during future high heat cycles. Always check the product label for compatibility.
How often should I self clean my Kenmore oven?
Most experts recommend running a self clean Kenmore oven cycle every three to six months. Households that cook frequently or prepare messy dishes may benefit from more frequent cleaning. Regular weekly maintenance, like wiping up spills, can also reduce the need for deep cleaning sessions.
What should I do if the oven door does not unlock after the self clean cycle?
The door lock will release automatically once the oven cools to a safe temperature. This can take 30 minutes to over an hour depending on how hot the oven got. If the door remains locked after the oven has fully cooled, check the user manual for troubleshooting steps or contact Kenmore customer support for assistance.
=== CONCLUSION ===
Learning how to self clean Kenmore oven is a skill that every homeowner should have. It is straightforward, effective, and saves you from the hassle of scrubbing baked-on grease by hand. By following the preparation steps, starting the cycle correctly, and handling the cleanup properly, you can keep your oven looking and performing like new.
Remember, the key to effortless oven maintenance is consistency. Regular light cleaning and periodic deep self clean cycles work together to keep your Kenmore appliance in top shape. Do not wait until the buildup becomes overwhelming. Make oven cleaning a routine part of your household maintenance schedule.
With the steps and tips outlined in this guide, you now have everything you need to tackle your next oven cleaning with confidence. Your kitchen will smell fresher, your oven will cook better, and you will enjoy the satisfaction of a job well done. Start today, and your future self will thank you.