What Oven Temp To Reverse Sear Steak For Juicy Perfection
Reverse sear steak is a game-changing cooking method that starts low and slow in the oven before finishing with a blazing hot sear. The ideal oven temp to reverse sear steak is between 200°F and 275°F, depending on how thick your cut is. This technique gives you a perfect medium-rare center with a stunning golden crust. You will learn the exact oven temperature, timing, and pro tips to nail this method every single time.
There is nothing quite like a perfectly cooked steak. The outside is crispy and caramelized. The inside is juicy and tender. Every bite melts in your mouth. Yet so many home cooks struggle to get this result. The oven temp to reverse sear steak is the secret most people overlook.
The reverse sear method flips traditional cooking on its head. Instead of starting with a hot pan, you begin in a cool oven. This gentle approach cooks the steak evenly from edge to edge. Then a quick, intense sear adds that beautiful brown crust. The result? A steak that rivals anything from a fine dining restaurant.
If you have ever bitten into a steak that was gray and overcooked on the edges, you know the frustration. The reverse sear solves this problem completely. It gives you control. It gives you consistency. And it gives you a steak that is truly juicy and perfect every time.
This guide covers everything you need to know. We will walk through the exact oven temperature, timing, and techniques. You will learn which steak cuts work best. We will share common mistakes to avoid. By the end, you will be ready to cook a reverse sear steak that will impress everyone at your table.
Key Takeaways
- Best oven temp: 225°F to 275°F for most steak cuts
- Low and slow approach: Gently raises the internal temperature for even cooking
- Perfect sear: A cast iron skillet or torch creates a restaurant-quality crust
- Thermometer is essential: Pull the steak at 110°F to 115°F before searing
- Resting matters: Let the steak rest 5 to 10 minutes after cooking
- Thick cuts work best: 1.5 inches or thicker is ideal for this method
- Season simply: Salt, pepper, and garlic go a long way
📑 Table of Contents
- What Is the Reverse Sear Method?
- What Oven Temp To Reverse Sear Steak?
- Which Steak Cuts Work Best for Reverse Searing?
- Step-by-Step Guide to Reverse Sear Steak
- Quick Tips for Perfect Reverse Sear Steak
- Common Mistakes to Avoid
- Reverse Sear vs. Traditional Sear: Which Is Better?
- Expert Insights on Oven Temp to Reverse Sear Steak
- Key Takeaways
- Conclusion
- FAQs
What Is the Reverse Sear Method?
The reverse sear is a two-step cooking process. First, you cook the steak slowly in a low oven. This gently brings the internal temperature up. Then you finish it with a hard sear on a hot skillet or with a torch. The name says it all. You reverse the traditional order of searing first and finishing in the oven.
This method works especially well for thick cuts. If your steak is less than an inch thick, the traditional method might be better. But for steaks that are 1.5 inches or thicker, the reverse sear is king. It gives you a uniform pink color all the way through. There are no gray bands or overcooked edges.
Why Does the Reverse Sear Work So Well?
The science behind this method is simple but brilliant. When you cook a steak at high heat, the outside cooks much faster than the inside. This creates a big temperature gradient. The center might be perfect, but the edges are overcooked.
With the reverse sear, the low oven heat warms the steak evenly. The entire piece of meat rises in temperature at the same rate. By the time you hit the skillet, the inside is almost at your target doneness. The sear only needs to add a thin crust. This means more of the steak is exactly how you like it.
The Maillard reaction is what creates that gorgeous brown crust. This chemical reaction happens when proteins and sugars meet high heat. It produces hundreds of flavor compounds. A quick sear at very high temperatures maximizes this reaction without overcooking the inside.
What Oven Temp To Reverse Sear Steak?
This is the question that brings most people here. The answer depends on a few factors. But the general range is clear. You want a low oven temperature that cooks the steak gently.
The Ideal Temperature Range
The best oven temp to reverse sear steak falls between 200°F and 275°F. Here is a simple breakdown:
- 200°F to 225°F: Slowest and most gentle. Best for very thick cuts over 2 inches. Takes longer but gives the most control.
- 225°F to 250°F: The sweet spot for most steaks. Good balance of time and results. Works great for 1.5-inch to 2-inch cuts.
- 250°F to 275°F: Faster cooking time. Best for thinner steaks around 1.5 inches. Less risk of drying out.
Most home cooks will do well with 250°F. It is a reliable middle ground. It cooks the steak evenly without taking forever. If your oven runs hot, drop down to 225°F. If it runs cool, try 275°F.
How Long Does It Take?
Cooking time depends on the thickness of your steak and your target internal temperature. Here is a rough guide:
- A 1.5-inch steak at 250°F takes about 20 to 25 minutes.
- A 2-inch steak at 250°F takes about 30 to 35 minutes.
- A 2.5-inch steak at 250°F takes about 40 to 50 minutes.
These times are approximate. The only way to know for sure is with a meat thermometer. Insert it into the thickest part of the steak. Pull the steak out of the oven when it is 10 to 15 degrees below your target doneness.
Which Steak Cuts Work Best for Reverse Searing?
Not all steaks are created equal for this method. Thick, well-marbled cuts produce the best results. The fat keeps the steak moist during the long, slow oven phase. Here are the top choices.
Ribeye
The ribeye is a fan favorite for a reason. It has beautiful marbling that melts during cooking. The fat keeps the steak incredibly juicy. A reverse sear ribeye comes out perfectly pink with a rich, beefy flavor.
Filet Mignon
Filet mignon is leaner than ribeye but still works wonderfully. The low oven temp prevents it from drying out. This cut is tender and mild. It pairs beautifully with a bold sauce or compound butter.
New York Strip
The New York strip offers a great balance of flavor and tenderness. It has enough marbling to stay moist during the reverse sear. The crust from the final sear adds a wonderful texture contrast.
Bone-In Ribeye (Tomahawk)
If you want to show off, a tomahawk steak is the way to go. The bone-in cut looks dramatic and tastes incredible. The reverse sear gives you perfect edge-to-edge cooking. It is the ultimate showstopper steak.
| Steak Cut | Best Thickness | Marbling Level | Difficulty |
|---|---|---|---|
| Ribeye | 1.5 to 2.5 inches | High | Easy |
| Filet Mignon | 1.5 to 2 inches | Low | Easy |
| New York Strip | 1.5 to 2 inches | Medium | Easy |
| Bone-In Ribeye | 2 to 3 inches | High | Medium |
Step-by-Step Guide to Reverse Sear Steak
Now that you know the oven temp to reverse sear steak, let us walk through the full process. Follow these steps for a perfect result every time.
Step 1: Prep the Steak
Take your steak out of the fridge 30 to 60 minutes before cooking. Let it come closer to room temperature. This helps it cook more evenly. Pat the steak dry with paper towels. Moisture is the enemy of a good sear.
Season generously with kosher salt and freshly cracked black pepper. If you like, add garlic powder or a touch of smoked paprika. Keep it simple. The quality of the meat speaks for itself.
Step 2: Set Up the Oven
Preheat your oven to 225°F to 250°F. Place a wire rack over a baking sheet. Set the steak on the rack. The rack allows air to circulate around the meat. This promotes even cooking. Do not skip the rack. Placing the steak directly on a sheet pan traps moisture and prevents a good crust later.
Step 3: Cook Low and Slow
Place the baking sheet on the middle oven rack. Cook until the internal temperature reaches 110°F to 115°F for medium-rare. Use a reliable digital meat thermometer. Check the temperature every 10 minutes.
Do not walk away completely. You want to pull the steak at the right moment. If you overshoot by even a few degrees, the steak will be more done than you want.
Step 4: Sear the Steak
While the steak is in the oven, heat a cast iron skillet over high heat. Let it get ripping hot. This is the key to a great crust. Add a high smoke point oil like avocado oil or grapeseed oil.
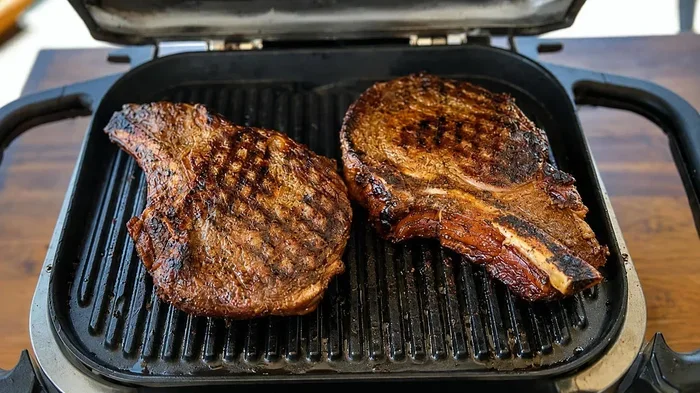
Place the steak in the skillet and do not touch it. Let it sear for 2 to 3 minutes on each side. You want deep, golden-brown sear marks. For extra flavor, add a knob of butter, a few crushed garlic cloves, and fresh thyme during the final 30 seconds. Spoon the melted butter over the steak as it sears.
Step 5: Rest the Steak
Transfer the steak to a cutting board. Let it rest for 5 to 10 minutes. This allows the juices to redistribute throughout the meat. If you cut too soon, the juice runs out and the steak dries out. Tent it loosely with foil if you prefer.
Step 6: Slice and Serve
Slice against the grain for maximum tenderness. Serve immediately with your favorite sides. A simple chimichurri or compound butter takes this steak to the next level.
Quick Tips for Perfect Reverse Sear Steak
These small tips make a huge difference. They separate a good steak from a great one.
- Use a wire rack. It promotes airflow and prevents the bottom from getting soggy.
- Pat the steak dry. Surface moisture lowers the skillet temperature and prevents browning.
- Invest in a good thermometer. An instant-read thermometer takes the guesswork out of cooking.
- Preheat the skillet. The pan should be smoking hot before the steak touches it.
- Do not skip the rest. Resting is just as important as cooking.
- Season early. Salt the steak at least 40 minutes before cooking for the best results.
- Use a thin layer of oil. Too much oil causes splattering and uneven searing.
Common Mistakes to Avoid
Even experienced cooks make mistakes with the reverse sear. Here is what to watch out for.
Starting with a Cold Steak
A fridge-cold steak cooks unevenly in the oven. The outside warms up while the center stays cold. Always let the steak sit at room temperature for at least 30 minutes before cooking.
Using the Wrong Oven Temperature
If the oven is too hot, the steak cooks too fast and you lose the even cooking benefit. If it is too low, the steak dries out before it reaches the right temperature. Stick to the 200°F to 275°F range.
Not Using a Thermometer
Guessing the internal temperature is a recipe for disaster. A meat thermometer is the single most important tool for reverse searing. It removes all the guesswork and takes the stress out of cooking.
Skipping the Dry Brine
Salting the steak ahead of time draws out moisture. The moisture dissolves the salt and gets reabsorbed into the meat. This seasons the steak deeply and creates a drier surface for a better sear. A dry brine of 40 minutes to overnight makes a noticeable difference.
Moving the Steak During the Sear
When the steak hits the hot skillet, leave it alone. Moving it around prevents proper crust formation. Let the Maillard reaction do its work undisturbed.
Reverse Sear vs. Traditional Sear: Which Is Better?
The traditional method starts with a hot pan and finishes in the oven. The reverse sear starts in the oven and finishes with a hot pan. Both have their merits. But for thick cuts, the reverse sear wins hands down.
The traditional method can leave a large gray band between the crust and the pink center. The reverse sear eliminates this problem. The entire steak is evenly cooked right up to the edge.
That said, the traditional method works well for thinner steaks. If your steak is less than an inch thick, the reverse sear might overcook it before you get a chance to sear. For thick cuts over 1.5 inches, the reverse sear gives you more control and better results.
Expert Insights on Oven Temp to Reverse Sear Steak
Professional chefs and barbecue experts swear by the reverse sear. Chef Thomas Keller has called it the best way to cook a thick steak. The low oven temp gives you precision that you simply cannot get with a hot pan alone.
Food scientist Harold McGee explains that the low oven temperature keeps the proteins from tightening too quickly. This preserves the juiciness of the meat. The slow rise in temperature also allows the collagen in tougher cuts to begin breaking down. This adds to the tenderness.
Many pitmasters use a similar approach for smoking brisket. The low and slow philosophy applies across different cuts of meat. Once you master the reverse sear for steak, you can apply the same principles to other proteins.
Can You Reverse Sear in a Toaster Oven?
Yes, you can. A toaster oven works well for individual steaks. Set the temperature to 225°F to 250°F. Use the convection setting if available. The smaller cavity heats up faster and uses less energy. Just watch the steak closely since toaster ovens can run hotter than full-size ovens.
Can You Use a Smoker Instead of an Oven?
Absolutely. A smoker set to 225°F to 250°F works perfectly for the reverse sear. The wood smoke adds an incredible layer of flavor. This is a popular method among barbecue enthusiasts. The process is the same. Low heat first, then a hard sear at the end.
Key Takeaways
- Best oven temp: 225°F to 250°F is the sweet spot for most steaks
- Thick cuts shine: 1.5 inches or thicker works best with this method
- Pull early: Remove the steak at 110°F to 115°F before searing
- Sear hard and fast: A smoking hot cast iron skillet creates the perfect crust
- Rest the steak: Give it 5 to 10 minutes before slicing
- Thermometer is non-negotiable: Precision is the whole point of the reverse sear
- Season simply: Salt, pepper, and fresh herbs are all you need
Conclusion
The oven temp to reverse sear steak is simpler than most people think. Set your oven to 225°F to 250°F. Cook your thick steak low and slow until it reaches 110°F to 115°F internally. Then hit it with a screaming hot cast iron skillet for a few minutes on each side. Rest it. Slice it. Serve it.
This method transforms your steak cooking forever. You get edge-to-edge perfection. You get a stunning crust. You get a juicier, more flavorful steak than almost any other method can deliver. The reverse sear steak technique puts restaurant-quality results in your own kitchen.
Start with a thick ribeye or strip steak. Follow the steps in this guide. Use a thermometer. Do not rush the process. Once you try the reverse sear, you will never go back to the traditional method. The oven temp to reverse sear steak is the single most impactful change you can make to your steak game. Give it a try tonight and taste the difference for yourself.
FAQs
Can I reverse sear a thin steak?
The reverse sear works best for steaks that are 1.5 inches thick or more. Thin steaks can dry out in the oven before reaching the right internal temperature. For cuts under an inch, stick with the traditional sear-first method.
Do I need to flip the steak in the oven?
No, you do not need to flip the steak during the oven phase. The low heat surrounds the meat evenly. The wire rack helps air circulate on all sides. Just check the temperature with your thermometer every 10 minutes.
What is the best oil for searing steak?
Use an oil with a high smoke point. Avocado oil, grapeseed oil, and refined coconut oil all work great. Avoid extra virgin olive oil because it burns at high temperatures and can add a bitter flavor.
Can I reverse sear steak on a gas grill?
Yes, you can. Set up your grill for indirect heat. Place the steak away from the flames. Keep the lid closed and maintain a temperature of 225°F to 250°F. Then move the steak over direct heat for the sear.
How long should I rest a reverse sear steak?
Rest the steak for 5 to 10 minutes on a cutting board. This gives the juices time to redistribute. If you cut too soon, the juice runs out and the steak loses its moisture and flavor.
Can I use a wire rack in a toaster oven for reverse searing?
Yes, a wire rack works perfectly in a toaster oven. It fits single steaks well and promotes even airflow. Set the toaster oven to 225°F and monitor the internal temperature closely since toaster ovens can vary in accuracy.