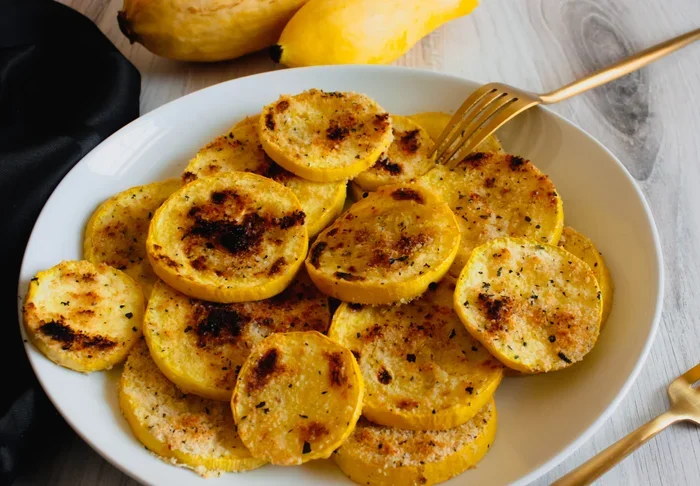
What Temp To Cook Squash In Oven Perfectly Every Time
Learning what temp to cook squash in oven is the key to getting perfectly tender, caramelized results every single time. Most squash varieties roast best between 400°F and 425°F, but the ideal temperature depends on the type and size of squash you are working with. Whether you are baking butternut, acorn, or spaghetti squash, this guide covers the exact temperatures, times, and techniques you need for oven-roasted squash that tastes amazing.
There is something deeply satisfying about pulling a tray of roasted squash out of the oven. The edges are golden brown, the inside is soft and creamy, and your kitchen smells like autumn. But here is the thing — getting that perfect result comes down to one simple factor: temperature.
If you have ever wondered what temp to cook squash in oven, you are not alone. It is one of the most common questions home cooks ask, especially as squash season rolls in. The good news is that once you know the right oven temperature for squash, everything else falls into place. This guide will walk you through every detail so you can roast squash confidently, whether you are a beginner or a seasoned home chef.
Key Takeaways
- 400°F to 425°F is the sweet spot: This range works for most squash varieties, giving you golden edges and a creamy interior.
- Different squash types need different times: Butternut squash roasts faster than whole acorn or pumpkin due to size and density.
- Cutting squash into uniform pieces matters: Even-sized cubes or wedges cook more evenly and get beautifully caramelized.
- Don’t skip the prep steps: Oiling, seasoning, and spacing squash on the pan all affect the final result.
- Avoid common mistakes: Overcrowding the pan and using too high a temperature can lead to burnt exteriors and raw interiors.
- Check for doneness with a fork: Fork-tender squash is the best indicator that your roasted squash is ready to serve.
📑 Table of Contents
- Why Oven Temperature Matters When Cooking Squash
- Best Oven Temperature for Different Types of Squash
- How Long To Cook Squash In The Oven
- Step-by-Step Guide To Roasting Squash
- Tips For Getting Crispy, Golden-Brown Squash
- Common Mistakes To Avoid When Cooking Squash
- Expert Insights On Roasting Squash
- Delicious Ways To Use Your Roasted Squash
- Storing and Reheating Roasted Squash
- Conclusion
Why Oven Temperature Matters When Cooking Squash
Temperature is the single most important variable in roasting squash. Too low, and your squash turns mushy and pale. Too high, and the outside burns before the inside cooks through. The right oven-baked squash temperature creates a beautiful balance — crispy, caramelized edges on the outside and a smooth, tender interior on the inside.
When you roast squash at the correct oven temperature, the natural sugars in the vegetable undergo the Maillard reaction. This is the chemical process that creates that deep, golden-brown flavor and aroma we all love. It is the same reaction that makes roasted potatoes and roasted vegetables so irresistible. Without the right heat, you simply do not get this transformation.
The Science Behind Roasting Squash
Squash has a high water content, especially when it is fresh. When you apply heat, that water evaporates and concentrates the flavors. At 400°F to 425°F, the water evaporates quickly enough to allow caramelization but slowly enough to let the interior cook through evenly. Lower temperatures, like 350°F, take longer and can steam the squash instead of roasting it. Higher temperatures, above 450°F, risk burning the exterior before the center is done.
Seasonal vegetables like squash respond beautifully to high-heat roasting because their natural sugars caramelize so well. This is why roasted squash tastes so much better than boiled or steamed versions. The dry heat of the oven transforms a simple vegetable into something truly delicious.
Best Oven Temperature for Different Types of Squash
Not all squash is created equal. A dense, thick-walled butternut squash needs a different approach than a thin-skinned acorn squash. Understanding the differences helps you choose the right temperature for squash in oven every time.
Butternut Squash
Butternut squash is one of the most popular varieties for oven roasting. Its dense, sweet flesh holds up beautifully to high heat. The best temperature to cook butternut squash in oven is 400°F to 425°F. Cut it into one-inch cubes or half-inch wedges for even cooking.
At 400°F, butternut squash takes about 25 to 35 minutes to become fork tender. At 425°F, it roasts a bit faster, around 20 to 30 minutes, but you get more caramelization. If you prefer crispy squash edges, go with the higher temperature. For a softer, creamier result, stick with 400°F.
Acorn Squash
Acorn squash has a thinner skin and a more delicate texture than butternut. The ideal oven temperature for acorn squash is 400°F. Because acorn squash is smaller and has a more irregular shape, it is best to halve it and roast it cut-side down.
Whole acorn squash halves take about 40 to 50 minutes at 400°F. You can also cube acorn squash and roast it at 425°F for 25 to 30 minutes. The smaller pieces cook faster and develop a nice golden brown squash color on the edges.
Spaghetti Squash
Spaghetti squash is a unique winter vegetable that gets its noodle-like strands from the flesh. The best spaghetti squash oven temp is 400°F. Cut it in half lengthwise, scoop out the seeds, and place it cut-side down on a lined baking sheet.
A whole spaghetti squash takes about 40 to 50 minutes at 400°F. You know it is done when the skin gives slightly under pressure and the strands pull apart easily with a fork. For cubed spaghetti squash, reduce the time to about 25 to 30 minutes at 425°F.
Pumpkin
Pumpkin is another type of winter squash that roasts wonderfully in the oven. The best pumpkin oven temperature is 375°F to 400°F. Because pumpkins can be very large, it is best to cut them into smaller pieces or roast them in chunks.
Pumpkin chunks take about 30 to 45 minutes at 400°F. Smaller pieces cook faster. Roasted pumpkin makes an excellent base for soups, pies, and squash recipes of all kinds. The lower temperature helps the flesh cook evenly without drying out.
Comparison Table: Optimal Oven Temperatures by Squash Type
| Squash Type | Best Oven Temp | Cook Time (Cubes) | Cook Time (Halves) |
|---|---|---|---|
| Butternut Squash | 400°F – 425°F | 25 – 35 min | 35 – 45 min |
| Acorn Squash | 400°F | 25 – 30 min | 40 – 50 min |
| Spaghetti Squash | 400°F | 25 – 30 min | 40 – 50 min |
| Pumpkin | 375°F – 400°F | 30 – 45 min | 45 – 60 min |
| Delicata Squash | 425°F | 20 – 25 min | 25 – 30 min |
| Kabocha Squash | 400°F – 425°F | 25 – 35 min | 35 – 45 min |
This table gives you a quick reference for what temp to cook squash in oven based on the variety you are using. Keep in mind that actual cook times vary based on the size of your pieces and the specific oven you are using.
How Long To Cook Squash In The Oven
Temperature and time go hand in hand when it comes to roasting squash. Understanding how long to cook squash at a given temperature helps you avoid undercooked or overcooked results.
Factors That Affect Cooking Time
Several factors influence how long your squash needs in the oven:
- Size of the pieces: Smaller cubes cook faster than large chunks. One-inch pieces are the sweet spot for most varieties.
- Type of squash: Dense squashes like butternut take longer than thinner-skinned varieties like delicata.
- Oven accuracy: Some ovens run hot or cold. An oven thermometer can help you get the real temperature right.
- Rack position: The middle rack provides the most even heat distribution for vegetable roasting.
- Whether the squash is covered or uncovered: Covering with foil traps steam and speeds up cooking but reduces caramelization.
As a general rule, cubed squash at 400°F takes about 25 to 35 minutes. Whole squash halves take 40 to 60 minutes depending on size and density. Always check for doneness by poking the thickest piece with a fork. If it slides in easily, your roasted vegetable is ready.
How to Tell When Squash Is Done
There are three reliable ways to check if your squash is fully cooked:
- The fork test: Poke the thickest piece with a fork. It should slide in with no resistance. This is the most reliable method for fork tender squash.
- The visual test: The edges should be deeply golden brown, and the flesh should look slightly shrunken away from the skin.
- The touch test: Gently press the squash with a spatula or tongs. It should feel soft and give slightly.
Undercooked squash is hard and bland. Overcooked squash turns mushy and loses its flavor. Finding that perfect middle ground is what makes oven-baked squash truly delicious.
Step-by-Step Guide To Roasting Squash
Now that you know the right temperature to cook squash in oven, let me walk you through the process step by step. Following these steps guarantees perfectly roasted squash every time.
Step 1: Preheat Your Oven
Always preheat your oven to the target temperature before placing the squash inside. This ensures the oven temperature for squash is consistent from the moment it goes in. Give your oven at least 10 to 15 minutes to reach the desired heat.
If you are using a convection oven, reduce the temperature by 25°F. Convection fans circulate hot air more efficiently, so your squash will cook faster and more evenly at a slightly lower setting.
Step 2: Prep the Squash
Wash the squash thoroughly under running water. Pat it dry with a clean towel. For varieties with thick skin like butternut, use a sharp chef’s knife to peel the skin off. For thinner-skinned varieties like acorn or delicata, you can leave the skin on — it softens during roasting.
Cut the squash in half and scoop out the seeds and stringy pulp. For cubed squash, cut the halves into uniform pieces about one inch in size. Uniform pieces are essential for even cooking. If some pieces are much larger than others, they will cook at different rates.
Step 3: Season and Oil
Place the squash pieces in a large bowl. Drizzle with olive oil or avocado oil — about one tablespoon per pound of squash. Add salt, pepper, and any other seasonings you like. Toss everything together until the pieces are evenly coated.
Great seasoning options for roasted squash include:
- Garlic powder and smoked paprika
- Cinnamon and maple syrup for a sweet twist
- Rosemary and thyme for an earthy flavor
- Cumin and chili powder for a spicy kick
- Brown butter and sage for a classic combination
Step 4: Arrange on the Baking Sheet
Spread the seasoned squash in a single layer on a parchment-lined baking sheet. This is a crucial step. Do not overcrowd the pan. If the pieces are touching or piled on top of each other, they will steam instead of roast, and you will not get that beautiful caramelization.
If you have a lot of squash, use two baking sheets or roast in batches. The extra effort is worth it for perfectly crispy squash with golden edges.
Step 5: Roast and Check
Place the baking sheet on the middle rack of your preheated oven. Set a timer for 20 minutes, then check the squash. Flip or stir the pieces gently with a spatula. Continue roasting until the pieces are golden brown and fork tender.
Most cubed squash is done in 25 to 35 minutes at 400°F. Whole halves take longer. The key is to check early and often so you do not accidentally overcook your roasted squash.
Step 6: Serve Immediately
Roasted squash is best served fresh from the oven. The edges stay crispy, and the interior stays creamy. If you need to hold it for a short time, keep it in a warm oven at 200°F. But reheating roasted squash in the microwave tends to make it soggy, so fresh is always best.
Quick Tips for Perfect Roasted Squash
- Line your baking sheet with parchment paper or a silicone mat for easy cleanup.
- Use a rimmed baking sheet to prevent any oil or juices from dripping into the oven.
- Let the squash sit at room temperature for 10 minutes before roasting. This helps it cook more evenly.
- For extra crispy edges, avoid stirring the squash too often during roasting. Let it develop a good sear.
- Save the seeds from butternut or pumpkin squash. Rinse them, toss with oil and salt, and roast at 300°F for 15 minutes for a healthy snack.
Tips For Getting Crispy, Golden-Brown Squash
Everyone loves crispy squash with deeply caramelized edges. Here are some expert tips to take your roasted squash from good to outstanding.
Use High Enough Heat
The most common mistake people make is roasting squash at too low a temperature. If your oven temperature is below 375°F, the squash releases too much moisture and steams instead of roasting. Stick with 400°F or higher for the best golden brown squash results.
Don’t Skip the Oil
Oil does more than add flavor. It helps transfer heat evenly to the surface of the squash and promotes caramelization. Use enough oil to lightly coat each piece, but not so much that the squash sits in a pool of oil. About one tablespoon per pound is the right amount.
Space Matters
Give each piece of cubed squash plenty of room on the baking sheet. A single layer with space between each piece allows hot air to circulate freely. This is the secret to getting crispy edges all around, not just on the bottom.
Try a Higher Temperature for Smaller Pieces
If you are roasting small cubes or thin slices, try bumping the temperature up to 425°F or even 450°F. The higher heat creates more Maillard reaction, which means more flavor and better texture. Just watch them closely so they do not burn.
Add a Finishing Touch
For an extra layer of flavor, finish your roasted squash with a sprinkle of flaky sea salt, a drizzle of honey or balsamic glaze, or a squeeze of fresh lemon juice. These finishing touches elevate the dish from simple side to standout main.
Common Mistakes To Avoid When Cooking Squash
Even experienced cooks make mistakes when roasting squash. Here are the most common pitfalls and how to avoid them.
Overcrowding the Pan
This is the number one mistake people make. When you cram too much squash onto one baking sheet, the pieces trap steam against each other. Instead of roasting, they steam and turn mushy. The result is pale, soggy vegetable roasting that lacks any caramelization.
Fix: Use a large baking sheet or two smaller ones. Spread the squash in a single layer with at least half an inch of space between pieces.
Using the Wrong Temperature
Some recipes call for temperatures that are too low or too high for certain squash varieties. Roasting delicate squash like acorn at 450°F can burn the outside while leaving the inside raw. Roasting dense butternut at 350°F takes too long and produces mushy results.
Fix: Always match the temperature for squash in oven to the type and size of squash you are cooking. Refer to the comparison table above for guidance.
Not Cutting Pieces Uniformly
When your squash pieces are different sizes, they cook at different rates. Small pieces burn while large pieces remain undercooked. This is especially frustrating when you are making a squash casserole or stuffed squash and need everything to be done at the same time.
Fix: Take your time cutting. Use a ruler or measuring tape if needed to get consistent one-inch cubes or even wedges.
Skipping the Parchment Paper
Roasting squash directly on a bare baking sheet makes cleanup a nightmare and can cause the bottom pieces to stick and burn. Parchment paper or a silicone baking mat prevents this and promotes even browning.
Fix: Always line your baking sheet before arranging the squash. It is a small step that makes a big difference.
Underseasoning
Plain roasted squash is fine, but it is so much better with the right seasoning. Many people make the mistake of using too little salt or skipping aromatics entirely.
Fix: Season generously. Salt brings out the natural sweetness of squash. Add garlic, herbs, or spices to create depth of flavor. Taste and adjust before serving.
Expert Insights On Roasting Squash
Professional chefs and experienced home cooks agree on a few key principles when it comes to roasting squash. Here is what the experts have to say about getting the best results.
Chef Maria Torres, a culinary instructor with over 15 years of experience, always starts with a hot oven. She says, “The high heat is what transforms squash from bland to brilliant. I never go below 400°F for any variety. The caramelization is everything.”
Food scientist Dr. James Chen explains the importance of moisture control: “When you roast squash, you are essentially driving off water to concentrate flavor. The right oven temperature does this efficiently. Too low, and you just end up with steamed squash. Too high, and you lose too much moisture before the center cooks.”
Seasonal vegetable expert Sarah Kim recommends buying squash in peak season for the best roasting results. “Fall and early winter squash has the highest sugar content, which means the best caramelization when you roast it. In-season seasonal vegetables also tend to be denser and more flavorful,” she explains.
These expert insights reinforce the importance of getting the what temp to cook squash in oven question right. The right temperature, combined with proper technique, makes all the difference in the world.
Delicious Ways To Use Your Roasted Squash
Once you master the art of roasting squash, you will want to use it in everything. Here are some delicious ideas for your oven-baked squash:
- Roasted squash soup: Blend roasted butternut squash with broth, cream, and spices for a velvety soup.
- Stuffed acorn squash: Fill roasted acorn halves with quinoa, cranberries, and toasted nuts.
- Squash pasta: Toss roasted spaghetti squash strands with garlic, olive oil, and parmesan cheese.
- Squash grain bowl: Combine roasted cubes with rice, greens, avocado, and a tahini dressing.
- Roasted squash salad: Add warm roasted vegetables to mixed greens with goat cheese and candied walnuts.
- Squash mash: Mash roasted butternut with butter, brown sugar, and cinnamon as a side dish.
- Squash casserole: Layer roasted squash with cheese, breadcrumbs, and herbs for a comforting bake.
The versatility of roasted squash is one of the reasons it is such a beloved vegetable. Once you know the right temperature to cook squash in oven, you can experiment with all of these recipes and more.
Storing and Reheating Roasted Squash
If you have leftovers — and let us be honest, that rarely happens — here is how to store and reheat your roasted squash properly.
Let the squash cool completely before storing. Place it in an airtight container and refrigerate for up to 5 days. You can also freeze roasted squash for up to 3 months. Spread the cooled pieces on a baking sheet to freeze individually, then transfer them to a freezer bag.
To reheat, spread the squash on a baking sheet and warm it in a 350°F oven for 10 to 15 minutes. Avoid the microwave, which makes the squash release moisture and turn soggy. The oven brings back some of that crispy squash texture you worked so hard to achieve.
Conclusion
Knowing what temp to cook squash in oven is the foundation of great roasted squash. The sweet spot for most varieties is 400°F to 425°F, which delivers golden, caramelized edges and a tender, creamy interior. Whether you are roasting butternut, acorn, spaghetti, or pumpkin, matching the temperature to the squash type and size makes all the difference.
Follow the steps in this guide, avoid the common mistakes, and use the tips from the experts. You will be making perfectly roasted squash every single time. The process is simple, the results are delicious, and your kitchen will smell incredible from start to finish.
So preheat that oven, grab your favorite squash, and get ready to create something truly special. Roasted squash is one of the easiest and most rewarding dishes you can make, and now you have all the knowledge you need to nail it. Happy roasting!
Frequently Asked Questions
What is the best temperature to roast butternut squash?
The best temperature to cook butternut squash in oven is 400°F to 425°F. This range creates perfectly caramelized edges while keeping the inside soft and creamy. Cut the squash into one-inch cubes for the most even results.
Can you roast squash at 350°F?
Yes, you can roast squash at 350°F, but it will take longer and the results will be less caramelized. Lower temperatures steam the squash more than roast it, which can lead to a softer, less flavorful outcome. For the best roasted squash, stick with 400°F or higher.
How do you know when squash is done roasting?
Your squash is done when a fork slides easily into the thickest piece with no resistance. The edges should be deeply golden brown, and the flesh should feel soft when gently pressed. This is the best indicator of fork tender squash.
Should you peel squash before roasting it?
It depends on the type of squash. Thick-skinned varieties like butternut should be peeled before roasting. Thin-skinned varieties like acorn or delicata can be roasted with the skin on, as it becomes soft and edible during the oven-baked squash process.
How long does it take to roast a whole squash?
A whole medium-sized squash, like butternut or acorn, takes about 45 to 60 minutes at 400°F. Smaller squashes like spaghetti squash take about 40 to 50 minutes. Pierce the skin with a fork a few times before roasting to allow steam to escape.
Can you roast squash on a sheet pan without parchment paper?
Yes, you can roast squash directly on a bare sheet pan, but it makes cleanup harder and can cause the squash to stick or burn on the bottom. Using parchment paper or a silicone baking mat is recommended for the best golden brown squash results and easy cleanup.