What To Do Before Using New Oven For The First Time
Before using a new oven, you need to clean out factory residue, run a burn-in cycle, check temperature accuracy, and read the manual carefully. These simple steps remove chemical odors, protect your health, and ensure your oven heats correctly. A little prep work before the first use saves time, money, and frustration down the road.
You just unboxed your brand-new oven. The shiny interior looks amazing. The sleek controls feel modern and exciting. But before you start cooking your favorite meal, there are important steps you need to take. Many people skip this part and end up with strange tastes, odd smells, or even uneven cooking. Knowing what to do before using new oven equipment makes a huge difference. This guide walks you through every step, from unboxing to that first perfect bake.
A new oven may look clean, but it is not ready to go straight away. Manufacturers leave behind factory oils, protective coatings, and residue from the production process. These substances can affect food taste and release unpleasant odors during the first few uses. Taking the time to prepare your oven properly ensures safe, delicious results every time you cook. Let us dive into the full process.
Key Takeaways
- Clean the interior thoroughly: Remove factory oils and residues with warm soapy water or a vinegar solution.
- Run a burn-in cycle: Heat the oven to its highest temperature for 30 minutes to burn off any remaining chemicals.
- Check temperature accuracy: Use an oven thermometer to verify your new oven heats to the right settings.
- Read the user manual: Understand your specific model’s features, safety warnings, and recommended break-in process.
- Inspect all components: Make sure racks, trays, and doors are properly installed and undamaged before cooking.
- Ventilate your kitchen: Open windows and turn on fans during the first few uses to clear out new oven smell.
- Register your warranty: Protect your investment by registering the product with the manufacturer.
📑 Table of Contents
- Read the User Manual Before You Start
- Clean the Oven Interior Thoroughly
- Run the Burn-In Cycle
- Check Temperature Accuracy
- Inspect All Components and Accessories
- Set Up Proper Ventilation and Placement
- Register Your Warranty and Keep Documentation
- Common Mistakes to Avoid Before First Use
- Expert Tips for a Smooth First Cooking Experience
- When to Call a Professional
- Conclusion
Read the User Manual Before You Start
Every oven model is different. The user manual contains specific instructions for your unit. Skipping this step means you might miss important safety warnings or unique features. Most manuals include a “Before First Use” section. This section outlines the exact steps the manufacturer recommends.
Here is what to look for in your manual:
- Break-in instructions: Some ovens need a specific heating cycle before first use.
- Maximum temperature limits: Know the highest heat your oven can safely reach.
- Placement requirements: Understand how much space your oven needs around it.
- Warranty registration details: Many brands require you to register online within a certain timeframe.
- Cleaning recommendations: Different interiors need different cleaning methods.
If you lost the paper manual, do not worry. Most manufacturers post digital versions on their websites. Simply search for your model number. You can also download the manual as a PDF. Keeping a copy saved on your phone is a smart move too.
Why the Manual Matters for New Oven Setup
The manual tells you about features you might not notice right away. Some ovens have a dedicated self-cleaning mode. Others require you to remove certain parts before the first heat cycle. Gas ovens have different needs than electric models. The manual also covers oven calibration details, which we will discuss later. Reading it takes only ten to fifteen minutes but saves hours of potential problems.
Clean the Oven Interior Thoroughly
This is the most important step before using new oven for the first time. During manufacturing and shipping, ovens accumulate oils, dust, metal particles, and protective coatings. Even if the interior looks clean, residue is almost always present. These leftovers can smoke during the first heating and leave a chemical taste on your food.
Step-by-Step Cleaning Process
Follow these steps to get your oven spotless inside:
- Remove all packaging materials: Check for plastic wrap, foam inserts, tape, and stickers inside the oven cavity. Also check racks and trays.
- Remove the racks and trays: Take out every removable part. You will clean these separately.
- Wipe down the interior: Use a soft cloth or sponge with warm water and mild dish soap. Wipe all walls, the floor, and the ceiling of the oven cavity.
- Clean the door glass: Use a glass cleaner or a vinegar-water solution on the inside and outside of the door.
- Wash the racks and trays: Soak them in warm soapy water. Scrub gently with a non-abrasive sponge. Rinse and dry completely.
- Wipe down the oven exterior: Do not forget the control panel, handle, and any other exterior surfaces.
Avoid using harsh chemical cleaners on the interior. Some ovens come with a special non-stick coating. Harsh chemicals can damage this coating. Stick to mild soap and warm water for best results. If you notice stubborn residue, a paste of baking soda and water works wonders.
Quick Cleaning Tip
For a natural cleaning solution, mix equal parts water and white vinegar in a spray bottle. Spray the interior surfaces, let it sit for five minutes, then wipe clean. This cuts through grease and removes any lingering factory odors. It is safe for almost all oven surfaces.
Run the Burn-In Cycle
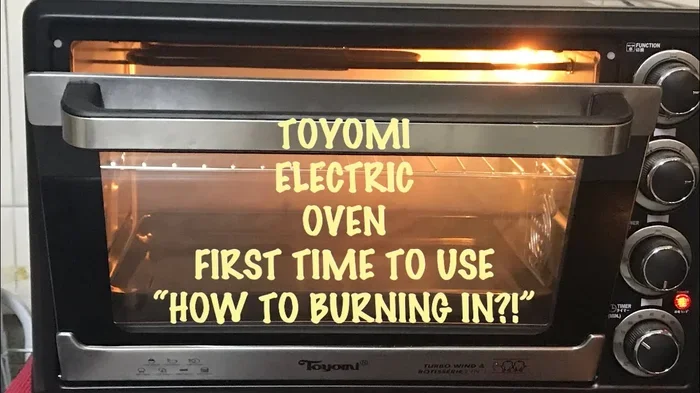
Also called the “bake and burn” cycle, this step is essential for new ovens. The burn-in process heats the oven to its maximum temperature. This burns off any remaining manufacturing oils, residues, or coatings. Most manufacturers recommend doing this before you cook any food.
How to Perform a Burn-In Cycle
Here is the standard process most experts follow:
- Remove all racks and trays: Keep the oven empty during this process.
- Ventilate your kitchen: Open windows and turn on the range hood fan. The first heating will produce some smoke and smell.
- Set the oven to its highest temperature: Most ovens go up to 450°F or 500°F (232°C or 260°C).
- Heat for 30 to 45 minutes: Let the oven maintain that high temperature for at least half an hour.
- Turn off the oven and let it cool: Do not open the door immediately. Let the heat dissipate naturally.
- Wipe down the interior again: After cooling, there may be some residue or discoloration. Wipe it away with a damp cloth.
You might notice a slight smell or some smoke during this process. This is completely normal. It comes from the factory coatings burning off. If the smell persists after two or three cycles, contact the manufacturer. Some ovens need two burn-in cycles for best results.
New Oven Smell: What to Expect
The new oven smell is something almost everyone experiences. It comes from the insulation materials, protective coatings, and manufacturing residues. This smell is usually strongest during the first one or two heating cycles. It should fade completely after the burn-in process. If the smell does not go away or smells like burning plastic, stop using the oven and check for any leftover packaging materials inside.
Check Temperature Accuracy
Not all new ovens heat exactly to the temperature you set. This is a common issue that many people overlook. An oven that runs too hot or too cold will ruin your recipes. Checking the temperature accuracy is a simple process that takes just a few minutes.
Using an Oven Thermometer
Buy an inexpensive oven thermometer from any kitchen supply store. These cost between five and fifteen dollars. Place the thermometer on the center rack. Then set your oven to 350°F (175°C). Wait for the oven to reach the target temperature and check the thermometer reading.
Here is what the readings might tell you:
- Thermometer matches the dial: Your oven is calibrated correctly. You are good to go.
- Thermometer reads 10-25°F higher: Your oven runs hot. You may need to lower your recipe temperature.
- Thermometer reads 10-25°F lower: Your oven runs cool. You may need to increase the temperature or extend cooking time.
Most ovens can be recalibrated if they are off by more than 25 degrees. Check your manual for the calibration procedure. Some models have a hidden calibration button behind the temperature knob. Others require you to enter a service mode. If you cannot find the calibration instructions, call the manufacturer’s customer service line.
Why Temperature Accuracy Matters
Baking is a science. The difference between a perfect cake and a flat disaster often comes down to temperature. Even a 15-degree variance can change how your food cooks. Cookies may spread too much. Bread may not rise properly. Roasted vegetables may burn on the outside but stay raw inside. Taking five minutes to check your temperature saves you from countless cooking failures.
Inspect All Components and Accessories
Before you start cooking, take a close look at every part of your oven. This includes the racks, trays, door seal, control panel, and heating elements. Catching a problem early prevents bigger issues later.
What to Check on Each Component
- Oven racks: Make sure they slide in and out smoothly. Check for any bends or warping from shipping.
- Trays and pans: Look for dents, scratches, or manufacturing defects. Defective trays can cause uneven heating.
- Door seal: Run your finger along the rubber gasket around the door. It should be smooth and intact. A damaged seal lets heat escape and wastes energy.
- Heating elements: For electric ovens, check the top and bottom elements. They should look uniform and undamaged. For gas ovens, inspect the igniter and burner.
- Control panel: Test every button and knob. Make sure the display works if your oven has one.
- Door hinges: Open and close the door several times. It should close firmly and evenly.
If you find any damage during inspection, contact the retailer or manufacturer right away. Most new ovens come with a warranty that covers manufacturing defects. The earlier you report the issue, the easier the resolution process will be.
Set Up Proper Ventilation and Placement
Where you place your oven matters more than most people realize. Proper ventilation ensures safe operation and extends the life of your appliance. Poor placement can lead to overheating, inefficient cooking, and even safety hazards.
Placement Guidelines
- Allow space around the oven: Most manufacturers recommend at least 2 to 3 inches of clearance on all sides. Check your manual for the exact requirement.
- Keep it away from walls: The heat your oven generates can damage nearby walls or cabinetry over time.
- Ensure proper airflow: Do not place the oven in a tight, enclosed cabinet without ventilation. Heat needs somewhere to go.
- Avoid direct sunlight: Placing the oven in direct sunlight can affect the temperature sensors and make the control panel hard to read.
- Check the floor surface: The oven should sit on a flat, heat-resistant surface. Uneven floors can cause the door to not close properly.
Ventilation During First Uses
During the first few uses, your oven will release some fumes and odors. This is normal and expected. To keep your kitchen comfortable, open a window or turn on your range hood. If you have a small kitchen with limited airflow, consider cooking with the oven door slightly ajar during the first burn-in cycle. This helps release any residual fumes faster.
Register Your Warranty and Keep Documentation
This step is easy to forget but incredibly important. Registering your oven warranty protects you if something goes wrong. Most manufacturers offer a standard one-year warranty. Some brands offer extended warranties if you register within 30 to 90 days of purchase.
Here is what to do:
- Find the model and serial number: These are usually on a sticker inside the oven door frame or on the back of the unit.
- Visit the manufacturer’s website: Look for a “Register Product” or “Warranty Registration” section.
- Fill out the registration form: You will need your purchase date, model number, and proof of purchase.
- Save the receipt and manual: Keep these documents in a safe place. You will need them if you ever file a warranty claim.
Some brands also send you exclusive offers or discount codes after registration. It is a win-win situation. You get protection and sometimes even savings on accessories or replacement parts.
Common Mistakes to Avoid Before First Use
Even with the best intentions, people make mistakes when preparing a new oven. Here are the most common ones and how to avoid them.
Skipping the Burn-In Cycle
The most common mistake is going straight to cooking. The burn-in cycle removes harmful residues and factory coatings. Skipping it means you could be cooking your food on surfaces that still contain chemical residues. Always do at least one full burn-in cycle.
Using Harsh Cleaners
Strong chemical cleaners can damage the interior coating of your new oven. Stick to mild soap, baking soda, or vinegar-based solutions. Your oven’s surfaces are delicate before you even use them once.
Not Checking Temperature
Assuming your oven heats correctly without verification is a recipe for disappointment. Many new ovens are off by 10 to 25 degrees. A simple oven thermometer fixes this problem instantly.
Overloading the Oven
During the first few uses, keep the oven empty or only use it for simple tasks. Heavy loads during the break-in period can stress the heating elements and temperature sensors before they are fully settled.
Ignoring the New Oven Smell
A mild smell during the first uses is normal. But if the smell is strong, persistent, or smells like chemicals or burning plastic, do not ignore it. This could indicate a manufacturing defect or leftover packaging material inside the oven.
Forgetting to Remove Packaging
It sounds obvious, but people forget. Small pieces of plastic, tape, or foam can get stuck inside the oven during shipping. Always double-check the interior, around the racks, and near the heating elements before the first use.
Expert Tips for a Smooth First Cooking Experience
Once you have completed all the preparation steps, you are ready to cook. Here are some expert tips to make your first cooking experience with a new oven a success.
Start with simple recipes: Do not attempt a complex multi-dish meal for your first cook. Start with something simple like cookies or roasted vegetables. This lets you get comfortable with your new oven’s heating patterns and hot spots.
Use oven-safe cookware: Not all cookware is safe for oven use. Check the bottom of your pans and baking dishes for oven-safe symbols. Using the wrong cookware can damage both your cookware and your oven.
Rotate your food halfway through: Most ovens have hot spots. Rotating your dishes halfway through cooking ensures even browning and baking. This is especially important for cakes, casseroles, and roasted meats.
Let the oven preheat fully: Modern ovens often signal when they have reached the target temperature. But giving an extra five minutes of preheat time ensures the entire cavity is evenly heated. This small patience pays off in better cooking results.
Keep a log of your observations: Note any quirks you notice during the first few uses. Does the oven run hot? Does the door seal properly? Writing these down helps you catch patterns and address issues early.
When to Call a Professional
Most new ovens work perfectly after the preparation steps outlined in this guide. But sometimes issues arise that need professional attention. If your oven does not heat at all, produces unusual noises, or shows error codes on the display, contact a qualified technician. Do not attempt to open the oven or fix electrical or gas components yourself. This could void your warranty and create safety risks.
Also reach out to the manufacturer if you notice any of the following:
- The oven door does not close properly or is misaligned.
- The temperature is off by more than 25 degrees even after calibration.
- You see sparks or arcing inside the oven during operation.
- The control panel is unresponsive or displays error codes.
- You smell gas (for gas oven models) at any point.
Conclusion
Taking the right steps before using new oven equipment is simple but essential. Cleaning the interior, running a burn-in cycle, checking temperature accuracy, inspecting all parts, and registering your warranty all take less than an hour combined. These steps protect your health, improve cooking results, and extend the life of your appliance. A little preparation goes a long way toward making every meal you cook in your new oven a success. Follow this guide, trust the process, and enjoy cooking with confidence from day one.
Remember, your new oven is an investment in your kitchen and your cooking journey. Treating it well from the very start means you will enjoy reliable performance for years to come. So take that extra time before you start cooking. Your future self and your taste buds will thank you.
Frequently Asked Questions
How long should I run the burn-in cycle for a new oven?
Most experts recommend running the burn-in cycle at the highest temperature for 30 to 45 minutes. Some ovens may need two cycles if there is a strong chemical smell. Check your user manual for model-specific instructions on the break-in process.
Is the new oven smell dangerous?
The new oven smell is usually not dangerous. It comes from factory coatings and insulation materials burning off during the first heating cycles. However, if the smell is very strong, smells like chemicals or burning plastic, or does not go away after two burn-in cycles, stop using the oven and contact the manufacturer.
Can I use oven cleaner on a brand-new oven?
It is best to avoid harsh commercial oven cleaners on a new oven. The interior surfaces may have a delicate coating that harsh chemicals can damage. Stick to mild soap and warm water, or a natural baking soda and vinegar solution for cleaning before first use.
Do I need an oven thermometer if my oven has a digital display?
Yes, even ovens with digital displays can be inaccurate. Temperature sensors can be off by 10 to 25 degrees from the factory. An inexpensive oven thermometer gives you an accurate reading and helps you adjust your cooking temperatures accordingly.
How soon after purchase should I register my oven warranty?
Register your warranty as soon as possible. Many manufacturers require registration within 30 to 90 days of purchase to qualify for extended warranty coverage. Keep your receipt and model number handy to make the registration process quick and easy.
What temperature should I use for the first burn-in cycle?
Set your oven to its highest temperature setting for the burn-in cycle. Most ovens reach 450°F to 500°F (232°C to 260°C). Heat the empty oven at this temperature for 30 minutes with the kitchen well-ventilated. This ensures any factory residue and coatings are fully burned off before you cook food.