What To Do When You Get A New Oven And Start Cooking Right
Getting a new oven is exciting, but skipping setup steps can ruin your first cooking experience. This guide walks you through everything from unboxing and cleaning to calibrating temperature and baking like a pro. You will learn practical steps to break in your new oven, avoid common mistakes, and enjoy delicious results every time you cook.
You just got a brand new oven. Maybe you saved up for weeks, or maybe it finally arrived after a long wait. Either way, that shiny new appliance sitting in your kitchen feels like a big deal.
But here is the thing most people forget. A new oven is not ready to bake a perfect cake right out of the box. There are important steps you need to take first. Skipping them can lead to uneven cooking, strange smells, or even safety issues.
This guide covers what to do when you get a new oven and how to start cooking right from day one. We will walk you through unboxing, cleaning, break-in procedures, temperature checks, and pro tips that actually make a difference. By the end, you will feel confident and ready to use your new oven like a seasoned baker.
Key Takeaways
- Clean before first use: Always wipe down your new oven and remove any manufacturing residue before cooking.
- Run a burn-in cycle: Heat your oven to a high temperature for one to two hours to burn off any leftover factory oils or chemicals.
- Calibrate the temperature: Use an oven thermometer to verify accuracy and adjust settings so your recipes cook correctly every time.
- Position racks properly: Correct oven rack placement affects heat distribution and ensures even cooking results.
- Season and maintain regularly: Simple habits like wiping spills right away and checking seals keep your oven running at peak performance for years.
- Read the manual: The user manual contains essential settings, safety info, and features specific to your oven model.
- Start with simple recipes: Build confidence with easy bakes before attempting complex dishes in your new appliance.
📑 Table of Contents
- Unbox and Inspect Your New Oven Carefully
- Deep Clean Your New Oven Before First Use
- Run a Burn-In Cycle to Break In Your Oven
- Calibrate the Oven Temperature for Accurate Cooking
- Master Rack Positioning and Heat Distribution
- Essential Tips for Cooking with Your New Oven
- Oven Safety and Maintenance Best Practices
- Troubleshooting Common New Oven Issues
- Conclusion
Unbox and Inspect Your New Oven Carefully
The first step in new oven setup is simple but often rushed. You need to unbox your oven and inspect every part carefully. This step matters more than most people realize.
Remove All Packaging Materials
Take out all Styrofoam, plastic wraps, tape, and cardboard pieces. Manufacturers use a lot of protective material during shipping. Even small pieces left inside can cause smoke or smells when you first turn the oven on. Check inside the oven cavity, around the door seal, and beneath the bottom panel.
Check for Physical Damage
Look at the exterior and interior for any scratches, dents, or cracks. Inspect the door glass for chips or cracks. Check that all racks slide in and out smoothly. Make sure the door opens and closes properly without sticking. If you find any damage, contact the seller or manufacturer right away.
Verify All Accessories Are Included
Most ovens come with racks, trays, and sometimes a baking stone or pizza stone. Cross-check with the manual or the packaging list. Missing parts can delay your first cook, so find out early. Keep all manuals and receipts in a safe place for warranty purposes.
Quick Tip: Take photos of the box and any visible damage before you remove packaging. This can help if you ever need to file a claim with the retailer or shipping company.
Deep Clean Your New Oven Before First Use
Even brand new ovens have residue. Factory oils, dust, metal shavings, and chemical coatings can coat the interior. These substances can affect the taste of your food and produce smoke during early uses. Oven cleaning before the first cook is absolutely essential.
What to Clean
- Interior walls and floor: Wipe down all surfaces with a damp cloth.
- Oven racks: Wash them with warm soapy water and dry thoroughly.
- Glass door: Clean both sides with a gentle glass cleaner.
- Door seal and gasket: Wipe around the rubber seal to remove any dust or debris.
- Control panel: Use a lightly dampened cloth to wipe buttons and knobs.
What Cleaning Products to Use
Use mild dish soap and warm water for the interior. Avoid harsh chemical cleaners on brand new surfaces. Some people use a baking soda paste for stubborn spots. Just make sure you rinse everything well and dry it completely before the next step.
Common Mistake: Many people skip this step because the oven looks clean. But visual inspection does not reveal invisible residues. Always clean even if the oven looks brand new.
Run a Burn-In Cycle to Break In Your Oven
Every new oven needs a break-in period. This process is sometimes called a oven break in or burn-in cycle. It removes any remaining factory oils, coatings, or manufacturing residues that did not come off during cleaning.
How to Run a Burn-In Cycle
- Remove all racks, trays, and accessories from the oven.
- Set the oven to its highest temperature, usually around 400 to 450 degrees Fahrenheit.
- Leave the oven empty with the door slightly ajar for ventilation.
- Let it run for one to two hours.
- Turn off the oven and let it cool completely.
- Wipe down the interior once more with a damp cloth.
You may notice some smoke or smell during this process. That is completely normal. It is just the factory residue burning off. Open a window or turn on your range hood to ventilate the kitchen.
After the burn-in cycle, your oven is ready for actual cooking. This step significantly improves oven performance and helps prevent off-flavors in your food.
Calibrate the Oven Temperature for Accurate Cooking
One of the most overlooked steps in new oven setup is temperature calibration. Many new ovens run slightly hot or cold out of the box. Even a difference of 15 to 25 degrees can ruin a delicate recipe like souffle or custard.
How to Test Your Oven Temperature
Buy an inexpensive oven thermometer. Place it on the center rack. Preheat the oven to 350 degrees Fahrenheit. Wait at least 20 minutes and check the thermometer reading. Compare it to the dial setting.
What to Do If the Temperature Is Off
- If the oven runs hot: Lower the temperature setting by the difference shown on the thermometer.
- If the oven runs cold: Increase the temperature setting by the difference shown.
- Some ovens allow manual calibration: Check your user manual for adjustment instructions specific to your model.
Recheck the temperature every few months. Over time, oven sensors can drift. Regular oven maintenance keeps your temperature readings accurate and your recipes consistent.
Expert Insight: Professional bakers always use oven thermometers. Do not trust the built-in dial alone. A twenty-dollar thermometer can save dozens of failed bakes.
Master Rack Positioning and Heat Distribution
Where you place the oven rack changes everything about how your food cooks. Oven rack positioning is one of the simplest yet most impactful things you can learn when starting with a new appliance.
Common Rack Positions and When to Use Them
- Bottom rack: Best for pizzas, bread, and dishes that need intense bottom heat.
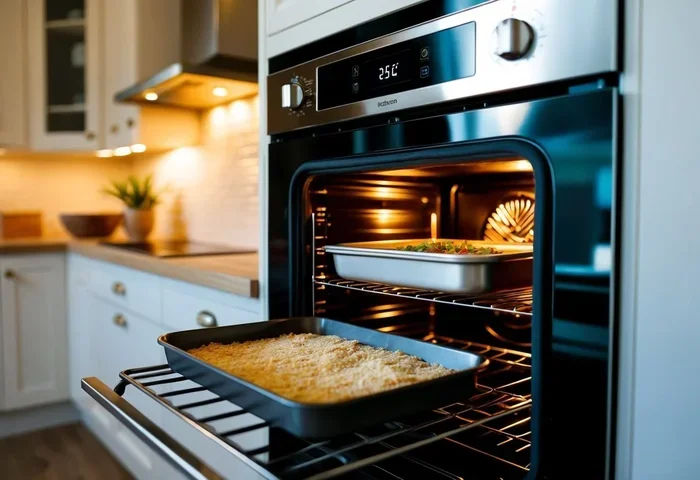
- Center rack: The default position for most baking and roasting. It provides the most even heat distribution.
- Top rack: Ideal for dishes that need a crispy top, like casseroles or broiled items.
- Multiple racks: Use when baking multiple trays at once, but rotate them halfway through for even results.
Convection vs. Conventional Heating
If your oven has a convection setting, it uses a fan to circulate hot air. This cooks food faster and more evenly. However, you may need to reduce the temperature by about 25 degrees when using convection mode. Convection ovens are excellent for roasting vegetables, baking cookies, and cooking multiple dishes at once.
Quick Tip: Always preheat your oven before placing food inside. Preheating ensures the temperature is stable and your food starts cooking immediately at the right heat.
Essential Tips for Cooking with Your New Oven
Now that your oven is clean, broken in, and calibrated, it is time to start cooking. Here are practical tips that help you get great results from day one.
Start with Simple Recipes
Do not attempt a complicated seven-layer cake on your first try. Start with simple recipes like cookies, roasted vegetables, or a basic sheet pan dinner. Simple recipes help you learn how your specific oven behaves. Every oven has its own personality and quirks.
Learn Your Oven Hot Spots
Most ovens have uneven heat zones. To find yours, spread a single layer of bread slices on a baking sheet. Toast them at 350 degrees for a few minutes and observe which slices brown fastest. Those areas are your hot spots. When baking, rotate your trays to compensate.
Use Oven-Safe Cookware Only
Not all cookware works in every oven. Check the manufacturer’s recommendations for maximum temperature limits. Glass pans, metal sheets, and cast iron are generally safe for high heat. Plastic handles and non-stick coatings with low heat limits need extra care.
Invest in Basic Oven Accessories
- Oven thermometer: Essential for temperature accuracy.
- Baking stones or steel: Improve heat retention and create crispier crusts.
- Parchment paper or silicone mats: Prevent sticking and make cleanup easier.
- Rack covers or shields: Protect delicate foods from burning on top.
Keep a Cooking Journal
Write down what works and what does not. Note temperatures, times, and rack positions that give you the best results. Over time, this journal becomes your personal guide for getting the most out of your new oven. It also helps you troubleshoot when something goes wrong.
Oven Safety and Maintenance Best Practices
A new oven is a long-term investment. Proper care keeps it safe, efficient, and performing well for many years. Oven maintenance does not need to be complicated. A few simple habits make a huge difference.
Safety Tips for New Oven Owners
- Always preheat before placing food inside.
- Use oven mitts when handling hot racks and trays.
- Keep flammable items like towels and paper away from the oven.
- Never leave a running oven unattended during long cooking sessions.
- Make sure the oven vent and exhaust fan are working properly.
- Test the door seal regularly to ensure it closes tightly.
Routine Maintenance Checklist
- Wipe up spills immediately after the oven cools.
- Clean racks and trays after every few uses.
- Check the door seal monthly for cracks or gaps.
- Recalibrate the oven thermometer every three months.
- Run a self-cleaning cycle if your oven has that feature.
- Inspect heating elements for damage or discoloration.
Common Mistake: Many people ignore small problems until they become big ones. A slightly damaged door seal lets heat escape, which increases cooking time and energy bills. Fix small issues early to avoid expensive repairs later.
Self-Cleaning Oven Tips
If your oven has a self-cleaning feature, use it periodically. Run the cycle after the oven has cooled from a high-heat session. Always ventilate the room during the self-cleaning cycle because it produces smoke and odors. After the cycle finishes, wipe away the ash residue with a damp cloth.
Troubleshooting Common New Oven Issues
Even with proper care, new ovens can sometimes behave unexpectedly. Here are common issues and how to fix them.
Oven Not Heating to the Right Temperature
This is usually a calibration issue. Use an oven thermometer to confirm the problem. Adjust the temperature setting manually or consult the manual for calibration mode instructions.
Food Cooking Unevenly
Check rack positioning and rotate trays halfway through cooking. If the problem persists, the heating element may need inspection. Contact a technician for oven troubleshooting if basic fixes do not work.
Strange Smells During First Few Uses
Some smell during the first few uses is normal. Run the burn-in cycle again if the smell persists after the initial break-in period. Make sure no packaging material is left inside.
Door Not Closing Properly
Check for debris around the seal and edges. If the door is misaligned, consult the manual for adjustment instructions. A door that does not seal properly wastes energy and affects cooking performance.
Key Takeaway: Most new oven issues have simple solutions. Start with the basics before calling a professional. Your user manual is the best first resource for any problem.
Conclusion
Getting a new oven opens up a world of cooking possibilities. But the real magic happens when you take the right steps from the very beginning. What to do when you get a new oven starts with careful unboxing, thorough cleaning, and a proper break-in cycle. From there, calibrating the temperature, learning rack positions, and following safe cooking habits set you up for success.
Treat your new oven with care, and it will reward you with perfectly baked breads, roasted meals, and countless delicious memories. Start simple, pay attention to how your oven behaves, and build your skills over time. The journey of cooking with a new oven is just as rewarding as the meals you create.
Now that you know exactly what to do, it is time to put these steps into action. Your new oven is ready. Your kitchen is ready. And your next great meal is just one preheated oven away.
Frequently Asked Questions
How long should I run the burn-in cycle for a new oven?
Run the burn-in cycle for one to two hours at the highest temperature setting. This removes factory oils and residues that can affect food taste and produce smoke during early uses.
Do I really need an oven thermometer if my oven has a built-in display?
Yes, you do. Built-in temperature displays are often inaccurate by 15 to 25 degrees. A separate oven thermometer gives you reliable readings and helps you adjust settings for perfect cooking results.
Can I cook immediately after unboxing a new oven?
No, you should not. Always clean the interior, remove all packaging residue, and run a burn-in cycle first. Skipping these steps can lead to off-flavors, smoke, and uneven cooking in your first few uses.
How often should I calibrate my oven temperature?
Check your oven temperature every three to four months. Over time, sensors can drift, and regular recalibration keeps your recipes consistent and your cooking results reliable.
What is the best rack position for baking cookies?
The center rack is the best position for baking cookies. It provides even heat distribution from all sides, which helps cookies bake uniformly without burning on the top or bottom.
Is it normal for a new oven to smell during the first use?
Yes, it is completely normal. The smell comes from factory coatings and oils burning off during the first few heating cycles. Ventilating the kitchen and running a burn-in cycle before cooking food helps eliminate the smell quickly.