How To Cook Panini In Oven For Perfect Results Every Time
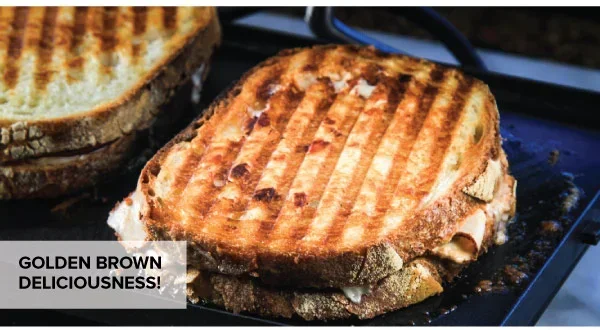
Learning how to cook panini in oven is simple, fast, and delivers amazing results without needing a fancy panini press. This guide walks you through every step, from choosing the right bread to nailing the perfect golden crunch. You will discover easy filling ideas, oven temperatures, and pro tips that make homemade panini taste like they came from a café. Follow our step-by-step instructions and enjoy perfect oven-baked panini any day of the week.
Cooking panini in the oven is one of the easiest and most satisfying ways to make a restaurant-quality sandwich at home. Whether you are craving a classic Italian sandwich or something with your own creative twist, the oven method gives you that perfect crispy exterior and gooey melted cheese interior. You do not need a special panini press or sandwich maker to get incredible results. All you need is a hot oven, some great bread, and your favorite fillings.
Many people think that making a great panini requires expensive equipment. That is simply not true. Your home oven works just as well, and in many ways even better. You get more control over the heat, you can cook multiple sandwiches at once, and the cleanup is a breeze. This guide will show you exactly how to cook panini in oven for perfect results every single time. Let us dive in.
Key Takeaways
- No panini press needed: Your regular oven can produce crispy, delicious panini with the right technique.
- Bread choice matters: Ciabatta, focaccia, and sourdough give the best results for oven panini.
- Temperature and timing are key: Baking at 375°F for 8 to 12 minutes creates the perfect crunch.
- Add weight for crispiness: Using a heavy pan or foil ball presses the sandwich gently for even browning.
- Avoid common mistakes: Overfilling, skipping butter, and not flipping halfway are the top errors to dodge.
- Endless filling options: From classic Italian to veggie-packed, the possibilities for your homemade panini are endless.
- Rest your sandwich briefly: Letting it sit for two minutes after baking keeps the filling from falling out.
📑 Table of Contents
- Why Cooking Panini In The Oven Is A Great Idea
- Choosing The Right Bread For Oven Panini
- How To Prepare The Perfect Panini Filling
- Step By Step Guide To Cooking Panini In Oven
- Tips For Crispy Golden Panini Every Time
- Common Mistakes To Avoid When Making Oven Panini
- Frequently Asked Questions About Cooking Panini In The Oven
- Conclusion
Why Cooking Panini In The Oven Is A Great Idea
There are many reasons to choose the oven method for making your next grilled sandwich. The oven gives you even heat distribution, which means every part of your panini gets crispy at the same rate. Unlike a stovetop grill where hot spots can burn one side, the oven surrounds the sandwich with consistent warmth.
Another big advantage is capacity. A standard oven can fit two or three panini at once. This makes it perfect for feeding a family or hosting a casual lunch. You do not need to cook them one at a time like you would with a panini press or a skillet on the stove.
Benefits Over A Panini Press
While a panini press works great, it has limitations. Most presses only handle one sandwich at a time. They also leave grill marks that some people love but others find messy. The oven method gives you a more uniform golden color on the bread. Plus, you are not limited by the size of your press.
The oven also allows you to use a wider variety of bread shapes and sizes. You can fit a large Italian loaf or smaller individual rolls without worrying about whether they fit between the plates of a press. This flexibility makes oven-baked panini a favorite among sandwich lovers.
When You Do Not Have A Panini Press
Let us be honest. Not everyone owns a panini press or sandwich maker. Maybe you just moved into a new apartment and have not bought one yet. Or perhaps you are at a friend’s house and they do not have one. The oven method solves this problem completely. You can make a fantastic panini with just your oven and a baking sheet.
Even if you do own a press, the oven method is worth learning. It gives you more control over the final texture and lets you experiment with different bread types and fillings. Many professional cooks prefer the oven for certain sandwich recipes because of the consistent results it delivers.
Choosing The Right Bread For Oven Panini
The bread you choose makes or breaks your panini. A good bread holds up to the heat and the weight of the fillings without turning to mush. At the same time, it needs to become crispy on the outside while staying soft on the inside. Not all breads are created equal when it comes to making the perfect oven-baked sandwich.
Best Bread Types For Crispy Panini
Here are the top bread choices for making homemade panini in the oven:
- Ciabatta: This Italian bread has a crispy crust and a soft, airy interior. It is the classic choice for a reason. Ciabatta holds fillings well and toasts beautifully in the oven.
- Focaccia: With its slightly chewy texture and olive oil richness, focaccia adds amazing flavor. It browns evenly and stays sturdy under heavy fillings.
- Sourdough: The tangy flavor of sourdough pairs wonderfully with melted cheese and cured meats. It also has a firm crust that crisps up nicely.
- French Baguette: A baguette gives you that shattering crispy exterior. Just be careful not to overfill it, as the thin loaf can become fragile when wet ingredients are added.
- Italian Bread: A classic Italian loaf works great for a traditional panini. It is sturdy, slightly chewy, and absorbs flavors without falling apart.
Breads To Avoid
Not every bread works well for oven panini. Avoid soft sandwich bread because it will not crisp up properly and will turn soggy from the fillings. Skip thin white bread as well, since it will burn before the inside heats through. Also, avoid very dense breads like pumpernickel unless you are using a very light filling. The bread needs some structure and a bit of chew to survive the oven.
| Bread Type | Crispiness | Holds Fillings Well | Flavor |
|---|---|---|---|
| Ciabatta | High | Excellent | Mild, slightly tangy |
| Focaccia | Medium-High | Excellent | Rich, herby, olive oil |
| Sourdough | High | Very Good | Tangy, complex |
| Baguette | Very High | Good | Neutral, crispy |
| Italian Bread | Medium-High | Very Good | Mild, slightly sweet |
| White Sandwich Bread | Low | Poor | Mild, bland when toasted |
How To Prepare The Perfect Panini Filling
The filling is where your creativity shines. A great panini filling balances flavors, textures, and moisture levels. Too much wet ingredient and your bread will get soggy. Too little and the sandwich will be dry and boring. The trick is layering things thoughtfully so every bite is delicious.
Cheese Options That Melt Beautifully
Cheese is the glue that holds a panini together. It also creates that beautiful gooey stretch every time you bite in. Here are the best cheeses for oven panini:
- Mozzarella: Melts perfectly and has a mild, creamy flavor. Fresh mozzarella is especially good because it has a soft, milky taste.
- Provolone: This Italian cheese adds a sharp, slightly smoky flavor. It melts smoothly and pairs well with cured meats.
- Cheddar: A classic melting cheese that brings sharpness and richness. Sharp cheddar adds a nice kick to any panini.
- Gruyère: A Swiss cheese that melts beautifully and has a nutty, slightly sweet flavor. It is a gourmet choice that elevates any sandwich.
- Fontina: This Italian cheese is creamy and mild, making it a fantastic melter. It works well with both meat and vegetable fillings.
Meat And Veggie Combinations
Your protein and vegetable choices can turn a simple sandwich into something extraordinary. Here are some winning combinations to try:
- Classic Italian: Prosciutto, fresh mozzarella, roasted red peppers, and basil leaves. Add a drizzle of balsamic glaze for extra flavor.
- Grilled Chicken Ranch: Sliced grilled chicken, sharp cheddar, lettuce, and ranch dressing. This is a crowd-pleaser for lunch boxes too.
- Veggie Delight: Roasted red peppers, sautéed mushrooms, spinach, and provolone. Add a spread of pesto for a burst of fresh flavor.
- Italian Meat Feast: Capicola, salami, pepperoni, provolone, and a touch of mustard. This is a hearty sandwich that satisfies any craving.
- Turkey Avocado: Sliced turkey, avocado, tomato, and Swiss cheese. A fresh, lighter option that still feels indulgent.
Spreads And Sauces To Elevate Your Sandwich
Do not underestimate the power of a good spread. A layer of sauce or butter on the outside of the bread adds flavor and helps create that golden crunch. Here are some spreads to consider:
- Butter: A thin layer of softened butter on the outside of the bread is the secret to extra crispy panini. It browns beautifully in the oven.
- Garlic Butter: Add minced garlic to softened butter for an aromatic boost. This works especially well with Italian fillings.
- Olive Oil: A light brush of olive oil on the bread gives a subtle richness and helps the crust turn golden.
- Marinara Sauce: A thin spread of marinara on the inside adds moisture and a savory Italian flavor. It is perfect for a meat-heavy panini.
- Pesto: Basil pesto adds a fresh, herbaceous note that pairs wonderfully with cheese and grilled vegetables.
Step By Step Guide To Cooking Panini In Oven
Now that you have your bread, fillings, and spreads ready, it is time to cook. Follow these simple steps for panini perfection every time.
Preheating And Setting Up
Start by preheating your oven to 375°F. This temperature is the sweet spot for panini. It is hot enough to crisp the bread quickly but not so hot that the fillings burn before the cheese melts. While the oven is heating, line a baking sheet with parchment paper. This prevents sticking and makes cleanup a breeze.
Next, assemble your sandwich. Layer your fillings in the center of one bread slice. Place the cheese directly against the bread, as it acts as a glue. Add your meats, vegetables, and spreads on top. Finish with the second slice of bread on top, spread side facing out. This means if you spread butter or oil on the outside, that side faces up and down against the pan.
The Cooking Process
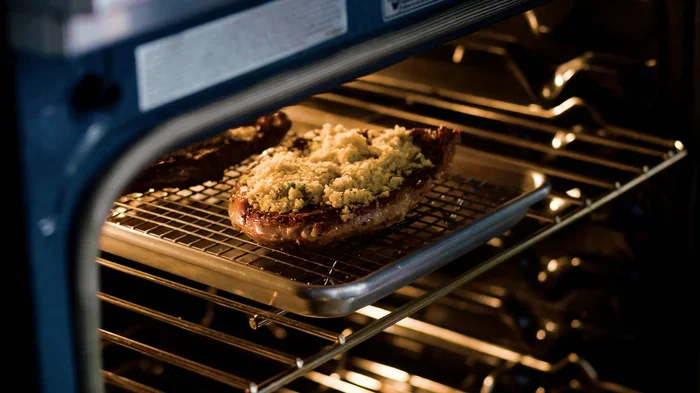
Place your assembled sandwich on the prepared baking sheet. If you are cooking more than one, leave a small gap between them so the hot air can circulate evenly. For extra crispiness, brush the top and bottom of the bread lightly with olive oil or melted butter before putting it in the oven.
Put the baking sheet on the middle rack of your oven. The middle position ensures even heat exposure on all sides of the sandwich. Avoid placing it too high or too low, as this can cause uneven browning.
Timing And Temperature Guide
Bake your panini at 375°F for about 8 to 12 minutes. Here is a quick reference for timing based on your oven and sandwich thickness:
- Thin sandwiches (under one inch): 6 to 8 minutes. Check at the 6-minute mark to prevent burning.
- Standard sandwiches (one to two inches): 8 to 10 minutes. This is the most common range for a perfect result.
- Thick sandwiches (over two inches): 10 to 14 minutes. You may need to flip halfway through for even crisping.
At the halfway point, carefully flip each sandwich using a spatula. This ensures both sides get equally golden and crispy. Watch the sandwiches closely during the last two minutes. You want the bread to be a deep golden brown, not burnt.
Tips For Crispy Golden Panini Every Time
Getting that perfect crispy exterior takes a little know-how. These simple tips will elevate your oven panini from good to absolutely amazing.
Use Parchment Paper For Easy Cleanup
Parchment paper does more than just keep your baking sheet clean. It also helps the bread crisp evenly by allowing air to flow underneath the sandwich. If you do not have parchment paper, a lightly greased baking sheet works too. Avoid using wax paper, as it can smoke in a hot oven.
Add Weight For Even Pressing
While the oven does not press the sandwich like a panini press, you can add weight for a flatter, crispier result. Place another sheet of parchment paper on top of the sandwich and then put a heavy baking sheet or a cast iron skillet on top. This gentle pressure helps the bread make better contact with the heat source.
Another trick is to place a small ball of aluminum foil on top of the parchment paper before adding the weight. The foil ball conforms to the shape of the sandwich and presses down on the high points, ensuring the entire surface gets crispy.
Flip Your Sandwich Halfway Through
This is one of the most overlooked tips for making oven panini. Flipping halfway through ensures both sides get equally golden. Without flipping, the top side can stay pale while the bottom gets too dark. Use a wide spatula to flip gently so the fillings do not slide out.
Let The Sandwich Rest Before Cutting
Patience is key. Let your panini rest for two to three minutes after removing it from the oven. This allows the melted cheese to set slightly, which means it stays inside the sandwich when you cut into it. Cutting too soon is the number one reason fillings spill out and make a mess.
Common Mistakes To Avoid When Making Oven Panini
Even with the best recipe, small mistakes can ruin your panini. Here are the most common errors and how to avoid them.
Overfilling The Sandwich
The biggest mistake people make is adding too much filling. An overstuffed panini is impossible to eat neatly and often falls apart. The bread cannot hold all that weight, and the excess moisture from vegetables and sauces makes the bread soggy. Keep your filling layer to about a quarter-inch thick. Less is more when it comes to panini.
Using The Wrong Temperature
Too high a temperature will burn the bread before the cheese melts. Too low a temperature will leave the bread limp and pale. Stick to 375°F for most sandwiches. If your oven runs hot, reduce the temperature by 10 to 15 degrees and check your panini a minute or two earlier.
Skipping The Butter Or Oil
Some people skip the fat on the outside of the bread entirely. This is a missed opportunity. A light coating of butter or olive oil on the outer bread slices is what creates the crispy, golden crust. Without it, your panini will look pale and feel dry, even if the inside is perfect.
Not Preheating The Oven
Putting your sandwich in a cold oven is a recipe for disappointment. Always preheat your oven fully before the panini goes in. A properly preheated oven ensures the bread starts crisping immediately, which locks in moisture and creates that satisfying crunch.
Using Wet Ingredients Without Drying Them First
Tomatoes, fresh mozzarella, and roasted peppers can release a lot of moisture. Pat these ingredients dry with a paper towel before adding them to your panini. This small step makes a huge difference in keeping your bread crispy instead of soggy.
Frequently Asked Questions About Cooking Panini In The Oven
Can I Use A Toaster Oven To Cook Panini?
Absolutely. A toaster oven works just as well as a full-size oven for cooking panini. The only difference is that you may need to adjust the cooking time slightly since toaster ovens can run hotter. Keep an eye on your sandwich and check it a minute or two earlier than you would in a regular oven. The results are just as crispy and delicious.
What Is The Best Temperature To Cook Panini In The Oven?
375°F is the ideal temperature for cooking panini in the oven. This heat level is hot enough to crisp the bread beautifully while giving the cheese and fillings time to melt through. If you prefer a lighter toast, you can drop the temperature to 350°F and add a couple of minutes to the cooking time. For a darker, crunchier crust, try 400°F but watch the sandwich closely to prevent burning.
Do I Need To Use Foil When Cooking Panini In The Oven?
Foil is not required, but it can be very helpful. Wrapping the sandwich loosely in foil creates a mini oven effect that traps heat and melts the cheese faster. However, foil will prevent the bread from getting as crispy. For the best of both worlds, cook the sandwich uncovered for most of the time and cover it with foil only during the last two minutes if the cheese needs more melting time.
How Long Should I Cook Panini In The Oven?
Most oven panini take between 8 and 12 minutes at 375°F. Thin sandwiches with fewer fillings may be done in as little as 6 minutes, while thicker, heavily stuffed sandwiches may need up to 14 minutes. The best indicator is the color of the bread. You want a deep golden brown on both sides. If you flip the sandwich halfway through, check both sides for even browning.
Can I Make Panini In The Oven Without Butter?
Yes, you can make delicious panini without butter. Simply brush the outside of the bread with olive oil instead. Olive oil gives a slightly different flavor but still creates a crispy, golden crust. You can also use a light spray of cooking oil. The sandwich will still turn out great even without butter, though butter does add a rich flavor that many people love.
What Are The Best Fillings For An Oven Panini?
The best fillings are those that balance flavor, moisture, and texture. Classic combinations include mozzarella and tomato with fresh basil, prosciutto with provolone and roasted peppers, or turkey with Swiss cheese and avocado. The key is to avoid overly wet ingredients and to use cheese as a binding layer. You can also add spreads like pesto, mustard, or a thin layer of marinara sauce for extra flavor. Get creative and experiment with your favorites.
Conclusion
Learning how to cook panini in oven opens up a world of delicious possibilities right in your own kitchen. You do not need expensive equipment or special skills. With the right bread, a thoughtful filling, and a hot oven set to 375°F, you can create sandwiches that rival any café or restaurant. The process is simple, fast, and endlessly customizable to suit your taste.
Remember the key steps: choose a sturdy bread like ciabatta or focaccia, layer your fillings thoughtfully, brush the outside with butter or olive oil, and bake for 8 to 12 minutes. Flip halfway through for even crispiness, and always let your panini rest for a couple of minutes before cutting. These small habits make a big difference in the final result.
Once you master the oven method, you will never go back to ordering panini from a shop. The beauty of homemade panini is that you control every ingredient. You can make them healthier, richer, spicier, or lighter depending on your mood. Whether you are making lunch for one or feeding a crowd, the oven method delivers every time.
So preheat your oven, gather your favorite ingredients, and start making perfect panini today. With this guide, you have everything you need for crispy, cheesy, golden-brown panini that taste incredible. Your kitchen is about to become your favorite sandwich shop. Enjoy every bite and happy cooking!