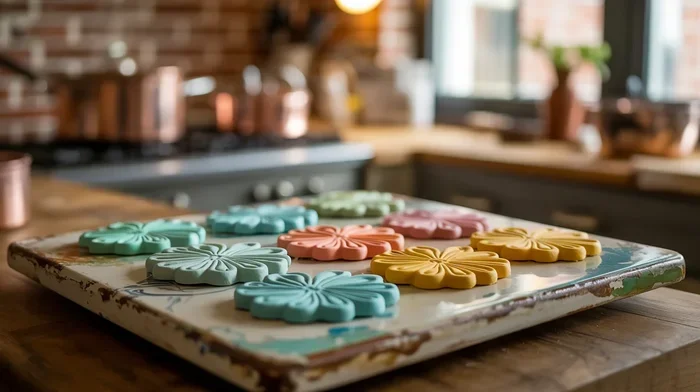
How Long Polymer Clay In Oven Takes to Cure Properly
How long polymer clay in oven takes to cure depends on thickness, brand, and oven temperature. Most projects need 15 to 30 minutes at 275°F (135°C). Baking at the right temperature for the correct duration ensures a durable, fully cured finished piece every single time.
Polymer clay is one of the most versatile and fun crafting materials available today. Whether you make jewelry, figurines, or home decor, you need to know how long polymer clay in oven takes to cure properly. Getting the baking time right makes the difference between a professional-looking piece and a frustrating disaster.
Many beginners worry about this step. They fear burning their creation or leaving it underbaked and fragile. The good news is that baking polymer clay is simple once you understand the basics. This guide covers everything you need to know about curing times, temperatures, and best practices.
By the end of this article, you will feel confident walking into your kitchen and baking your polymer clay projects with perfect results every time. Let us dive into the details.
Key Takeaways
- Standard baking time is 15-30 minutes per quarter inch of thickness at 275°F (135°C).
- Never overbake or underbake polymer clay as both lead to brittleness or softness.
- Use an oven thermometer to verify accurate temperature since ovens often run hot or cold.
- Thickness is the biggest factor in determining how long polymer clay in oven needs to bake.
- Always condition your clay first to remove air bubbles and ensure even curing.
- Different brands have slightly different requirements, so check the packaging instructions.
- Let pieces cool completely before handling to prevent cracking or warping.
📑 Table of Contents
What Is Polymer Clay and Why Does Baking Time Matter?
Polymer clay is a synthetic modeling material made from PVC particles, plasticizers, and pigments. Unlike air-dry clay, polymer clay requires heat to harden. The baking process triggers a chemical reaction that bonds the particles together into a solid, durable form.
The baking time matters because it directly affects the quality of your finished piece. Too little time and the clay stays soft and crumbly. Too much time and it can burn, discolor, or become brittle. Finding the sweet spot is essential for a successful project.
Most polymer clay brands recommend baking at around 275 degrees Fahrenheit, which is about 135 degrees Celsius. However, the exact duration varies based on several factors we will cover below. Understanding these factors helps you avoid common pitfalls and achieve consistent results.
When you learn how long polymer clay in oven needs to bake, you unlock endless creative possibilities. You can confidently create intricate designs, layered pieces, and detailed sculptures without worrying about the curing process.
The Science Behind Curing Polymer Clay
The curing process is straightforward but fascinating. When you place polymer clay in a heated oven, the PVC particles soften and the plasticizers bind them together. This creates a solid, flexible structure that holds its shape permanently.
The reaction happens at a specific temperature range. If your oven is too cool, the clay will not fully cure. If it is too hot, the plasticizers break down and the clay becomes brittle. This is why precision matters so much in the baking process.
Always preheat your oven before placing your clay inside. A stable temperature ensures even curing throughout the entire piece. Uneven heat can leave some parts soft while others are overcooked.
The Ideal Oven Temperature for Polymer Clay
Getting the temperature right is the most critical step in baking polymer clay. Most brands, including Fimo, Sculpey, and Kato, recommend 275 degrees Fahrenheit or 135 degrees Celsius. This is the standard temperature for baking polymer clay properly.
However, not all ovens are created equal. Many home ovens run hotter or cooler than the dial indicates. This is where an oven thermometer becomes your best friend. A simple thermometer placed inside your oven gives you an accurate reading of the actual temperature.
Here are some important temperature guidelines to keep in mind:
- Standard temperature: 275 degrees Fahrenheit (135 degrees Celsius) for most brands.
- Kato clay: Sometimes requires slightly higher temperatures around 300 to 325 degrees Fahrenheit.
- Sculpey Original: Stays at the standard 275 degrees Fahrenheit.
- Fimo Professional: Also bakes at 275 degrees Fahrenheit but may need slightly longer times.
Always check the specific brand instructions on the packaging. Each manufacturer provides recommended temperatures and times tailored to their formula. Following these guidelines ensures the best possible outcome for your project.
Why Oven Accuracy Is Crucial
An inaccurate oven can ruin your polymer clay projects without you even realizing it. If your oven runs 25 degrees hot, you might be baking at 300 degrees instead of 275. This subtle difference can cause discoloration and brittleness over time.
Convection ovens present another consideration. The fan circulates hot air, which can cause uneven baking if you are not careful. Some crafters recommend lowering the temperature by 25 degrees in convection ovens to compensate.
A standalone oven thermometer costs just a few dollars and eliminates all guesswork. Place it inside your oven and compare the reading to your oven’s display. If there is a discrepancy, adjust accordingly. This small investment pays off in perfectly cured pieces every time.
How Long to Bake Polymer Clay in the Oven
The general rule of thumb for how long polymer clay in oven takes is 15 minutes per quarter inch of thickness. So a piece that is half an inch thick needs about 30 minutes of baking time. A quarter-inch piece needs around 15 minutes.
But this is just a starting point. The actual time depends on the clay brand, the thickness, the oven temperature, and the size of your project. Let us break this down further.
Baking Times by Thickness
Thickness is the single most important factor in determining baking duration. Here is a quick reference guide:
- 1/4 inch (6mm): 15 minutes at 275 degrees Fahrenheit.
- 1/2 inch (12mm): 30 minutes at 275 degrees Fahrenheit.
- 3/4 inch (19mm): 45 minutes at 275 degrees Fahrenheit.
- 1 inch (25mm): 60 minutes at 275 degrees Fahrenheit.
These times apply to standard polymer clay brands at the recommended temperature. If you are working with a thicker piece, you may need to increase the time slightly. Always err on the side of slightly longer rather than shorter. It is far better to overbake by a few minutes than to underbake.
Baking Times by Brand
Different brands have slightly different formulations, which affects curing time. Here is a comparison of popular brands and their recommended baking guidelines:
- Sculpey Original: 15 minutes per quarter inch at 275 degrees Fahrenheit.
- Fimo Professional: 30 minutes at 275 degrees Fahrenheit regardless of thickness.
- Kato Polyclay: 10 to 15 minutes per quarter inch at 300 to 325 degrees Fahrenheit.
- Cernit: 30 minutes at 275 degrees Fahrenheit.
Always read the instructions on your specific clay package. The manufacturer knows their formula best and provides the most accurate guidance for their product.
Factors That Affect Baking Time and Curing
Several factors influence how long polymer clay in oven needs to bake. Understanding these variables helps you adjust your approach for each unique project.
Thickness and Size of Your Piece
The thicker the clay, the longer it needs to bake. This is because heat needs time to penetrate through the entire piece. A thin pendant cures quickly, while a thick sculpture requires significantly more time.
For large or thick projects, some crafters bake in intervals. They bake for 15 minutes, let the piece cool, and then bake again. This gradual approach helps prevent burning on the outside while ensuring the inside cures fully.
Clay Composition and Mixtures
If you mix different brands or colors of polymer clay, the curing time may change. Some clays are softer and need more time, while others are firmer and cure faster. When mixing clays, aim for the longer baking time of the two brands to ensure everything cures completely.
Adding inclusions like metal findings, glass beads, or wire armatures also affects baking time. Metal conducts heat differently than clay, so pieces with embedded metal components may need slightly adjusted times.
Oven Type and Placement
The type of oven you use matters. Conventional ovens provide more even heat distribution than toaster ovens. However, toaster ovens work fine for small polymer clay projects if you monitor the temperature carefully.
Placement inside the oven also affects results. Center your clay on the middle rack for the most even heat exposure. Avoid placing pieces too close to the oven walls or heating elements, as this can cause uneven browning or burning.
Altitude and Room Temperature
Higher altitudes have lower air pressure, which can affect how polymer clay cures. Crafters living above 3,000 feet may need to adjust baking times slightly. Room temperature also plays a role. If your clay is cold when it goes into the oven, it needs extra time to come up to temperature before curing begins.
Common Mistakes People Make When Baking Polymer Clay
Even experienced crafters sometimes make mistakes when baking polymer clay. Knowing what to avoid saves you time, money, and frustration.
Underbaking the Clay
Underbaking is the most common mistake in polymer clay crafting. When clay does not bake long enough, it remains soft and crumbly. An underbaked piece can crumble at the edges or break easily under pressure.
If you suspect your clay is underbaked, you can return it to the oven for additional time. However, it is better to get the time right the first time. Use a timer and follow the recommended guidelines closely.
Overbaking and Burning
Overbaking causes discoloration, brittleness, and in severe cases, burning. Overbaked polymer clay turns brown or black and becomes fragile. The fumes from overheated polymer clay can also be unpleasant and potentially irritating.
Always set a timer and stay nearby when baking polymer clay. While it is difficult to overbake by just a few minutes, leaving clay in for too long at high temperatures will damage it.
Skipping the Oven Thermometer
Many people assume their oven displays the correct temperature. In reality, most ovens have a variance of 10 to 25 degrees. Skipping the thermometer is a gamble that often leads to inconsistent results.
An oven thermometer removes all doubt. It costs very little and provides peace of mind. Make this one small investment and your polymer clay projects will thank you.
Baking on the Wrong Surface
Never bake polymer clay directly on bare metal or cardboard. Metal can create shiny spots on the bottom of your piece, and cardboard can leave ash marks. Use parchment paper, ceramic tiles, or a dedicated polymer clay baking surface instead.
Parchment paper is the most popular choice because it is inexpensive and widely available. Just lay your clay on a sheet of parchment paper placed on a baking tray and you are ready to go.
Tips for Perfectly Cured Polymer Clay Every Time
Follow these practical tips to consistently achieve beautiful, fully cured polymer clay pieces. These recommendations come from experienced crafters and help you avoid the most common pitfalls.
Condition Your Clay Before Baking
Conditioning means kneading the clay until it becomes soft and pliable. This process removes air bubbles and ensures the clay is ready for baking. Air bubbles can expand during baking and create holes or cracks in your finished piece.
Use a pasta machine or simply knead by hand for several minutes. Well-conditioned clay cures more evenly and produces better results. This step is especially important for thicker pieces where trapped air can cause problems.
Let Pieces Cool Completely
Polymer clay is still slightly soft when you first remove it from the oven. Resist the urge to handle it immediately. Let it cool completely on a flat surface before moving or displaying it.
Cooling allows the internal structure to solidify fully. Moving a warm piece can cause it to bend, warp, or crack. Patience at this stage pays off with a stable, durable finished product.
Test with a Scrap Piece
If you are unsure about baking time or temperature, test with a small scrap piece first. Bake a scrap at your chosen settings and check the hardness afterward. This simple test helps you dial in your process before committing your main project.
You can test hardness by pressing a fingernail into the cooled clay. If it leaves an indent, the clay needs more time. A fully cured piece should be firm and resist pressure.
Use a Dedicated Oven or Toaster Oven
If you craft with polymer clay regularly, consider using a dedicated toaster oven. This prevents clay fumes from contaminating your food and eliminates the worry about residual smells. A small toaster oven works perfectly for most polymer clay projects.
Just make sure to clean the toaster oven thoroughly before and after each use. Line the bottom with foil or parchment paper to catch any drips or residue. Keeping your crafting oven separate from your kitchen oven is a smart practice.
Conclusion
Understanding how long polymer clay in oven takes to cure properly is essential for every crafter. The standard guideline of 15 minutes per quarter inch at 275 degrees Fahrenheit works for most projects. But remember that thickness, brand, oven accuracy, and clay composition all play a role in the final result.
Use an oven thermometer, follow the manufacturer’s instructions, and never rush the baking process. With a little practice and attention to detail, you will create beautiful, durable polymer clay pieces that look professionally made. Start with simple projects, test your baking settings, and build your confidence over time. Happy crafting!
Frequently Asked Questions
Can you overbake polymer clay in the oven?
Yes, overbaking is possible and it causes the clay to become brittle and discolored. Always follow the recommended baking times and temperatures for your specific clay brand. Setting a timer and staying nearby helps prevent overbaking accidents.
What happens if you underbake polymer clay?
Underbaked polymer clay remains soft, crumbly, and prone to breaking. It will not hold its shape well and may crumble at the edges over time. If you discover your piece is underbaked, you can return it to the oven for additional curing time.
Do you need to flip polymer clay while baking?
Flipping is not strictly necessary for most projects, but it can help ensure even curing for thicker pieces. If you notice one side browning faster than the other, flipping halfway through the baking time promotes more uniform results.
Can you bake polymer clay in a toaster oven?
Yes, a toaster oven works well for baking polymer clay, especially for small projects. However, toaster ovens may have less even heat distribution than full-size ovens. Use an oven thermometer to verify the temperature and monitor your pieces closely during baking.
How do you know when polymer clay is fully cured?
Fully cured polymer clay feels firm and does not leave an indent when pressed with a fingernail. It should not be soft or flexible. A simple hardness test after cooling confirms whether the piece has cured completely and is ready for sanding, painting, or sealing.
Is it safe to bake polymer clay in the same oven you use for food?
Yes, it is generally safe to bake polymer clay in a kitchen oven used for food. Polymer clay does not release toxic fumes when baked at the correct temperature. However, many crafters prefer to use a dedicated toaster oven to avoid any potential flavor transfer to food. Always keep your baking area clean and well-ventilated.