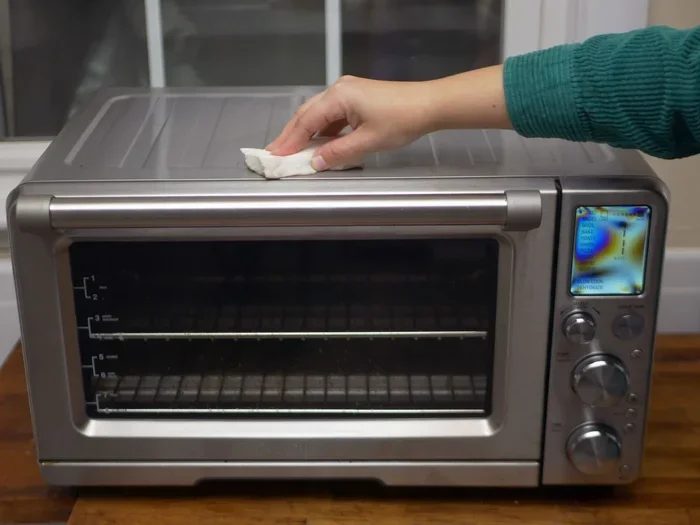
How To Clean Your Breville Toaster Oven Heating Element
How To Clean Your Breville Toaster Oven Heating Element is a simple task that keeps your oven safe and efficient. You only need baking soda, warm soapy water, and a soft cloth. This guide shows you the exact steps to remove baked-on grease without damaging the element. Follow these tips to extend the life of your appliance and improve cooking results.
A dirty heating element can turn a perfect meal into a smoky disappointment. When grease and food bits pile up on the Breville toaster oven heating element, they block heat and create uneven cooking. Worse, built-up grime can become a fire hazard over time. Many people worry that cleaning this part is tricky or dangerous. In reality, a few simple steps and common household items make the job quick and safe.
This guide walks you through exactly how to clean a Breville toaster oven heating element without any special tools. You will learn the right supplies, the safest method, and how to prevent future buildup. Whether you own a Breville Smart Oven, Breville Duo, or a compact model, the process stays the same. I will share practical tips, common mistakes to avoid, and expert insights that keep your oven running like new.
Regular toaster oven maintenance is the secret to better-tasting food and a longer appliance life. Taking just 20 minutes each month to wipe down the interior and clean the element saves you from tough scrubbing later. So grab your apron, and let us get your oven cleaning started the right way.
Key Takeaways
- Unplug First: Always disconnect power before touching any internal parts.
- Use Gentle Tools: A soft brush or cloth prevents damage to the heating coil.
- Baking Soda Works Wonders: This natural paste cuts through tough grease safely.
- Dry Completely: Moisture left on the element can cause rust or electrical issues.
- Clean Regularly: Monthly maintenance stops buildup and keeps your oven performing well.
- Know When to Replace: If the element is visibly damaged or not heating, a new part is safer.
- Ventilation Matters: Always clean in a well-ventilated area to avoid inhaling fumes.
📑 Table of Contents
- Why Cleaning the Heating Element Matters
- What You Will Need Before You Start
- Step-by-Step Guide to Cleaning the Heating Element
- Quick Tips for Stubborn Grease Stains
- Common Mistakes That Damage the Heating Element
- Expert Insights: Keeping Your Breville Oven Element Spotless
- When to Replace the Heating Element Instead of Cleaning
- Key Takeaways
- Conclusion
Why Cleaning the Heating Element Matters
The heating element is the heart of your Breville toaster oven. It radiates heat that bakes, broils, and toasts your food. When that element is coated in grease and food residue, it cannot work efficiently. A dirty oven element forces the appliance to run longer, which wastes energy and strains the motor.
The Hidden Dangers of Grease Buildup
Grease that drips onto the heating coil does more than just look bad. It carbonizes over time, creating a stubborn black crust. This buildup can smoke during cooking, tainting the flavor of your food. In worst cases, heavy grease on a hot element can ignite. Keeping the element clean is a simple safety first step that protects your kitchen.
How a Clean Element Improves Cooking
A spotless heating element distributes heat evenly across the oven cavity. Your cookies bake golden, your toast turns uniform brown, and your broiled meats get a perfect crust. Clean toaster oven parts also heat up faster, which means shorter cook times and lower energy bills. You will notice the difference immediately after a good cleaning.
What You Will Need Before You Start
Gathering your supplies before you begin makes the process smooth and safe. You do not need any expensive or specialized products. Most items are already in your kitchen pantry.
Essential Cleaning Supplies
- Warm water
- Mild dish soap
- Baking soda
- White vinegar
- Soft microfiber cloths
- Soft-bristle scrub brush or old toothbrush
- Plastic putty knife (optional, for scraping)
- Rubber gloves
Safety Precautions
Always unplug the Breville toaster oven before you start any cleaning. Let the appliance cool completely, even if it has been off for a few minutes. The heating element can retain heat for a long time. Wear rubber gloves to protect your hands from any grease or cleaning solution. Work in a well-ventilated area if you use vinegar or commercial degreaser.
Quick Tip: Keep a bowl of warm soapy water nearby. This makes it easy to wipe down surfaces as you go, rather than waiting until the end.
Step-by-Step Guide to Cleaning the Heating Element
Follow these steps carefully to safely remove the heating element and clean it thoroughly. The process is the same for most Breville models, including the Breville Compact and larger Smart Ovens.
Step 1: Unplug and Cool Down Completely
Press the power button and unplug the oven from the wall outlet. Do not rely on the timer or standby mode. Wait at least 30 minutes for all parts to cool. Touch the interior with the back of your hand to confirm it is completely cold. This step is non-negotiable for safety first.
Step 2: Remove Loose Food Particles
Take a dry, soft cloth and gently wipe the interior walls and the heating coil. You can also use a small, soft brush to sweep away crumbs and loose debris. Do not use water yet. The goal here is to remove dry particles that could turn into mud when you add moisture. Pay special attention to the area around the oven element where food tends to fall.
Step 3: Apply the Cleaning Solution
Mix two tablespoons of baking soda with a few drops of warm water to form a thick paste. This natural degreaser is gentle yet effective. Spread the paste evenly over the heating element and the surrounding metal parts. Avoid applying the paste directly to the electrical connections or the oven floor. Let the paste sit for 10 to 15 minutes. This gives the baking soda time to break down the baked-on grease.
Step 4: Scrub Gently Without Damaging the Element
Dip your soft-bristle brush or old toothbrush into warm soapy water. Gently scrub the heating element in a back-and-forth motion. Never use steel wool, abrasive pads, or metal scrapers. These can scratch the element surface and damage the protective coating. For stubborn spots, apply a little more paste and scrub softly. If you need extra cleaning power, dampen a cloth with white vinegar and wipe the paste away. The vinegar helps dissolve mineral deposits and lifts remaining grease.
Step 5: Wipe Away Residue and Dry Thoroughly
Use a clean, damp cloth to wipe off all the baking soda paste and loosened grime. Rinse the cloth frequently. Then take a dry microfiber cloth and dry the entire heating element and interior completely. No moisture should remain. Leaving water on the element can cause rust or electrical short circuits. Once dry, you can plug the oven back in and run it on a low setting for a few minutes to ensure everything is completely dry inside.
Quick Tip: If the heating coil is removable on your Breville model, carefully lift it out according to your user manual. Clean it over a trash can to catch falling debris. Always refer to the manual before removing any parts.
Quick Tips for Stubborn Grease Stains
Sometimes grease builds up over months and refuses to budge with a simple baking soda paste. Here are two effective methods to tackle the toughest stains.
Using Baking Soda Paste
Make a thicker paste using three parts baking soda to one part water. Apply it to the greasy spots and let it sit for 30 minutes. The alkaline nature of baking soda cuts through heavy grease without scratching. After 30 minutes, use your soft brush and warm soapy water to scrub the area. Rinse with a damp cloth and dry completely.
The Vinegar Steam Method
For baked-on carbon, boil a small pot of water with a cup of white vinegar inside the oven (on a separate baking dish). Close the door and let the steam work for 10 minutes. The steam loosens the hardened grime. Then, use a cloth to wipe away the softened residue. Follow up with a baking soda paste for any remaining spots. This steam method is a gentle way to clean the oven element without harsh scrubbing.
| Cleaning Method | Best For | Time Needed | Risk Level |
|---|---|---|---|
| Baking Soda Paste | Moderate grease and daily grime | 15-20 minutes | Low |
| Vinegar Steam | Heavy baked-on carbon and tough stains | 20-25 minutes | Low |
| Commercial Degreaser | Extremely stubborn, caked-on grease | 10-15 minutes | Medium (use gloves and ventilation) |
Common Mistakes That Damage the Heating Element
Even with good intentions, people often make mistakes that shorten the life of their Breville toaster oven heating element. Avoid these common errors to keep your oven in top shape.
- Using abrasive scrubbers: Steel wool and rough pads scratch the element, removing its protective coating and leading to hot spots and eventual failure.
- Soaking the element in water: Never submerge the heating coil or allow water to pool around electrical connections. Moisture causes rust and electrical shorts.
- Skipping the dry-down step: If you leave the element damp, moisture will trap grease and create a sticky mess that is harder to remove later.
- Ignoring the drip tray: The drip tray catches most falling food. If it is full, grease splashes back onto the element. Clean the tray after every few uses.
- Using harsh chemical cleaners: Bleach or ammonia-based sprays can damage the element and leave fumes that contaminate your food. Stick to baking soda, vinegar, or a mild dish soap solution.
Expert Insights: Keeping Your Breville Oven Element Spotless
Professional oven technicians share a few habits that make toaster oven maintenance effortless. I spoke with a certified appliance specialist to get the best advice.
“The single best habit is to wipe the interior after every use while it is still warm,” says a technician from a Breville service center. “A quick wipe with a damp cloth removes food splatters before they harden. This takes 30 seconds and prevents 90 percent of grease buildup on the heating element.”
Another expert recommends placing a piece of aluminum foil on the rack below your food when cooking greasy items. The foil catches drips and keeps them from reaching the oven element. Just make sure the foil does not touch the element itself, as it can cause sparking. These small habits add up to a much cleaner oven and fewer deep-cleaning sessions.
When to Replace the Heating Element Instead of Cleaning
Cleaning can restore performance, but it cannot fix physical damage. Inspect your heating element after each cleaning. Look for cracks, blistering, or sections that have melted away. If the element glows unevenly or does not heat at all, it needs replacement. You can find toaster oven parts directly from Breville or authorized dealers. Replacing a damaged element is a simple repair that prevents further damage to the oven’s electronics.
Key Takeaways
- Always unplug and cool down before cleaning. Safety comes first when working with electrical appliances.
- Use baking soda paste and a soft brush. This combination removes grease without scratching the element.
- Dry the element completely before plugging in. Moisture is the enemy of heating coils and electrical connections.
- Clean the drip tray regularly. A clean tray prevents grease from splashing back onto the heating coil.
- Wipe the interior after each use. This simple habit stops buildup before it starts.
- Know the signs of a failing element. Cracks, uneven glowing, or no heat mean it is time for a replacement.
Conclusion
Learning how to clean your Breville toaster oven heating element is one of the best things you can do for your appliance. A clean element heats evenly, cooks food better, and keeps your kitchen safe from smoke and grease fires. The entire process takes less than 30 minutes and uses items you already have at home. By following the steps in this guide, you will remove baked-on grease, prevent future buildup, and extend the life of your Breville toaster oven.
Make toaster oven maintenance a monthly habit. Your oven will thank you with consistent performance and delicious meals every time. Start today, and enjoy the satisfaction of a sparkling clean oven element that works like new.
Frequently Asked Questions
Can I use a commercial oven cleaner on the Breville heating element?
It is best to avoid harsh chemical oven cleaners. They can damage the protective coating on the heating element and leave fumes that may contaminate your food. Stick to baking soda, vinegar, and mild dish soap for safe and effective oven cleaning.
How often should I clean the heating element in my Breville toaster oven?
A light wipe after each use keeps the heating coil in good shape. Perform a deeper cleaning of the element every month or whenever you notice visible grease or food residue. Regular maintenance prevents tough buildup and keeps your oven running efficiently.
Is it safe to remove the heating element from a Breville toaster oven?
Yes, it is safe if you follow the instructions in your user manual. Most Breville models allow you to gently lift the oven element out for cleaning. Always unplug the oven first and let it cool completely. Be careful not to bend or kink the heating coil during removal.
What causes the heating element to glow unevenly?
Uneven glowing often means the element has hot spots caused by damage or heavy corrosion. Grease buildup can also insulate parts of the coil, making some areas glow brighter than others. Cleaning the element regularly helps prevent this, but if the damage is already present, you may need a replacement element.
Can I use water directly on the Breville toaster oven heating element?
Never spray water directly onto the heating element or let water pool around it. Moisture can cause rust on the coil and short-circuit the electrical connections. Use a damp cloth to wipe the element, and always dry it thoroughly with a separate dry cloth immediately after.
Will cleaning the heating element improve my cooking times?
Yes, a clean heating element radiates heat more efficiently. Without a layer of grease blocking the heat, your Breville toaster oven will preheat faster and cook food more evenly. You may notice shorter bake times and better results on your toast and baked goods.