How To Slow Cook Ribs In Oven At 250 For Tender Perfection
Learning how to slow cook ribs in oven at 250 is the ultimate way to achieve tender, fall-off-the-bone meat. This method uses low heat to break down collagen slowly, resulting in incredibly juicy pork ribs. You will discover the simple steps to prep, season, and bake your ribs to perfection. Whether you prefer baby backs or spare ribs, this guide ensures delicious results every time. Get ready to impress your family with restaurant-quality barbecue at home.
There is nothing quite like pulling a rack of ribs out of the oven and seeing that perfect bark. If you have ever wondered how to achieve tender, juicy pork ribs at home, the answer is simple. You need to learn how to slow cook ribs in oven at 250. This low and slow method transforms tough cuts into delicious meals. It breaks down the collagen in the meat, giving you that incredible fall-off-the-bone texture. Many people think you need a smoker for great ribs, but your oven can do the same job. With the right temperature and a little patience, you will create smoky flavor right in your kitchen. This guide will walk you through every step of the process.
Cooking ribs at home does not have to be intimidating. In fact, using your oven gives you complete control over the environment. You do not have to worry about wind or fluctuating outdoor temperatures. The oven provides consistent heat that surrounds the meat evenly. When you follow this method, you will get tender meat every single time. Let us dive into the details of how to slow cook ribs in oven at 250 and make your next meal a hit.
Key Takeaways
- Low and slow is key: Cooking at 250 degrees ensures tender meat without drying it out.
- Choose the right cut: Baby back ribs cook faster, while spare ribs offer more flavor and fat.
- Use a meat thermometer: Internal temperature of 195 to 203 degrees guarantees perfect doneness.
- Wrap in foil: The Texas crutch helps retain moisture and speeds up cooking.
- Rest your ribs: Letting the meat sit after cooking makes it juicier and easier to slice.
- Apply sauce late: Brush BBQ sauce on in the last 15 minutes to prevent burning.
📑 Table of Contents
Why 250 Degrees Is The Sweet Spot
When it comes to baking ribs, temperature is everything. Cooking at 250 degrees Fahrenheit is the gold standard for a reason. This temperature is low enough to prevent the meat from drying out, yet high enough to cook it in a reasonable timeframe. It creates the perfect environment for the collagen in the ribs to break down into gelatin. This process is what gives you that silky, tender texture you love.
Some cooks wonder if they should go even lower, like 225 degrees. While that works, it takes much longer. At 250 degrees, you strike the perfect balance. The meat cooks efficiently without losing too much moisture. The fat has enough time to render and baste the meat from the inside. You will notice that the ribs develop a beautiful crust without burning the outside. This is the magic of the low and slow approach. Always place the ribs on the middle oven rack to ensure even heat distribution.
The Science Of Low And Slow
Understanding the science behind this method helps you appreciate the results. When you expose pork ribs to high heat, the muscle fibers contract quickly. This squeezes out moisture and makes the meat tough. However, low and slow cooking allows the fat to render gradually. The heat gently melts the connective tissues without squeezing them dry. As a result, the ribs become incredibly juicy and flavorful. The 250-degree mark hits the sweet spot where the meat cooks thoroughly but remains succulent.
Another benefit of this oven temperature is the bark formation. The dry rub caramelizes slowly on the surface. This creates a flavorful crust that contrasts beautifully with the tender interior. You will notice that the meat easily pulls away from the bone. This is a clear sign that the collagen has done its job. Achieving this texture consistently starts with maintaining that steady 250-degree heat. Do not open the oven door too often, as this drops the temperature and slows down the process. A stable cooking environment is the key to perfect ribs.
Choosing The Right Ribs For Your Oven
Not all ribs are created equal. Before you start, you need to choose the right cut for your baking sheet. The two most popular options are baby back ribs and pork spare ribs. Both work wonderfully when you slow cook ribs in oven at 250, but they have distinct differences. Knowing these differences helps you pick the best option for your family.
When shopping, look for ribs with a good amount of pink meat on the bone. Avoid ribs that look gray or dry, as they will not turn out well in the oven. The meat should feel firm but not hard. If you are buying from a butcher, ask them to trim the excess fat from the surface. Too much fat can make the ribs greasy, while too little can leave them dry. A thin layer of fat is perfect for keeping the meat moist during the long cook. Fresh ribs should have a mild, porky smell, never sour or ammonia-like.
Baby Backs Vs Pork Spare Ribs
Baby back ribs come from the top of the ribcage, near the spine. They are leaner and cook faster than other cuts. Because of their leanness, they tend to be more tender and slightly sweeter. Spare ribs, on the other hand, come from the lower belly of the pig. They have more fat and more connective tissue. This extra fat makes them incredibly rich and flavorful, but they require a longer cooking time.
Another thing to consider is whether you want bone-in or boneless ribs. Bone-in ribs are the traditional choice for slow cooking in the oven at 250. The bones add flavor to the meat and protect it from drying out. They also make it easier to tell when the ribs are done by checking how much the meat has pulled back from the bone. Boneless ribs cook faster but can sometimes lack the structural integrity that bone-in ribs have. For the best results, stick with bone-in pork ribs when using this method.
Here is a quick comparison to help you decide:
- Baby Back Ribs: Leaner, smaller, cooks in 3 to 4 hours.
- Pork Spare Ribs: Fattier, larger, cooks in 4 to 5 hours.
| Feature | Baby Back Ribs | Pork Spare Ribs |
|---|---|---|
| Cook Time | 3 to 4 hours | 4 to 5 hours |
| Texture | Leaner, tender | Fattier, hearty |
| Flavor | Mild, sweet | Rich, smoky |
No matter which cut you choose, the method remains the same. You simply adjust the cooking time based on the weight and thickness of the rack. Always look for ribs with a good amount of pink meat on the bone. Avoid ribs that look gray or dry, as they will not turn out well in the oven. If you are new to cooking ribs, start with baby backs. They are more forgiving and cook faster, which makes them perfect for beginners.
Step-By-Step Guide To Slow Cooking Ribs
Now that you have your ribs ready, it is time to cook them. The process is straightforward, but it requires patience. Rushing the cook will lead to tough, chewy meat. Follow these steps carefully to ensure the best results.
Prepping Your Meat
Start by removing the membrane from the back of the ribs. This thin layer of skin can be tough and prevents rub and smoke from penetrating the meat. Use a butter knife to loosen it at the edge, then grab it with a paper towel and peel it off. Next, pat the ribs dry with paper towels. This helps the dry rub adhere better to the surface.
Take your time with this step. Removing the membrane is one of the most important things you can do for a better eating experience. If you leave it on, the ribs will be chewy and the rub will not penetrate the meat. It only takes a minute to peel it off, but it makes a huge difference. After removing the membrane, you can also trim any excess fat that is thicker than a quarter inch. This prevents the ribs from becoming overly greasy during the long cook.
Generously apply your seasoning mix to all sides of the ribs. Make sure you press the rub into the meat so it sticks. Let the seasoned ribs sit at room temperature for about thirty minutes before cooking. This helps the oven temperature work more evenly on the meat. It also reduces the overall cooking time slightly. This step is often overlooked, but it makes a big difference in the final product. You can also add a splash of apple cider vinegar to the rub for a tangy kick.
The Wrapping Technique
Once your ribs are seasoned, it is time to wrap them. This technique is often called the Texas crutch. Take a large piece of aluminum foil and place the ribs in the center. You can add a few splashes of apple cider vinegar or apple juice to the foil. This liquid creates steam, which helps keep the meat moist during the long cook.
Wrap the ribs tightly, making sure there are no gaps for steam to escape. Place the wrapped ribs on a baking sheet with the seam facing up. This prevents any juices from leaking into your oven. The foil acts as a mini oven, trapping heat and moisture around the ribs. This is the secret to achieving that fall-off-the-bone tenderness you crave. The steam bastes the meat continuously, keeping it incredibly juicy. Make sure the foil is double-layered if the ribs are particularly fatty.
The Final Unwrap And Glaze
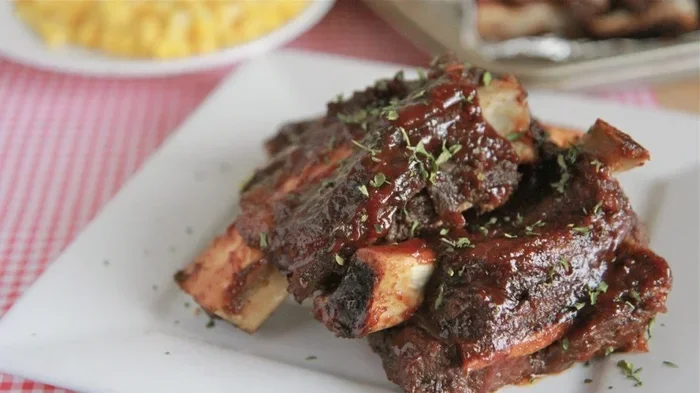
After the ribs have cooked for the majority of the time, it is time to unwrap them. Carefully remove the foil, keeping the juices inside. Increase the oven temperature to 275 or 300 degrees for the final stage. This higher heat helps the bark set and the sauce caramelize. Brush a thin layer of BBQ sauce on the ribs and return them to the oven uncovered.
When you unwrap the ribs, be careful of the steam. It will be very hot and can burn you. Use tongs to hold the ribs if needed. Place the unwrapped ribs back on the baking sheet. The bark should now be set and firm to the touch. The interior should be incredibly tender. If you press the meat with a fork, it should easily fall apart. This is the sign of perfectly cooked ribs.
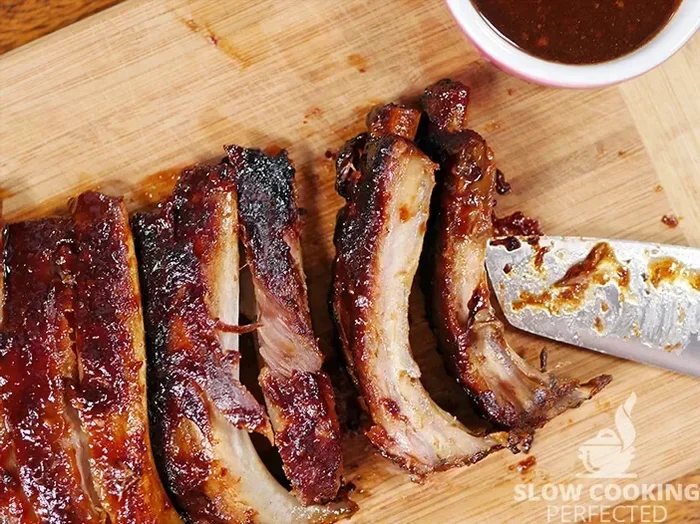
Keep an eye on the ribs during this final phase. The sauce can burn quickly if the heat is too high. You want a nice glaze, not charred sugar. Once the sauce is sticky and the edges are slightly crispy, the ribs are ready to come out. This final step adds a beautiful texture and a burst of flavor to your pork ribs. Repeat the sauce application two or three times for a thick, glossy coating.
Essential Tools And Ingredients
Having the right tools makes the process much easier. You do not need fancy equipment, but a few basics will ensure success. Before you start, gather your ingredients and gear. This preparation saves you time and stress during the cooking process.
Must-Have Kitchen Gear
First, you need a sturdy baking sheet. A heavy-duty aluminum pan works best because it distributes heat evenly. You will also need a large piece of aluminum foil for wrapping. A reliable meat thermometer is absolutely essential. You cannot guess the doneness of ribs; you must measure the internal temperature to be safe.
A sharp pair of kitchen scissors can also be very handy. You can use them to trim the ribs into smaller portions if needed. This is especially useful if you are cooking for a smaller group and do not want to cook a full rack. A sharp knife will also make it easier to slice the ribs against the grain when serving. Cutting against the grain ensures that each piece is tender and easy to chew. Always rest your meat before slicing to lock in the juices.
Other useful tools include a sharp knife for trimming, tongs for handling the hot meat, and a basting brush for applying sauce. Keeping a spray bottle filled with apple cider vinegar nearby is also a great idea. If the ribs start to brown too quickly, you can spritz them to keep the moisture levels high. All of these tools contribute to a smooth, successful cooking experience. A roasting pan with a rack is another great alternative to a baking sheet.
Building Your Dry Rub
The dry rub is what gives your ribs their signature flavor. A great rub balances sweet, savory, and spicy notes. Start with brown sugar as your base. It caramelizes beautifully in the oven and creates a sticky, sweet crust. Add paprika for color and a subtle smokiness. Garlic powder and onion powder provide a savory depth that complements the pork.
Do not forget the salt and black pepper, as they enhance the natural flavor of the meat. For a little kick, add a pinch of cayenne pepper or chili powder. Mix all these ingredients together in a small bowl. When you apply the rub, make sure you cover every inch of the ribs. The more surface area coated, the more flavorful your final product will be. You can also add a touch of mustard powder to help the rub stick and add a tangy note. Mustard powder does not make the ribs taste like mustard; it just enhances the savory profile.
Common Mistakes To Avoid
Even experienced cooks make mistakes when baking ribs. Learning from these errors helps you avoid disappointment. By knowing what not to do, you can focus on getting it right the first time.
Skipping The Rest
One of the biggest mistakes is cutting into the ribs the moment they come out of the oven. Resting the meat is crucial for juicy results. When you remove the ribs from the heat, the juices inside are boiling rapidly. If you cut immediately, all those flavorful juices will run out onto the cutting board. This leaves the meat dry and less satisfying.
Instead, let the ribs rest for at least ten to fifteen minutes. Tent them loosely with aluminum foil to keep them warm. During this time, the muscle fibers relax and reabsorb the juices. When you finally slice, the meat stays moist and tender. This small step makes a huge difference in the final quality of your pork ribs. Patience is the secret ingredient in this recipe. A good rest transforms good ribs into great ribs.
Overcooking The Meat
Overcooking is the enemy of tender ribs. While you want the meat to fall off the bone, you do not want it to turn to mush. Overcooked ribs lose their structure and become dry and stringy. To avoid this, monitor the internal temperature closely. The target temperature for perfectly cooked ribs is between 195 and 203 degrees Fahrenheit.
Use your meat thermometer to check the thickest part of the meat, avoiding the bone. The bone conducts heat faster than the meat, so readings near the bone can be misleading. If the meat is pulling back from the bone and the temperature is in the target range, your ribs are ready. Remember, it is better to slightly undercook than to overcook, as you can always cook them a little longer. Trust the thermometer, not the clock. Every oven runs slightly differently, so rely on temperature, not time.
Opening The Oven Door Too Often
Every time you open the oven door, you release valuable heat. This causes the oven temperature to drop significantly. The ribs then have to spend extra time and energy to recover that heat. This slows down the cooking process and can lead to unevenly cooked meat. Try to resist the urge to peek inside every few minutes.
Instead, use the oven light to check on the progress. If you need to spritz the ribs, do it quickly and close the door right away. Maintaining a steady oven temperature is key to consistent results. The low and slow method relies on a stable environment to break down the tough fibers properly. A steady temperature ensures that the collagen renders evenly throughout the rack. If you must open the door, do it quickly and minimize the time the heat escapes.
Serving And Storing Your Ribs
Once your ribs are done, it is time to enjoy them. Serving ribs is a fun experience, especially when you get the glaze just right. And if you have leftovers, storing them properly ensures they taste just as good the next day.
Glazing With BBQ Sauce
BBQ sauce adds a sweet and tangy finish to your ribs. However, you must apply it at the right time. If you add the sauce too early, the sugars in the sauce will burn in the oven. This creates a bitter taste that ruins the flavor. The best approach is to wait until the last fifteen minutes of cooking.
Unwrap the ribs from the foil and brush a generous layer of sauce on all sides. Return them to the oven uncovered. This allows the sauce to caramelize and form a sticky, glossy coating. You can apply multiple layers of sauce for extra thickness. Just make sure each layer sets before adding the next one. The result is a beautiful, flavorful crust that complements the tender meat inside. Your guests will love the glossy finish. A little sauce goes a long way, so do not drown the meat.
Storing Leftovers
If you have any ribs left over, do not let them go to waste. Allow the ribs to cool to room temperature first. Then, place them in an airtight container or wrap them tightly in plastic wrap. Store them in the refrigerator for up to three days. Reheating ribs can be tricky, as you do not want to dry them out.
The best way to reheat is to add a little moisture. Place the ribs in a baking dish with a splash of apple cider vinegar or broth. Cover tightly with aluminum foil and warm them in the oven at 250 degrees for about fifteen minutes. This gentle reheating method keeps the meat moist and tender. It is a great way to enjoy your slow-cooked ribs for days after the initial cook. The flavors often meld together even better the next day. You can also freeze cooked ribs for up to three months if you want to save them for later.
Freezing ribs is also a great option if you want to enjoy them weeks later. Place the cooled ribs in a heavy-duty freezer bag or wrap them tightly in aluminum foil. Squeeze out as much air as possible before sealing. When you are ready to eat them, thaw the ribs in the refrigerator overnight. Reheat them using the same gentle method mentioned above. Avoid using the microwave, as it will dry out the meat and make the ribs rubbery. Proper storage ensures that your hard work does not go to waste.
Conclusion
Learning how to slow cook ribs in oven at 250 is a game changer for any home cook. It takes the guesswork out of making tender, flavorful pork ribs. By following the steps outlined above, you can achieve restaurant-quality results without stepping outside. The low and slow method ensures that every bite is packed with juicy, smoky flavor. Remember to choose the right ribs, apply a great dry rub, and be patient.
Avoid common pitfalls like skipping the rest or adding sauce too early. With a little practice, you will master this technique. Your family and friends will be begging you to make ribs every weekend. So fire up your oven, grab a rack of ribs, and enjoy the process. You have everything you need to create a mouthwatering meal that everyone will love. Happy cooking!
Frequently Asked Questions
How long does it take to slow cook ribs in oven at 250?
Baby back ribs typically take 3 to 4 hours, while pork spare ribs need 4 to 5 hours at 250 degrees. Always use a meat thermometer to check for doneness rather than relying solely on the clock.
Do you need to wrap ribs in foil when slow cooking?
Yes, wrapping ribs in aluminum foil, also known as the Texas crutch, helps retain moisture and speeds up the cooking process. The foil traps steam, which keeps the meat incredibly tender and juicy.
Can I use a baking sheet for this?
Absolutely! A heavy-duty baking sheet works perfectly for slow cooking ribs in oven at 250. You can also use a roasting pan with a rack, but a baking sheet lined with foil makes cleanup much easier.
What temperature should ribs be when done?
The internal temperature of perfectly cooked ribs should be between 195 and 203 degrees Fahrenheit. At this range, the collagen has broken down sufficiently, and the meat is tender and juicy.
How do I know when ribs are ready?
The meat should pull back from the bone by about a quarter inch, and the ribs should feel tender when you press them with a fork. If the meat bends and cracks slightly on the surface, they are done.
Can I add wood chips for a smoky flavor?
Yes, you can add soaked wood chips to the foil pouch or to a pan on the oven floor to create a smoky flavor. This is a great way to mimic the taste of a smoker right in your kitchen.