How Long To Cook Chicken Breast Pieces In Your Oven
Learning how long to cook chicken breast pieces in oven is simple once you know the right temperature and timing. This guide covers everything from baking temperature for chicken to juicy chicken breast tips that guarantee great results every time. Whether you are cooking boneless chicken breast or bone-in pieces, you will find clear times and easy steps to follow.
Cooking chicken breast pieces in the oven is one of the easiest ways to prepare a healthy and delicious meal. Whether you are meal prepping for the week or making dinner for your family, how long to cook chicken breast pieces in oven is the first question most people ask. The good news is that once you understand the basics, it becomes second nature.
Many home cooks worry about drying out their chicken. The truth is that with the right baking temperature for chicken and a little patience, you can get perfectly juicy chicken breast every single time. This guide walks you through everything you need to know about cooking chicken in oven — from timing and temperature to seasoning and serving.
We will cover different piece sizes, common mistakes, and expert tips that make a real difference. By the end, you will feel confident enough to bake chicken breast without even checking a recipe. Let us dive in and make your next oven roasted chicken dinner a success.
Key Takeaways
- Bake at 400°F for 20-25 minutes for the best balance of crispy outside and juicy chicken breast pieces.
- Internal temperature of 165°F is the golden rule for safe and perfectly cooked chicken breast.
- Brining or marinating adds moisture and flavor to your oven baked chicken every single time.
- Piece size matters a lot — smaller pieces cook faster, larger ones need more time.
- Resting chicken after baking keeps juices locked in for tender, flavorful results.
- Avoid overcooking by using a meat thermometer and following the recommended chicken cook time.
- Season generously with simple spices to make your chicken breast recipe taste restaurant-quality.
📑 Table of Contents
- What Temperature Is Best for Baking Chicken Breast Pieces
- How Long To Cook Chicken Breast Pieces In Oven
- Step-by-Step Guide to Baking Chicken Breast Pieces
- Tips for Juicy and Flavorful Chicken Breast
- Common Mistakes That Ruin Chicken Breast
- Expert Insights for Perfect Chicken Breast Every Time
- How to Store and Reheat Baked Chicken Breast
- Key Takeaways
What Temperature Is Best for Baking Chicken Breast Pieces
Why 400°F Is the Sweet Spot
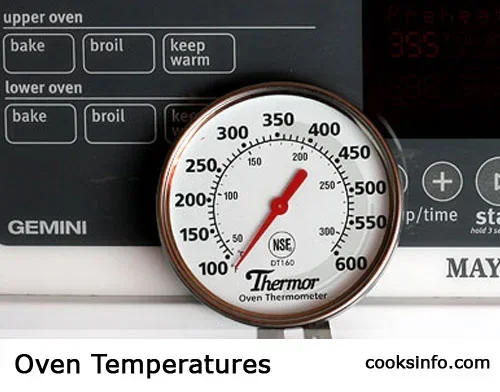
The most recommended baking temperature for chicken is 400°F (200°C). At this heat, the chicken cooks quickly enough to stay juicy but slowly enough to develop a light golden crust on the outside. Lower temperatures like 350°F work too, but they take longer and can dry out the meat if you are not careful.
When you cook chicken breast pieces at 400°F, the outside gets a nice texture while the inside stays tender. This is the ideal chicken breast temperature for most home cooks. If you prefer softer, more uniform cooking, you can drop the heat to 375°F, but add a few extra minutes to the chicken cooking time.
Here is a quick look at how temperature affects your results:
- 400°F: Faster cooking, slightly crispier outside, juicy inside. Best for most chicken breast pieces.
- 375°F: Gentler cooking, great for larger or thicker pieces.
- 425°F: Quick and crispy, but requires close attention to avoid drying out.
Always Use a Meat Thermometer
The safest and most reliable way to check chicken breast doneness is with a meat thermometer. Insert it into the thickest part of the piece. When the internal temperature chicken reaches 165°F (74°C), it is done. This is the standard food safety guideline from the USDA.
Do not rely on color alone. Sometimes chicken can look done on the outside but still be undercooked inside. A quick read with a thermometer takes the guesswork out completely. This simple tool is the best investment you can make for how to bake chicken breast perfectly every time.
How Long To Cook Chicken Breast Pieces In Oven
Cooking Times by Piece Size
The chicken cook time depends mainly on the size and thickness of your pieces. Here is a general breakdown of how long to cook chicken breast pieces in oven at 400°F:
- Small cubes or diced pieces (1 inch): 15 to 18 minutes. These cook fast, so keep an eye on them.
- Thin strips or cutlets (half-inch thick): 12 to 15 minutes. They cook through quickly at high heat.
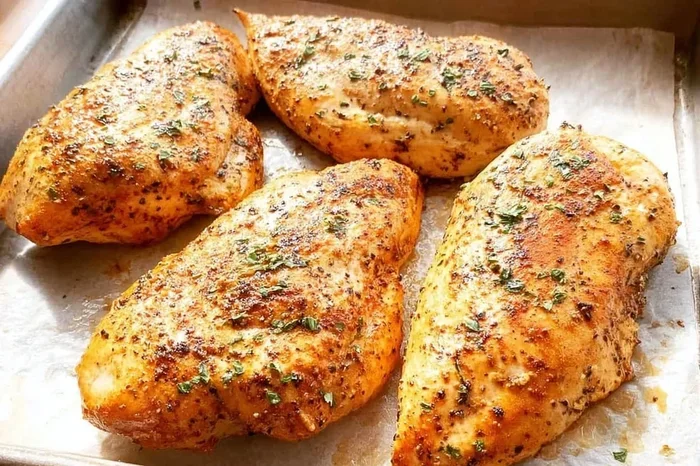
- Standard strips or halves (1 inch thick): 20 to 25 minutes. This is the most common size for home cooking.
- Thick pieces or bone-in chunks (1.5 inches): 25 to 30 minutes. Give them extra time to cook through evenly.
These times are estimates. Always check with a meat thermometer to confirm chicken breast doneness. Factors like oven accuracy, pan type, and whether the pieces are touching can all affect cooking time.
Bone-In vs. Boneless Chicken Breast Pieces
Boneless chicken breast pieces cook faster than bone-in pieces. The bone acts as an insulator, which means the meat around it takes longer to reach the safe internal temperature. If you are using bone-in chunks, add about 5 to 8 extra minutes to the standard chicken cooking time.
For chicken breast halves, the cooking time also depends on whether the skin is on or off. Skin-on pieces take slightly longer but stay more moist. Skinless pieces cook a bit faster but can dry out more easily if you are not careful with timing.
Quick Reference Table for Oven Baking Times
| Chicken Piece Type | Thickness | Time at 400°F | Internal Temp |
|---|---|---|---|
| Diced cubes | 1 inch | 15-18 min | 165°F |
| Thin cutlets | 0.5 inch | 12-15 min | 165°F |
| Standard strips | 1 inch | 20-25 min | 165°F |
| Thick bone-in chunks | 1.5 inch | 25-30 min | 165°F |
| Large halves (skin-on) | 1.5 inch | 25-28 min | 165°F |
Use this table as your starting point. Adjust times based on your oven and the specific size of your pieces. Remember, the goal is juicy chicken breast that is cooked through but still tender.
Step-by-Step Guide to Baking Chicken Breast Pieces
Step 1: Prep Your Chicken
Start by patting your chicken pieces dry with paper towels. This might seem like a small step, but it makes a big difference. Dry chicken gets crispier in the oven. If your pieces are wet, they will steam instead of roast, and you will lose that nice texture.
Cut your chicken into even-sized pieces so they cook at the same rate. Uneven pieces lead to some being overcooked and others undercooked. For the best oven baked chicken, aim for consistency in size and thickness.
Step 2: Season Generously
Chicken breast seasoning is where you can really make this dish your own. A simple mix of olive oil, salt, pepper, garlic powder, and paprika works wonders. But do not be afraid to get creative with herbs and spices.
Here are some easy seasoning ideas for your chicken breast recipe:
- Italian style: dried oregano, basil, garlic powder, and a squeeze of lemon.
- Spicy kick: smoked paprika, cayenne pepper, cumin, and a touch of honey.
- Herb butter: softened butter mixed with thyme, rosemary, and minced garlic.
- Asian-inspired: soy sauce, sesame oil, ginger, and a little brown sugar.
Coat every piece evenly. Let the seasoned chicken sit for 10 to 15 minutes before baking if you have time. This allows the flavors to penetrate the meat, giving you a more flavorful result when you cook chicken in oven.
Step 3: Arrange on the Baking Sheet
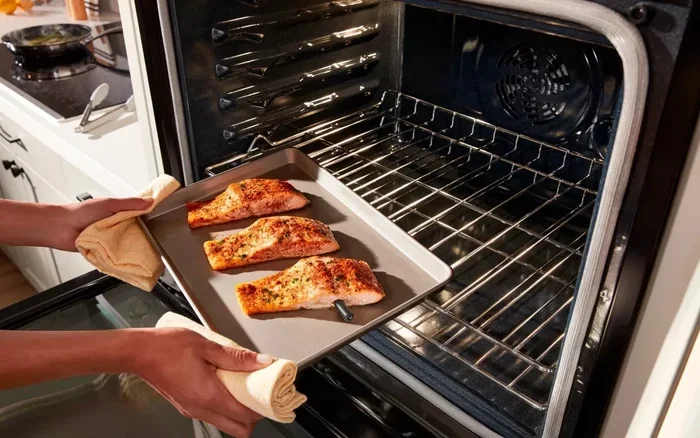
Line a baking sheet with parchment paper or lightly grease it. Spread the chicken pieces in a single layer with space between them. Crowding the pan traps steam and prevents the chicken from getting crispy. If you have a lot of pieces, use two sheets or bake in batches.
For crispy chicken breast on the outside, make sure the pieces are not touching. Air circulation around each piece is key to even chicken breast baking. This one simple tip can elevate your results from good to great.
Step 4: Bake and Monitor
Place the baking sheet in the center of your oven. Set a timer for the recommended chicken cook time based on your piece size. At the halfway point, flip or toss the pieces for even cooking. This prevents one side from over-browning while the other side catches up.
Start checking for chicken breast doneness a few minutes before the timer goes off. Every oven is slightly different, and piece size varies. The internal temperature chicken should read 165°F when measured at the thickest point.
Step 5: Rest Before Serving
This step is easy to skip but incredibly important. Remove the chicken from the oven and let it rest for 5 to 10 minutes. During resting, the juices redistribute throughout the meat. If you cut into it right away, those juices run out, and you end up with dry chicken.
Resting is one of the simplest tips for juicy chicken breast that most people overlook. Just cover the pan loosely with foil and wait. Your oven roasted chicken will be noticeably more tender and flavorful because of it.
Tips for Juicy and Flavorful Chicken Breast
Brining: The Secret to Moisture
If you want truly juicy chicken breast, try brining your pieces before baking. A brine is simply a saltwater solution that the chicken soaks in for 30 minutes to a few hours. The salt helps the meat retain moisture during cooking, which is especially helpful for lean chicken breast.
To make a simple brine, dissolve 1/4 cup of salt in 4 cups of cold water. Add any optional flavorings like sugar, garlic, or herbs. Submerge your chicken pieces and refrigerate for at least 30 minutes. Rinse and pat dry before seasoning and baking. This is a game-changer for how to bake chicken breast that stays moist.
Marinating for Extra Flavor
Marinating is different from brining but equally effective for adding flavor. A good marinade adds taste to the surface and just below it. Acidic ingredients like lemon juice, vinegar, or yogurt help tenderize the meat slightly, making it more flavorful when you serve it.
Marinate your chicken breast pieces for at least 30 minutes, but overnight is even better. Just remember to pat them dry before baking. A wet surface on the chicken will steam rather than roast, which works against getting that nice golden finish on your oven baked chicken.
Using a Wire Rack for Better Results
One expert tip that makes a noticeable difference is baking chicken on a wire rack set over a baking sheet. The rack allows hot air to circulate around the chicken from all sides, including the bottom. This means the pieces cook more evenly and get crispier on all surfaces.
If you do not have a wire rack, a cooling rack placed on top of a baking sheet works just as well. This small upgrade takes your chicken breast baking to the next level without any extra effort or time.
Common Mistakes That Ruin Chicken Breast
Overcooking the Chicken
The number one mistake people make when cooking chicken in oven is overcooking. Chicken breast is very lean, which means it dries out quickly once it passes the 165°F mark. Even a few extra minutes can turn tender pieces into dry, rubbery results.
Set your timer and stay nearby. Check the internal temperature chicken early and often. When it hits 165°F, pull it out immediately. The residual heat will continue to cook the chicken slightly as it rests, which brings the final temperature up to the safe zone without overcooking.
Skipping the Resting Period
As mentioned earlier, resting is crucial. But it is worth repeating because so many people skip it. Cutting into hot chicken right out of the oven releases all the juices onto the cutting board instead of keeping them in the meat. Give your chicken breast pieces at least 5 minutes of rest, and you will taste the difference.
Using the Wrong Pan or Overcrowding
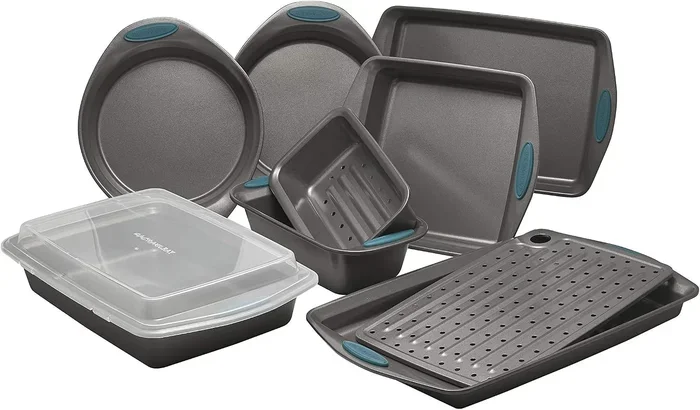
Throwing all your chicken onto one small sheet pan is a common mistake. Overcrowding leads to uneven cooking, steaming instead of roasting, and soggy results. Use a large baking sheet or two smaller ones. The extra space allows proper air flow, which is essential for crispy chicken breast and even chicken breast doneness.
Also, avoid dark or non-stick pans for crispy results. Light-colored metal baking sheets work best because they conduct heat evenly without creating hot spots. Glass or ceramic pans can work but may require a slight adjustment in cooking time.
Expert Insights for Perfect Chicken Breast Every Time
Professional chefs and cooking instructors share a few insights that separate good oven roasted chicken from great ones:
- Bring chicken to room temperature before baking. Cold chicken from the fridge cooks unevenly. Let it sit out for 15 to 20 minutes while you preheat the oven.
- Flatten thick pieces evenly. If you have pieces of different thicknesses, use a meat mallet or your hands to even them out. This ensures uniform chicken cook time across all pieces.
- Add a little fat to the pan. A drizzle of olive oil or melted butter on the chicken helps with browning and flavor. It also prevents sticking.
- Do not skip the preheating step. Putting chicken into a cold or lukewarm oven throws off your timing and can lead to uneven cooking. Always preheat to your target baking temperature for chicken before placing the food inside.
These small details might seem minor, but they add up to a much better end result. Once you make them part of your routine, how long to cook chicken breast pieces in oven becomes second nature, and your results will be consistently excellent.
How to Store and Reheat Baked Chicken Breast
Storing Leftover Chicken
If you have leftovers from your chicken breast recipe, store them properly to keep them safe and tasty. Let the chicken cool to room temperature within two hours of cooking. Place it in an airtight container and refrigerate for up to 4 days. For longer storage, freeze the chicken in a sealed bag for up to 3 months.
Reheating Without Drying Out
Reheating is where many people ruin their oven baked chicken. The microwave tends to make chicken rubbery. Instead, reheat in the oven at 325°F for about 10 to 15 minutes. Cover the pieces loosely with foil to trap moisture. Add a splash of chicken broth or a few drops of water to the pan to create steam and keep things moist.
Check the internal temperature chicken when reheating to make sure it reaches 165°F again. This is especially important if you are reheating for children, elderly family members, or anyone with a sensitive immune system.
Key Takeaways
- Bake at 400°F for 20-25 minutes for the best balance of crispy outside and juicy chicken breast pieces.
- Internal temperature of 165°F is the golden rule for safe and perfectly cooked chicken breast.
- Brining or marinating adds moisture and flavor to your oven baked chicken every single time.
- Piece size matters a lot — smaller pieces cook faster, larger ones need more time.
- Resting chicken after baking keeps juices locked in for tender, flavorful results.
- Avoid overcooking by using a meat thermometer and following the recommended chicken cook time.
- Season generously with simple spices to make your chicken breast recipe taste restaurant-quality.
Frequently Asked Questions
Can I cook chicken breast pieces at 350°F instead of 400°F?
Yes, you can cook chicken breast pieces at 350°F, but it will take longer. Expect to add about 5 to 10 extra minutes to the standard chicken cooking time. The lower temperature produces a softer crust and gentler cooking, which some people prefer for thicker pieces. Just make sure the internal temperature chicken still reaches 165°F.
How do I know if chicken breast pieces are done without a thermometer?
The most reliable method without a thermometer is to cut into the thickest piece. The meat should be white all the way through with no pink remaining. The juices should run clear, not cloudy or pink. However, a meat thermometer is still the best and safest way to check chicken breast doneness every single time.
Can I bake frozen chicken breast pieces in the oven?
Yes, you can bake frozen chicken breast pieces, but you need to increase the chicken cook time by about 50 percent. Bake at 400°F for roughly 30 to 40 minutes depending on piece size. Make sure the internal temperature chicken reaches 165°F in the center. It is best to cook from frozen in a single layer for even heat distribution.
What is the best seasoning for chicken breast pieces in the oven?
A simple blend of olive oil, salt, black pepper, garlic powder, and smoked paprika works beautifully for most chicken breast recipes. If you want more flavor, add dried herbs like oregano, thyme, or rosemary. For a sweeter profile, a light drizzle of honey mixed with soy sauce creates a tasty glaze for your oven roasted chicken.
How long can I store cooked chicken breast pieces in the fridge?
Cooked chicken breast pieces can be stored in the refrigerator for up to 4 days when kept in an airtight container. For longer storage, freeze them in a sealed freezer bag for up to 3 months. Always reheat to an internal temperature chicken of 165°F before serving to ensure food safety.
Should I cover chicken breast pieces with foil while baking?
Generally, it is best to bake chicken breast pieces uncovered for a crispy exterior. Covering with foil traps steam and prevents browning. However, if your pieces are at risk of over-browning on top, you can loosely tent them with foil during the last 5 to 10 minutes of cooking. This gives you control without steaming the chicken throughout the entire chicken breast baking process.
=== CONCLUSION ===
How long to cook chicken breast pieces in oven really comes down to three things: the right temperature, the correct timing, and a little patience. Bake at 400°F, follow the recommended times based on your piece size, and always check that the internal temperature chicken reaches 165°F. These simple steps give you juicy chicken breast with a nice golden finish every time.
Remember to season generously, avoid overcrowding the pan, and never skip the resting period. These small habits make a big difference in the final result. Whether you are a beginner in the kitchen or a seasoned cook looking for a quick chicken breast recipe, this guide gives you everything you need for success.
Now that you know the ins and outs of cooking chicken in oven, it is time to put this knowledge into action. Preheat your oven, grab some chicken breast pieces, and give it a try. With practice, you will nail the perfect chicken cook time without even thinking about it. Happy baking!