How To Cook Arm Roast In Oven And Get Perfect Results
Learning how to cook arm roast in oven is easier than you think. This guide walks you through every step, from choosing the right cut to pulling a perfectly tender roast from your oven. You will get clear instructions, pro tips, and a simple recipe that works every single time.
There is something deeply satisfying about pulling a beautiful, tender roast out of the oven. The whole kitchen smells amazing, and you know you are about to eat one incredible meal. If you have ever wondered how to cook arm roast in oven, you are in the right place. This guide will take you through every single step with clarity and confidence.
An arm roast is one of the most affordable and flavorful cuts of beef you can buy. It comes from the shoulder area, which means it has just the right amount of fat and connective tissue. When cooked slowly in the oven, that tough tissue breaks down into pure, melt-in-your-mouth tenderness. Whether you are feeding a family of four or hosting a holiday dinner, this cut delivers every time.
We will cover everything you need to know. From selecting the best roast at the butcher counter to making rich gravy from the pan drippings, this article has you covered. You will learn the ideal oven temperature, the correct cooking time, and all the little tricks that separate a good roast from a great one. Let us get started.
Key Takeaways
- Pick the right cut: A bone-in or boneless beef chuck arm roast gives you the best flavor and tenderness.
- Sear first, then slow cook: Searing locks in juices, and low-and-slow oven heat makes the meat fall-apart tender.
- Use a meat thermometer: Aim for an internal temperature of 190°F to 200°F for the most tender results.
- Rest the roast: Letting it rest for 15 to 20 minutes keeps the juices inside the meat.
- Make gravy from drippings: The pan juices create a rich, homemade gravy that elevates the whole meal.
- Avoid common mistakes: Skipping the sear, cutting too early, and using too high heat are the top errors.
📑 Table of Contents
- What Is an Arm Roast and Why Is It Perfect for the Oven?
- How To Prepare Your Arm Roast Before Cooking
- The Best Oven Temperature and Cooking Time for Arm Roast
- Step-by-Step Instructions for Cooking Arm Roast In Oven
- Tips for Getting a Tender and Juicy Arm Roast Every Time
- How To Make Rich Gravy from the Roasting Pan
- Common Mistakes to Avoid When Cooking Arm Roast in the Oven
- Serving Suggestions and Meal Ideas
- Conclusion
What Is an Arm Roast and Why Is It Perfect for the Oven?
An arm roast comes from the shoulder primal cut of a cow. It is also sometimes called a beef arm pot roast or a shoulder pot roast. This cut is well known for its deep beefy flavor and its ability to become incredibly tender when cooked low and slow. It is a budget-friendly choice that punches way above its price tag.
Unlike leaner cuts like a sirloin or tenderloin, the arm roast has plenty of intramuscular fat and collagen. These elements are what make it perfect for oven roasting. When you apply gentle heat over several hours, the collagen turns into gelatin. That is what gives you that silky, succulent texture that makes people go back for seconds.
Bone-In vs. Boneless Arm Roast
You will find arm roasts sold both with and without the bone. Each option has its own advantages. A bone-in arm roast adds extra flavor to the meat during cooking. The bone acts as a natural heat conductor, which helps the roast cook more evenly. It also makes a stunning presentation on the dinner table.
A boneless arm roast, on the other hand, is easier to slice and serve. It also tends to cook a bit faster since there is no bone to conduct heat through the center. Both options work beautifully in the oven. Choose whichever one fits your needs and budget better.
How Arm Roast Differs From Other Roast Cuts
It is helpful to understand how an arm roast compares to other popular roast cuts. A chuck roast is very similar and can often be used interchangeably. A rump roast is leaner and slightly tougher. A brisket requires a longer cooking time and different techniques. The arm roast sits in a sweet spot where it is flavorful, forgiving, and reliable for oven cooking.
If you have ever made a pot roast on the stovetop, you already know the potential of this cut. The oven method simply makes it easier and more hands-off. You get all the same benefits with less effort.
How To Prepare Your Arm Roast Before Cooking
Preparation is the step most people rush through. But taking a little extra time here makes a big difference in the final result. A well-prepared arm roast will cook evenly, taste deeper, and look more beautiful on the plate.
Choosing the Right Roast at the Store
Start by selecting a high-quality arm roast. Look for meat that has a bright red color with fine white streaks of fat throughout. Avoid roasts that look gray or have large hard chunks of fat on the outside. The fat should be creamy white, not yellow. Yellow fat can indicate an older animal and may affect the flavor.
Choose a roast that weighs between 3 and 5 pounds for most family meals. This size fits comfortably in a standard oven-safe pot or Dutch oven. It also gives you generous portions without risking overcooking.
Trimming and Seasoning the Roast
Once you bring the roast home, remove it from the refrigerator about 30 minutes before cooking. Letting it come to room temperature helps it cook more evenly. While it rests, pat it dry with paper towels. Dry meat sears much better than wet meat.
Next, trim off any large, thick pockets of external fat. Leave a thin layer, about a quarter inch, for flavor and moisture. Then season the roast generously on all sides with salt and pepper. You can also add garlic powder, onion powder, smoked paprika, or dried thyme for extra depth.
Optional: Sear the Roast for Maximum Flavor
Searing is an optional but highly recommended step. It creates a beautiful brown crust on the outside of the roast through a process called the Maillard reaction. This reaction builds complex flavors that make your finished dish taste richer and more savory.
To sear, heat a tablespoon of oil in a Dutch oven over medium-high heat. Once the oil is shimmering, place the roast in the pot. Let it sear undisturbed for about 3 to 4 minutes per side. You want a deep golden-brown crust on every surface. Use tongs to sear the edges as well. This step only takes about 10 minutes total but adds tremendous flavor.
The Best Oven Temperature and Cooking Time for Arm Roast
Getting the temperature and time right is the key to a perfect arm roast. Too high and the outside will burn before the inside is tender. Too low and you will be waiting all day for results. The sweet spot is a moderate oven temperature that allows the meat to cook gently over time.
Recommended Oven Temperature
Set your oven to 325°F for the best results. This temperature is low enough to break down the connective tissue slowly but high enough to get a good sear and develop flavor. Some cooks prefer 300°F for an even slower cook, especially for larger roasts over 5 pounds. Both temperatures work well.
Avoid going above 350°F. Higher temperatures will dry out the outside of the roast long before the inside becomes tender. The whole point of cooking an arm roast in the oven is to use gentle, consistent heat over time.
How Long To Cook Arm Roast in the Oven
Cooking time depends on the size of your roast and whether it is bone-in or boneless. As a general rule, plan for about 30 to 35 minutes per pound at 325°F. Here is a simple breakdown to help you plan:
- 3-pound roast: About 1.5 to 2 hours
- 4-pound roast: About 2 to 2.5 hours
- 5-pound roast: About 2.5 to 3 hours
These times are approximate. The real guide is the internal temperature of the meat, not the clock. Always use a meat thermometer to check for doneness.
Internal Temperature Guide for Perfect Doneness
The target internal temperature for a fully tender arm roast is between 190°F and 200°F. At this range, the collagen has fully broken down and the meat will be easy to pull apart with a fork. Here is a quick reference:
- 160°F: Medium-rare. The meat will be pink and firm. Not ideal for arm roast.
- 170°F: Medium. Still slightly tough for this cut. Not recommended.
- 190°F to 200°F: Well-done and falling-apart tender. This is the sweet spot.
- 210°F and above: Can become dry and stringy. Avoid overshooting.
Insert the thermometer into the thickest part of the roast, avoiding any bone if present. The bone conducts heat differently and can give you a false reading.
Step-by-Step Instructions for Cooking Arm Roast In Oven
Now that you understand the basics, let us walk through the entire process step by step. Follow these instructions and you will have a stunning roast every time.
Step 1: Gather Your Ingredients and Tools
You will need the following items before you start:
- One 3 to 5 pound arm roast
- Salt and pepper
- 2 tablespoons cooking oil (vegetable or canola work well)
- 1 large onion, chopped
- 3 to 4 cloves of garlic, minced
- 2 cups beef broth
- 1 cup red wine (optional, but adds great flavor)
- 2 tablespoons tomato paste
- Fresh herbs like rosemary and thyme
- A Dutch oven or oven-safe pot with a lid
- A meat thermometer
Step 2: Preheat the Oven and Prepare the Pot
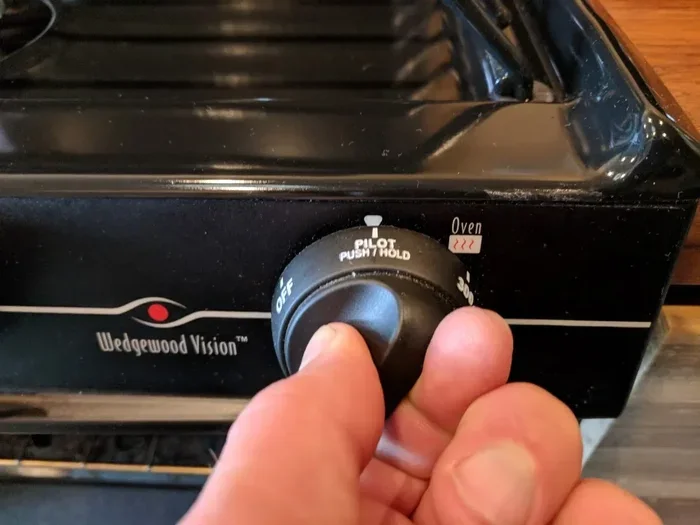
Preheat your oven to 325°F. While the oven is heating up, place your Dutch oven on the stove over medium-high heat. Add the cooking oil and let it get hot. You want the oil to shimmer but not smoke.
Step 3: Sear the Roast
Place the seasoned arm roast in the hot Dutch oven. Sear it on all sides until you have a deep brown crust. This should take about 3 to 4 minutes per side. Once seared, remove the roast and set it aside on a plate. Leave the drippings in the pot.
Step 4: Build the Base Flavors
Lower the heat to medium. Add the chopped onion to the pot and cook for about 5 minutes until it softens and turns golden. Add the minced garlic and cook for another minute until fragrant. Stir in the tomato paste and cook for 30 seconds to deepen its flavor.
Step 5: Deglaze and Add Liquids
Pour in the beef broth and red wine if using. Use a wooden spoon to scrape up all the browned bits stuck to the bottom of the pot. Those bits, called fond, are packed with flavor. They will dissolve into the liquid and create a rich base for your roast.
Step 6: Return the Roast to the Pot
Place the seared arm roast back into the pot. Tuck the fresh rosemary and thyme sprigs around the meat. The liquid should come about halfway up the sides of the roast. It should not cover the roast completely.
Step 7: Cover and Place in the Oven
Cover the Dutch oven with its lid. Place it in the preheated oven on the center rack. Set a timer based on the weight of your roast. For a 4-pound roast, that is about 2 to 2.5 hours.
Step 8: Check the Internal Temperature
After about 2 hours, carefully remove the pot from the oven. Insert the meat thermometer into the thickest part of the roast. Check the temperature. If it has not yet reached 190°F to 200°F, return it to the oven and check again every 20 to 30 minutes.
Step 9: Rest the Roast
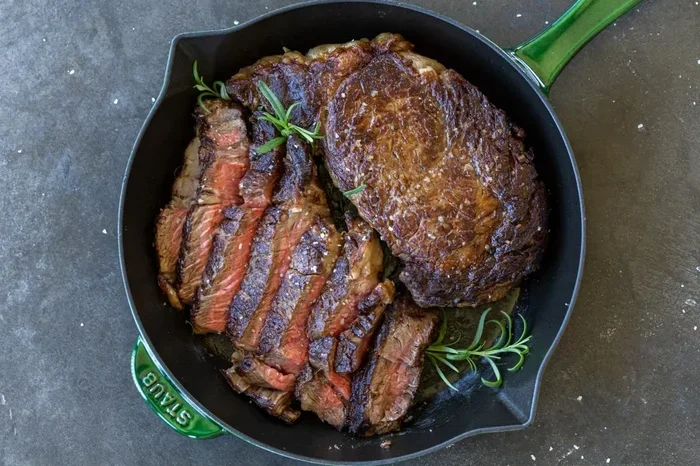
Once the roast reaches the target temperature, remove it from the oven. Transfer it to a cutting board and cover it loosely with aluminum foil. Let it rest for 15 to 20 minutes. This resting period allows the juices to redistribute throughout the meat. If you cut too early, the juices will run out and the roast will be less moist.
Step 10: Slice and Serve
After resting, slice the roast against the grain into thick pieces. Serve it with the cooking liquid and any vegetables you cooked alongside it. Pour the juices over the top for extra flavor and moisture.
Tips for Getting a Tender and Juicy Arm Roast Every Time
Even experienced cooks can run into trouble with roast beef. Here are some expert tips that will help you get consistent, outstanding results every single time you cook an arm roast in the oven.
Use a Meat Thermometer
This is the single most important tool for roasting beef. Relying on a timer alone is not enough. Every oven is different, and every roast varies in size and shape. A meat thermometer takes the guesswork out of the equation and tells you exactly when the roast is done.
Do Not Skip the Searing Step
Searing adds a layer of flavor that you simply cannot get any other way. It creates a caramelized crust that makes the entire dish taste more complex and rich. Even if you are short on time, spend the extra 10 minutes to sear your roast properly.
Keep the Oven Closed
Every time you open the oven door, you lose heat and extend the cooking time. Try to resist the urge to check on the roast too frequently. Trust your thermometer and check the temperature only when the estimated time is nearly up.
Let the Roast Rest Properly
Resting is not just a suggestion. It is a crucial step. During cooking, the juices in the meat are pushed toward the center by the heat. Resting allows those juices to spread back out evenly throughout the roast. This makes every slice moist and flavorful.
Cook Vegetables Alongside the Roast
You can add potatoes, carrots, and celery to the pot during the last hour of cooking. These vegetables will absorb the flavorful juices and become tender and delicious. Just make sure to cut them into large chunks so they do not overcook and turn to mush.
Reheat Leftovers Gently
If you have leftovers, reheat them slowly in the oven or on the stovetop with a splash of broth. Microwaving can dry out the meat quickly. Gentle reheating keeps the roast moist and tender even on day two.
How To Make Rich Gravy from the Roasting Pan
One of the best parts of cooking an arm roast is the gravy you can make from the pan drippings. Do not let those flavorful juices go to waste. Homemade gravy takes just a few extra minutes and elevates the entire meal.
Start by carefully removing the roast and the vegetables from the pot. Set them aside. Place the pot on the stovetop over medium heat. Add the chopped onion and garlic that are left in the pot along with any juices. Stir for a minute or two.
Sprinkle in about 2 tablespoons of flour and stir constantly for 1 to 2 minutes. This will create a roux that will thicken the liquid. Slowly pour in 2 cups of beef broth or water, stirring constantly to prevent lumps. Let the mixture simmer for about 5 minutes until it thickens to your desired consistency.
Taste the gravy and adjust the seasoning with salt and pepper. If you want a richer flavor, stir in a tablespoon of butter at the end. Strain the gravy through a fine mesh sieve if you want it perfectly smooth. Serve it alongside the sliced roast and enjoy.
Common Mistakes to Avoid When Cooking Arm Roast in the Oven
Even with the best intentions, it is easy to make mistakes when roasting beef. Here are the most common errors and how to avoid them.
Using Too High a Temperature
Some cooks crank the oven up to 400°F or higher, thinking it will speed things up. This approach dries out the outside of the roast while leaving the inside undercooked and tough. Stick to 325°F for the best balance of tenderness and flavor.
Not Using Enough Liquid
Arm roast needs moisture to stay tender during the long cooking process. If the liquid in the pot evaporates completely, the roast will dry out. Check the pot halfway through cooking and add more broth if the level gets too low.
Cutting the Roast Too Soon
It can be tempting to slice into the roast the moment it comes out of the oven. Resist that urge. Cutting too early releases all the juices onto the cutting board instead of staying in the meat. Give it the full 15 to 20 minutes of resting time.
Overcooking the Roast
While arm roast needs high internal temperatures to be tender, going too far past 200°F can cause it to dry out. Pull the roast as soon as it hits 195°F to 200°F. The residual heat will continue to cook the meat slightly even after it leaves the oven.
Skipping the Seasoning
A plain arm roast is still edible, but it will not be memorable. Season the meat well before cooking. Simple salt, pepper, garlic, and herbs make a world of difference. Do not be afraid to be generous with your seasoning.
Serving Suggestions and Meal Ideas
A perfectly cooked arm roast pairs beautifully with a variety of sides. Here are some ideas to build a complete meal around your roast:
- Mashed potatoes: A classic pairing that soaks up the rich gravy beautifully.
- Roasted root vegetables: Carrots, parsnips, and sweet potatoes caramelize in the oven alongside the roast.
- Green beans almondine: A light, fresh side that balances the richness of the beef.
- Crusty bread: Perfect for mopping up every last drop of gravy from the plate.
- Creamy polenta: A comforting alternative to mashed potatoes that complements the savory roast.
Leftover arm roast makes excellent sandwiches the next day. Simply slice the meat thin, pile it onto a hoagie roll, and add some of the pan gravy. You can also chop the leftover roast and toss it into beef stew or soup for a second meal full of flavor.
Conclusion
Cooking an arm roast in the oven is one of the most rewarding things you can do in the kitchen. It is a simple cut of beef that transforms into something extraordinary with just a little time and patience. By following the steps in this guide, you will consistently produce a tender, juicy, and flavorful roast that your whole family will love.
Remember to choose a good quality roast, season it well, sear it for flavor, and cook it low and slow at 325°F. Use a meat thermometer to know exactly when it is done, and always let it rest before slicing. With these principles in mind, you will master the art of oven-roasted arm roast in no time.
Now it is your turn. Head to the kitchen, grab an arm roast, and put these tips into action. Once you taste the results, you will never go back to any other method. Happy cooking!
Frequently Asked Questions
Can I cook an arm roast at 350°F instead of 325°F?
Yes, you can cook at 350°F, but the cooking time will be shorter. You will need to monitor the internal temperature closely to avoid overcooking. Higher temperatures can dry out the outer layers before the inside becomes fully tender.
How long does it take to cook a 3-pound arm roast in the oven?
A 3-pound arm roast typically takes about 1.5 to 2 hours at 325°F. The exact time depends on your oven and whether the roast is bone-in or boneless. Always use a meat thermometer to check for doneness at 190°F to 200°F.
Do I need to cover the arm roast while cooking in the oven?
Yes, covering the roast with a lid or aluminum foil helps retain moisture during the long cooking process. The trapped steam keeps the meat from drying out. You can remove the cover for the last 30 minutes if you want a slightly crispier exterior.
What is the best way to tell if my arm roast is done?
The best way is to use a meat thermometer. Insert it into the thickest part of the roast and look for an internal temperature between 190°F and 200°F. The meat should be easily shreddable with a fork when it is fully done and tender.
Can I use a slow cooker instead of the oven for arm roast?
Yes, you can absolutely use a slow cooker. The results will be similar, with tender, fall-apart meat. However, the oven method gives you the added benefit of a seared crust and richer pan drippings for making gravy.
Should I add water or broth to the bottom of the pan when roasting?
Adding beef broth instead of plain water is highly recommended. The broth adds flavor to the meat as it cooks and creates a better base for gravy. Water works in a pinch but will not contribute any additional taste to the dish.