How To Light A Gas Stove Oven With A Lighter Guide
Learning how to light a gas stove oven with a lighter is a simple skill every home cook should know. Whether your oven has lost power or your igniter is broken, a standard lighter can get your gas stove oven up and running in minutes. This guide walks you through each step clearly, so you can light your oven safely and confidently without calling a technician.
Have you ever stood in front of your gas stove, ready to cook dinner, only to realize the oven won’t light? It happens to the best of us. The good news is that you do not need a fancy tool or a repair technician to fix this. A simple lighter can do the job. In this guide, we will walk you through exactly how to light a gas stove oven with a lighter, step by step. We will also cover safety tips, common problems, and expert advice to make the process smooth and stress-free.
Knowing how to manually ignite your oven gives you independence. You are not stuck waiting for a repair appointment or buying expensive replacement parts. Whether it is late at night, during a power outage, or your spark igniter just stopped working, this skill puts you back in control of your kitchen. Let us dive right in.
Key Takeaways
- Manual ignition is easy: You can light a gas stove oven with a lighter when the electric igniter fails or during a power outage.
- Safety comes first: Always check for gas smells, open ventilation, and follow proper lighting steps before turning on the gas.
- Tools needed are minimal: A long-reach lighter, a matchstick, and basic kitchen supplies are all you need.
- Know your oven type: Different gas ovens have different access points for lighting, and this guide covers them all.
- Troubleshooting helps: Understanding common problems like weak flames or no gas flow saves time and money.
- Regular maintenance matters: Keeping your burner cap and igniter clean prevents future lighting issues.
📑 Table of Contents
- Why You Need to Know How to Light a Gas Stove Oven Manually
- What You Need Before You Start
- Step-by-Step Guide to Lighting Your Gas Stove Oven
- Common Problems and How to Fix Them
- Different Oven Types and How They Affect Lighting
- Safety Tips You Must Follow
- When to Call a Professional
- Maintenance Tips to Prevent Future Lighting Issues
- Benefits of Knowing How to Manually Light Your Oven
- Final Thoughts
Why You Need to Know How to Light a Gas Stove Oven Manually
Modern gas ovens come with electric igniters. These small devices create a spark to light the gas automatically. They work great most of the time. But like any mechanical part, they can fail. When that happens, you are left with a cold oven and a dinner plan falling apart.
Here are common reasons your oven igniter might not work:
- Power outage: No electricity means no spark from the igniter.
- Worn-out igniter: Over time, the spark mechanism wears down and stops working.
- Dirty igniter: Grease and food debris can block the spark gap.
- Faulty wiring: Loose connections prevent the igniter from receiving power.
- Control board failure: The electronic board that sends power to the igniter may malfunction.
When any of these issues happen, a lighter becomes your best friend. Learning this basic skill saves you time, money, and frustration. It also helps you understand your gas cooking appliance better, which builds confidence in the kitchen.
What You Need Before You Start
Before you attempt to light your gas oven, gather a few simple items. Having everything ready makes the process faster and safer. You do not want to be fumbling around with a lit flame and no plan.
Essential Tools
- Long-reach lighter: A grill lighter or fireplace lighter with an extended neck works best. It keeps your hand far from the flame.
- Matchsticks: A good backup option. Long kitchen matches work well too.
- Flashlight or phone light: Helps you see inside the oven cavity.
- Clean cloth: For wiping down any grease or debris around the burner area.
Safety Gear and Precautions
- Keep a fire extinguisher nearby, just in case.
- Make sure children and pets are away from the stove area.
- Wear short sleeves or roll up your sleeves to avoid loose fabric catching fire.
- Never use a damaged or leaking lighter.
Quick Tip: Always use a long-reach lighter instead of a short one. Your hand should never be close to the gas flame when you turn on the oven. This simple habit keeps you safe every time you light a gas stove oven manually.
Step-by-Step Guide to Lighting Your Gas Stove Oven
Now that you have your tools ready, let us get into the actual process. Follow these steps carefully and you will have your oven lit in no time. This guide works for most standard gas oven models, including those from popular brands like GE, Whirlpool, Samsung, and Frigidaire.
Step 1: Turn Off the Gas Supply
Before you do anything, make sure the gas valve to the oven is in the off position. This is the most important safety step. The gas valve controls the flow of gas to the burner. If gas is already flowing and you have a lighter flame nearby, you could face a dangerous situation.
Locate the gas shut-off valve behind or near your oven. Turn it to the closed position. You can also turn off the main gas supply to your kitchen if you prefer extra caution.
Step 2: Open the Oven Door
Open the oven door fully and prop it open with a oven mitt or a sturdy object. This gives you clear access to the oven interior and the burner area. Working with the door open also ensures proper ventilation, which is essential for safety.
Use your flashlight or phone light to look inside the oven cavity. You want to find the oven burner, which is usually located at the bottom of the oven. It looks like a metal tube with small holes along the sides.
Step 3: Check for Gas Buildup
Before lighting anything, take a moment to sniff the air. Do you smell gas? A rotten egg smell is added to natural gas specifically so you can detect leaks. If you smell gas strongly, do not attempt to light the oven. Open windows, leave the kitchen, and call your gas company immediately.
For a light gas smell that is not a full leak, open the kitchen window and turn on the range hood fan. Let the area ventilate for a few minutes before proceeding.
Step 4: Position the Lighter
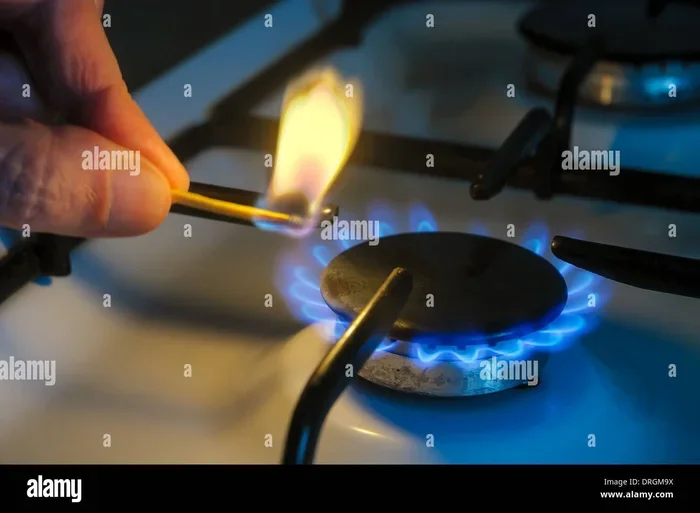
Hold your long-reach lighter near the oven burner. You want the flame to be close to the burner holes but not touching them yet. Position the lighter so your hand remains well away from the gas path.
If you are using a matchstick, strike it and hold it steady. A matchstick works fine, but a lighter gives you more control and a longer burn time. This is why a long-reach lighter is the preferred tool for this job.
Step 5: Turn On the Gas and Light Simultaneously
This is the critical moment. With the lighter flame positioned near the burner, slowly turn the oven knob to the ignite position. Most ovens have a specific mark or symbol for the pilot light or ignition setting. Turn the knob to that position.
You should hear a slight hissing sound as gas begins to flow. The flame from your lighter should catch the gas almost immediately. Once you see the burner flame ignite, hold the lighter steady for a few seconds to ensure the flame establishes properly.
Expert Insight: If the burner does not light on the first try, do not panic. Turn the knob back to the off position and wait 30 seconds. This lets any built-up gas dissipate before you try again. Repeated attempts with gas buildup can create a small fireball, which is dangerous.
Step 6: Adjust the Flame
Once the burner is lit, you can adjust the oven temperature knob to your desired setting. The flame should be blue with a small yellow tip. A blue flame means complete combustion and efficient heating. If the flame is mostly yellow or orange, the burner may need cleaning.
Close the oven door gently. Your gas stove oven is now lit and heating up. You can place your dish inside once the oven reaches the target temperature, just as you normally would.
Common Problems and How to Fix Them
Lighting a gas oven with a lighter is usually straightforward. But sometimes things do not go as planned. Here are the most common issues and how to solve them.
The Oven Won’t Light Even With a Lighter
If you turn the gas on and the lighter flame does not ignite the burner, check a few things. First, make sure the gas valve is fully open. A partially closed valve limits gas flow. Second, check the burner tube for blockages. Grease, food crumbs, and spider webs can clog the small holes in the burner. Use a toothpick or a thin wire to clear them out.
Third, check the oven igniter. Even though you are using a lighter, the igniter can sometimes interfere with the flame pattern. If the igniter is broken, it may need replacement.
The Flame Goes Out Immediately
This usually happens when the gas flow is too low or the burner is partially blocked. Clean the burner tube thoroughly and try again. Also check that the oven knob is turning fully into the ignite position.
The Flame Is Yellow Instead of Blue
A yellow flame indicates incomplete combustion. This can be caused by a dirty burner, blocked air vents, or a misaligned burner cap. Remove the burner cap, clean it with warm soapy water, and replace it properly. The burner cap should sit flush on the oven base with no wobble.
You Smell Gas After Lighting
A slight gas smell right after lighting is normal as the gas ignites. But if the smell persists, turn off the gas valve immediately. Check all connections around the burner tube. If you are unsure, contact a professional technician to inspect your gas line and oven connections.
Different Oven Types and How They Affect Lighting
Not all gas ovens are the same. The way you access the burner for manual lighting depends on your oven type. Here is a quick look at common models.
| Oven Type | Burner Location | Lighting Access | Difficulty Level |
|---|---|---|---|
| Standard Range Oven | Bottom of oven cavity | Open oven door, remove bottom panel if needed | Easy |
| Slide-In Range | Bottom, behind drawer | Access through oven floor or rear panel | Moderate |
| Freestanding Range | Bottom of oven | Open oven door directly | Easy |
| Wall Oven | Bottom of oven unit | May need to remove back panel | Moderate to Hard |
| Double Oven | Each oven has its own burner | Access through each oven door | Easy |
For standard range ovens and freestanding ranges, the process is the simplest. The oven burner is at the bottom and you can access it easily with the door open. Wall ovens may require removing a back panel or accessing the burner from the rear, which adds a bit of complexity. If you own a slide-in range, the oven drawer below may block some access points.
Quick Tip: Before you start, consult your oven’s user manual. The manual will show you the exact burner location and any specific instructions for manual ignition. Most manufacturers also include a diagram that makes the process much clearer.
Safety Tips You Must Follow
Lighting a gas oven with a lighter involves an open flame and combustible gas. Safety is not optional; it is essential. Follow these rules every single time.
- Never light the oven with the door closed. Gas can build up inside the oven cavity, creating a fireball risk when you ignite it.
- Always ventilate your kitchen. Open a window or turn on the exhaust fan before you start.
- Keep flammable items away. Towels, paper, and plastic should be far from the stove area.
- Do not use a damaged lighter. A leaking lighter is a fire hazard near gas appliances.
- Teach family members. Everyone in your household should know how to manually light the oven in case of emergencies.
- Install a gas detector. A carbon monoxide and gas leak detector adds an extra layer of protection to your kitchen.
Common Mistake: Many people rush through the lighting process and skip the wait time between attempts. This is dangerous. Always wait at least 30 seconds after a failed attempt before trying again. Letting the gas dissipate prevents flare-ups and keeps you safe.
When to Call a Professional
There are times when lighting your oven with a lighter is not enough. You should call a licensed technician if you experience any of the following:
- The gas smell persists even after you turn off the oven.
- The burner ignites but the oven does not heat up.
- You see visible damage to the gas line or burner tube.
- The oven knob feels stuck or does not turn properly.
- You have tried multiple times and the oven still will not light.
Gas appliances require careful handling. A professional technician has the tools and training to diagnose and fix complex issues safely. Do not hesitate to call for help when you need it. It is always better to be safe than sorry.
Maintenance Tips to Prevent Future Lighting Issues
Once you have successfully lit your gas oven with a lighter, you want to make sure it does not become a regular problem. Regular maintenance keeps your gas cooking appliance running smoothly and reduces the need for manual ignition.
Clean the Burner Regularly
Remove the burner cap and clean it with warm soapy water at least once a month. Wipe away grease, food spills, and debris that can clog the burner holes. A clean burner promotes a strong, even flame.
Check the Igniter Periodically
Even if you are using a lighter for manual ignition, the electric igniter still needs to work for everyday use. Test it regularly by turning the oven knob to the bake setting. If you do not see a bright orange glow within a few seconds, the igniter may need replacement.
Inspect the Gas Line
Check the gas supply line for any signs of wear, cracks, or leaks. Use a soapy water solution and brush it along the connections. Bubbles forming indicate a gas leak. Tighten connections or call a professional if you find any leaks.
Replace Worn Parts Promptly
Burner caps, igniters, and gas valves all have a lifespan. Replace worn parts as soon as you notice problems. Delaying replacements can lead to bigger issues and more expensive repairs down the road.
Key Takeaway: A little regular maintenance goes a long way. Clean your gas oven components often, check for wear, and address small issues before they become big problems. This keeps your oven reliable and your kitchen safe.
Benefits of Knowing How to Manually Light Your Oven
Beyond the immediate convenience, there are several benefits to mastering this skill. First, you save money. You do not need to pay for a service call or buy replacement parts for a simple igniter failure. Second, you gain independence. Power outages, broken igniters, and other issues do not stop you from cooking.
Third, you become more self-reliant in the kitchen. Understanding how your gas stove oven works gives you confidence and control. You are not at the mercy of technology or repair schedules. You can handle the situation yourself, anytime.
Finally, this knowledge helps you troubleshoot other issues. Once you understand the gas flow, burner mechanics, and ignition process, you can identify problems faster and communicate more effectively with a technician if you ever need one.
Final Thoughts
Learning how to light a gas stove oven with a lighter is a practical, valuable skill for any homeowner or renter. It takes just a few minutes to master, and it can save you from a lot of frustration when your oven igniter fails or the power goes out. Follow the safety steps, use the right tools, and take your time with the process.
Remember to always prioritize safety. Ventilate your kitchen, keep flammable items away, and never rush the process. With the steps in this guide, you are fully equipped to handle manual oven ignition with confidence. Keep this guide bookmarked for future reference, and share it with family members so everyone in your household knows what to do.
Your gas oven is a reliable cooking appliance that serves you every day. Knowing how to keep it running, even when things go wrong, is part of being a capable and confident cook. So the next time your oven fails to light on its own, grab your long-reach lighter and follow the steps you learned here. You have got this.
Frequently Asked Questions
Can I use a regular matchstick to light my gas stove oven?
Yes, a matchstick works fine for lighting a gas oven manually. However, a long-reach lighter is safer because it keeps your hand further away from the gas flame. If you use matches, make sure they are long kitchen matches and hold them steady when you turn on the gas.
Is it safe to light a gas oven with a lighter during a power outage?
It is completely safe as long as you follow the proper steps. Open a window for ventilation, check for gas smells, and light the burner before fully turning on the gas. Manual ignition does not require electricity, so it works perfectly during power outages.
Why does my gas oven igniter keep failing?
Oven igniters wear out over time due to regular use. Grease buildup, moisture, and electrical surges can also damage them. If your igniter fails frequently, consider replacing it with a new one. Most replacement igniters are affordable and easy to install.
How long should I hold the lighter when lighting the oven?
Hold the lighter flame near the burner for about 5 to 10 seconds after the gas ignites. This gives the burner enough time to establish a steady flame. Once the flame is burning consistently, you can remove the lighter and set your desired oven temperature.
What should I do if I smell gas while trying to light the oven?
If you smell a strong gas odor, do not attempt to light the oven. Turn off the gas valve immediately, open windows for ventilation, and leave the kitchen. Contact your gas company or a licensed technician to inspect for leaks before using the oven again.
Do all gas ovens have a manual ignition option?
Most modern gas ovens support manual ignition with a lighter or matchstick. However, some newer models rely entirely on electronic ignition and may not have a traditional pilot light or burner opening. Check your oven’s user manual to confirm whether manual lighting is possible for your specific model.
=== CONCLUSION ===
Knowing how to light a gas stove oven with a lighter is an essential kitchen skill that everyone should have. It is simple, safe, and incredibly useful when your electric igniter fails or the power goes out. With the right tools, a little patience, and the steps outlined in this guide, you can light your oven quickly and confidently every single time.
Remember to always put safety first. Ventilate your kitchen, check for gas leaks, and never rush the process. Keep your burner clean and maintain your gas stove oven regularly to prevent future issues. Share this guide with friends and family so they too can handle manual oven ignition with ease. Happy cooking!